Meta Tech Provider
Help Center - Articles Detail
How to Create a Facebook
Business Manager Account (Using Wavixo)
A step-by-step guide to set up Facebook Business Manager, required for WhatsApp Business API.
Overview
If you’re planning to apply for the WhatsApp Business API, having a verified Facebook Business Manager account is mandatory.
Without an approved Facebook Business Manager account:
You’ll have limited access to WhatsApp Business API
You’ll only be able to message up to 250 users at once
Once your Facebook Business Manager account is approved:
You can upgrade your broadcast messaging tier
You can send messages to a larger or unlimited audience, based on your tier
To get started with all this, the first step is creating a Facebook Business Manager account.
Steps to Create a Facebook Business Manager Account
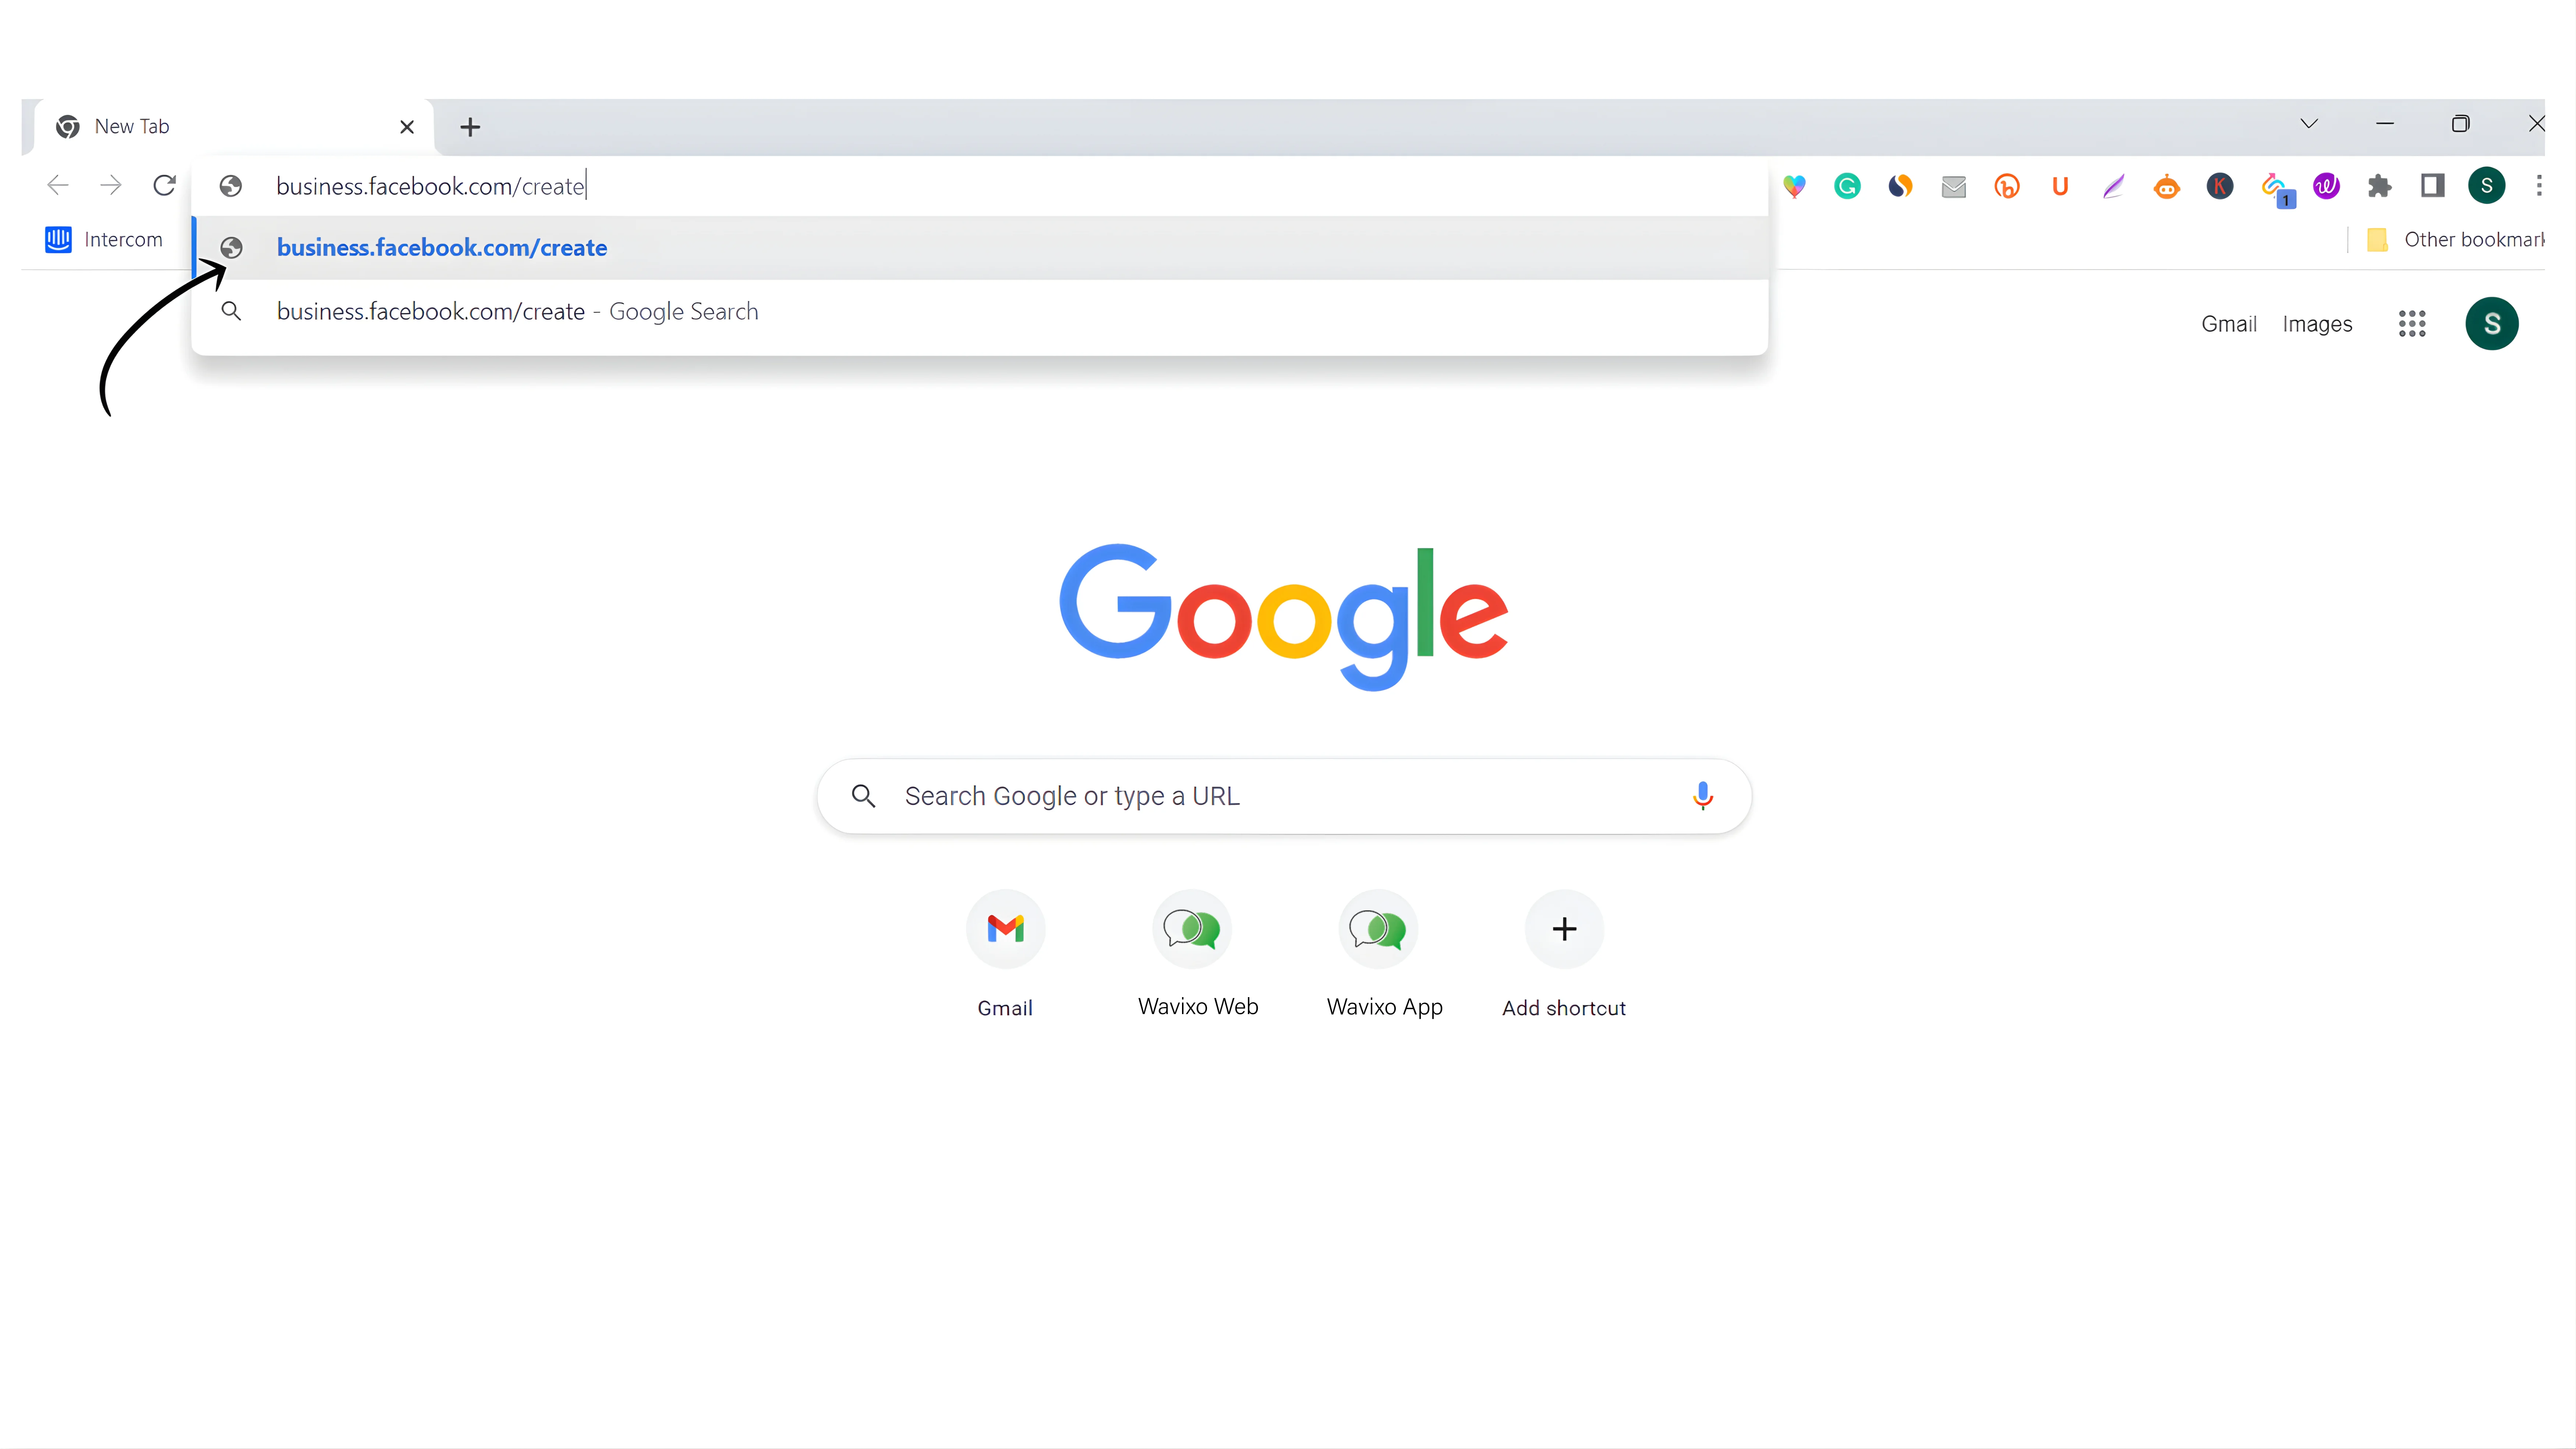
Step 1: Visit the Facebook Business Signup Page
To begin, open the Facebook Business Manager creation page:
👉 https://business.facebook.com/create
This is the official page to create a Business Manager account.
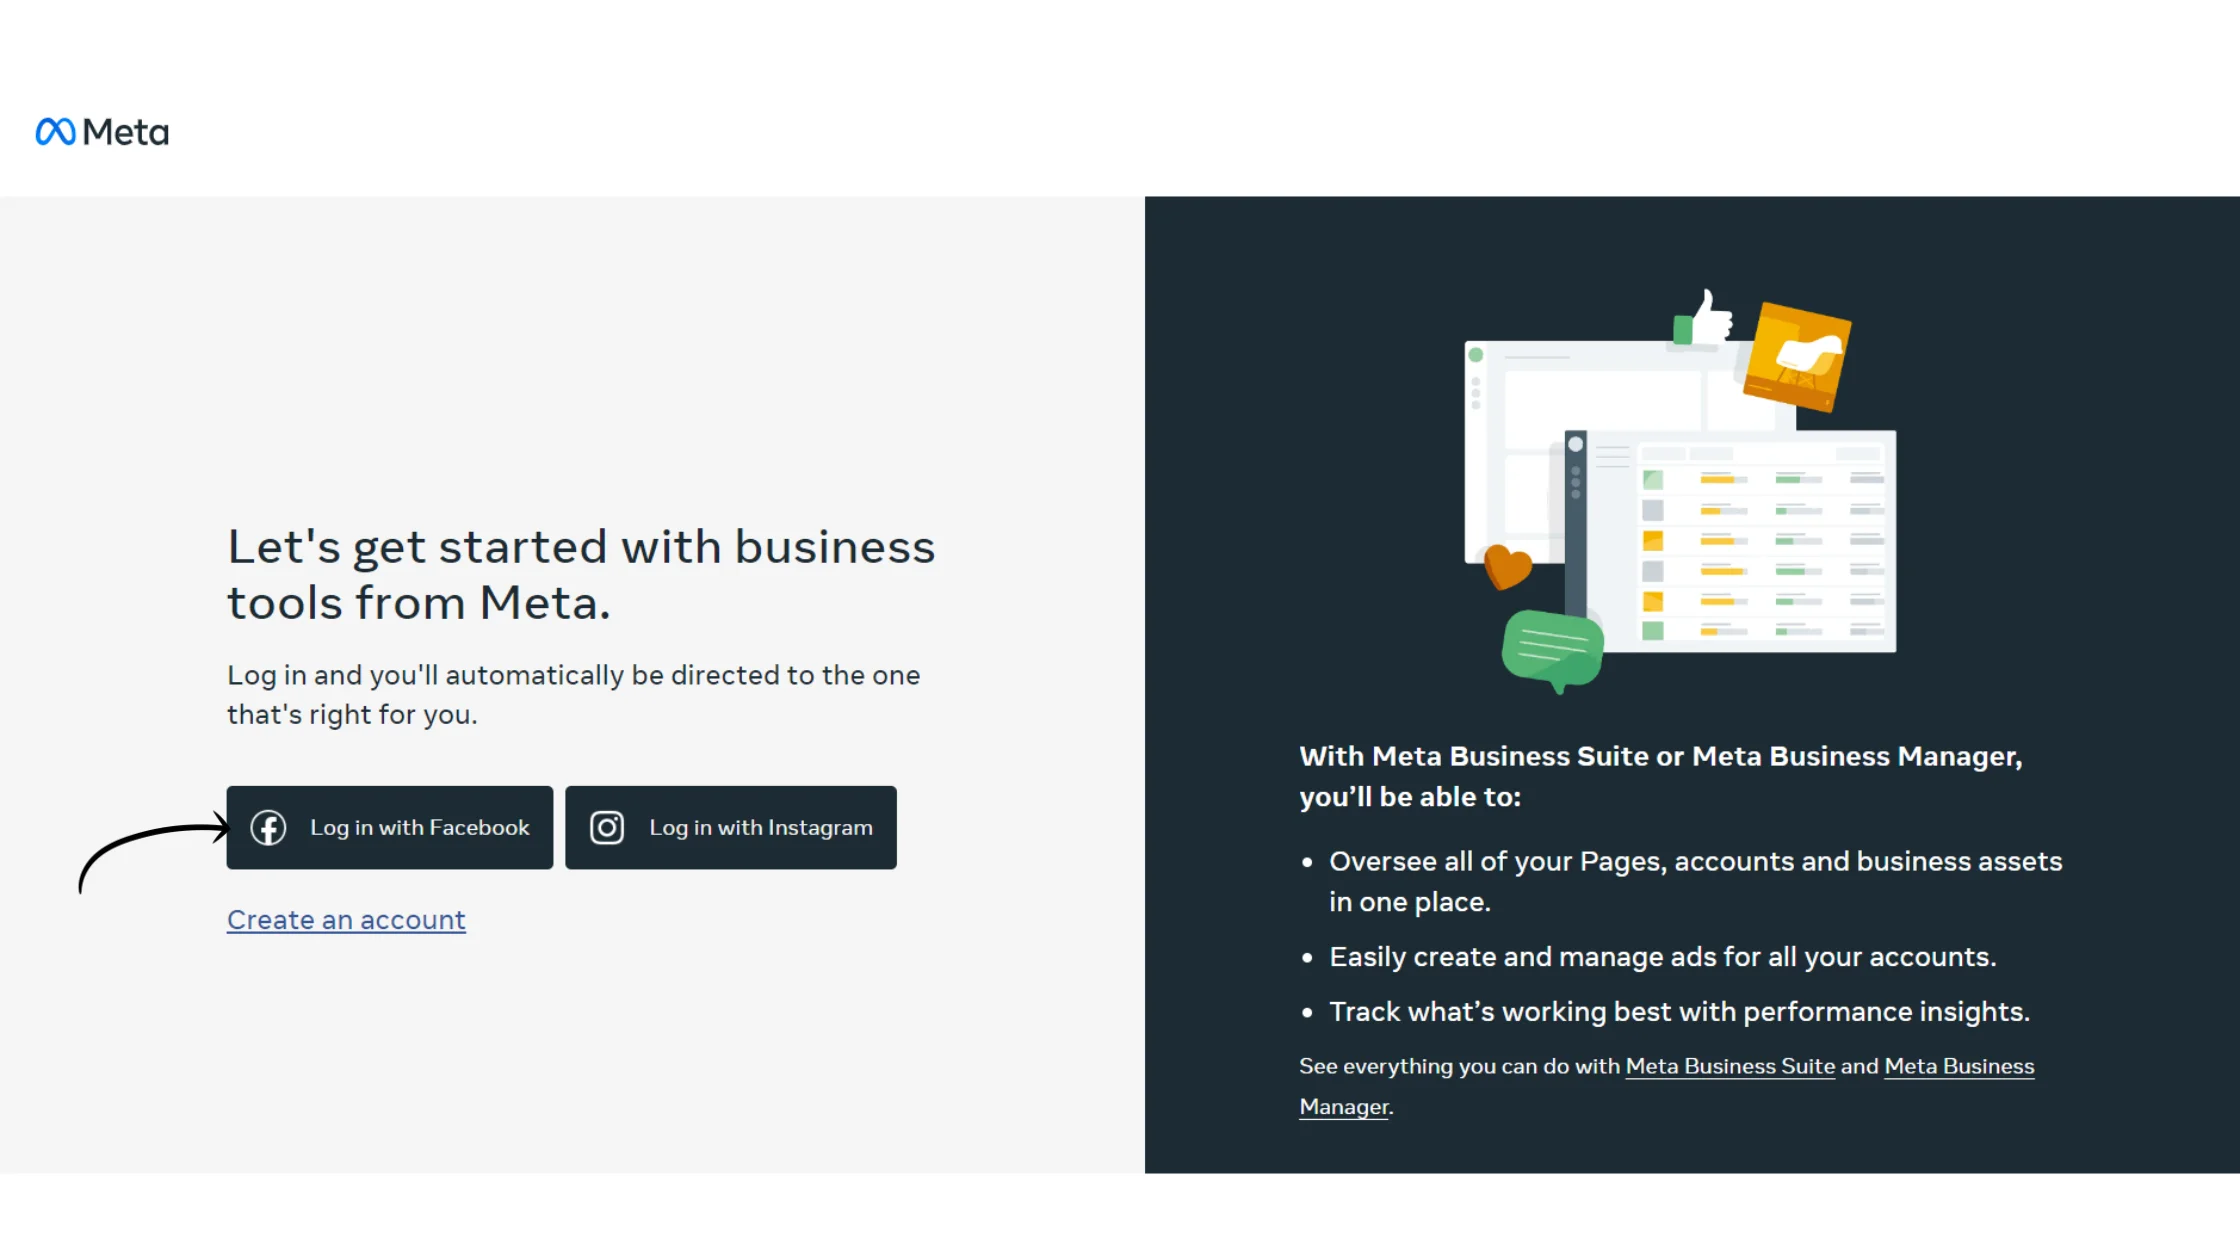
Step 2: Click “Log in with Facebook”
On the signup page:
Click on “Log in with Facebook” to proceed
You’ll need a personal Facebook account to create and manage your Business Manager.
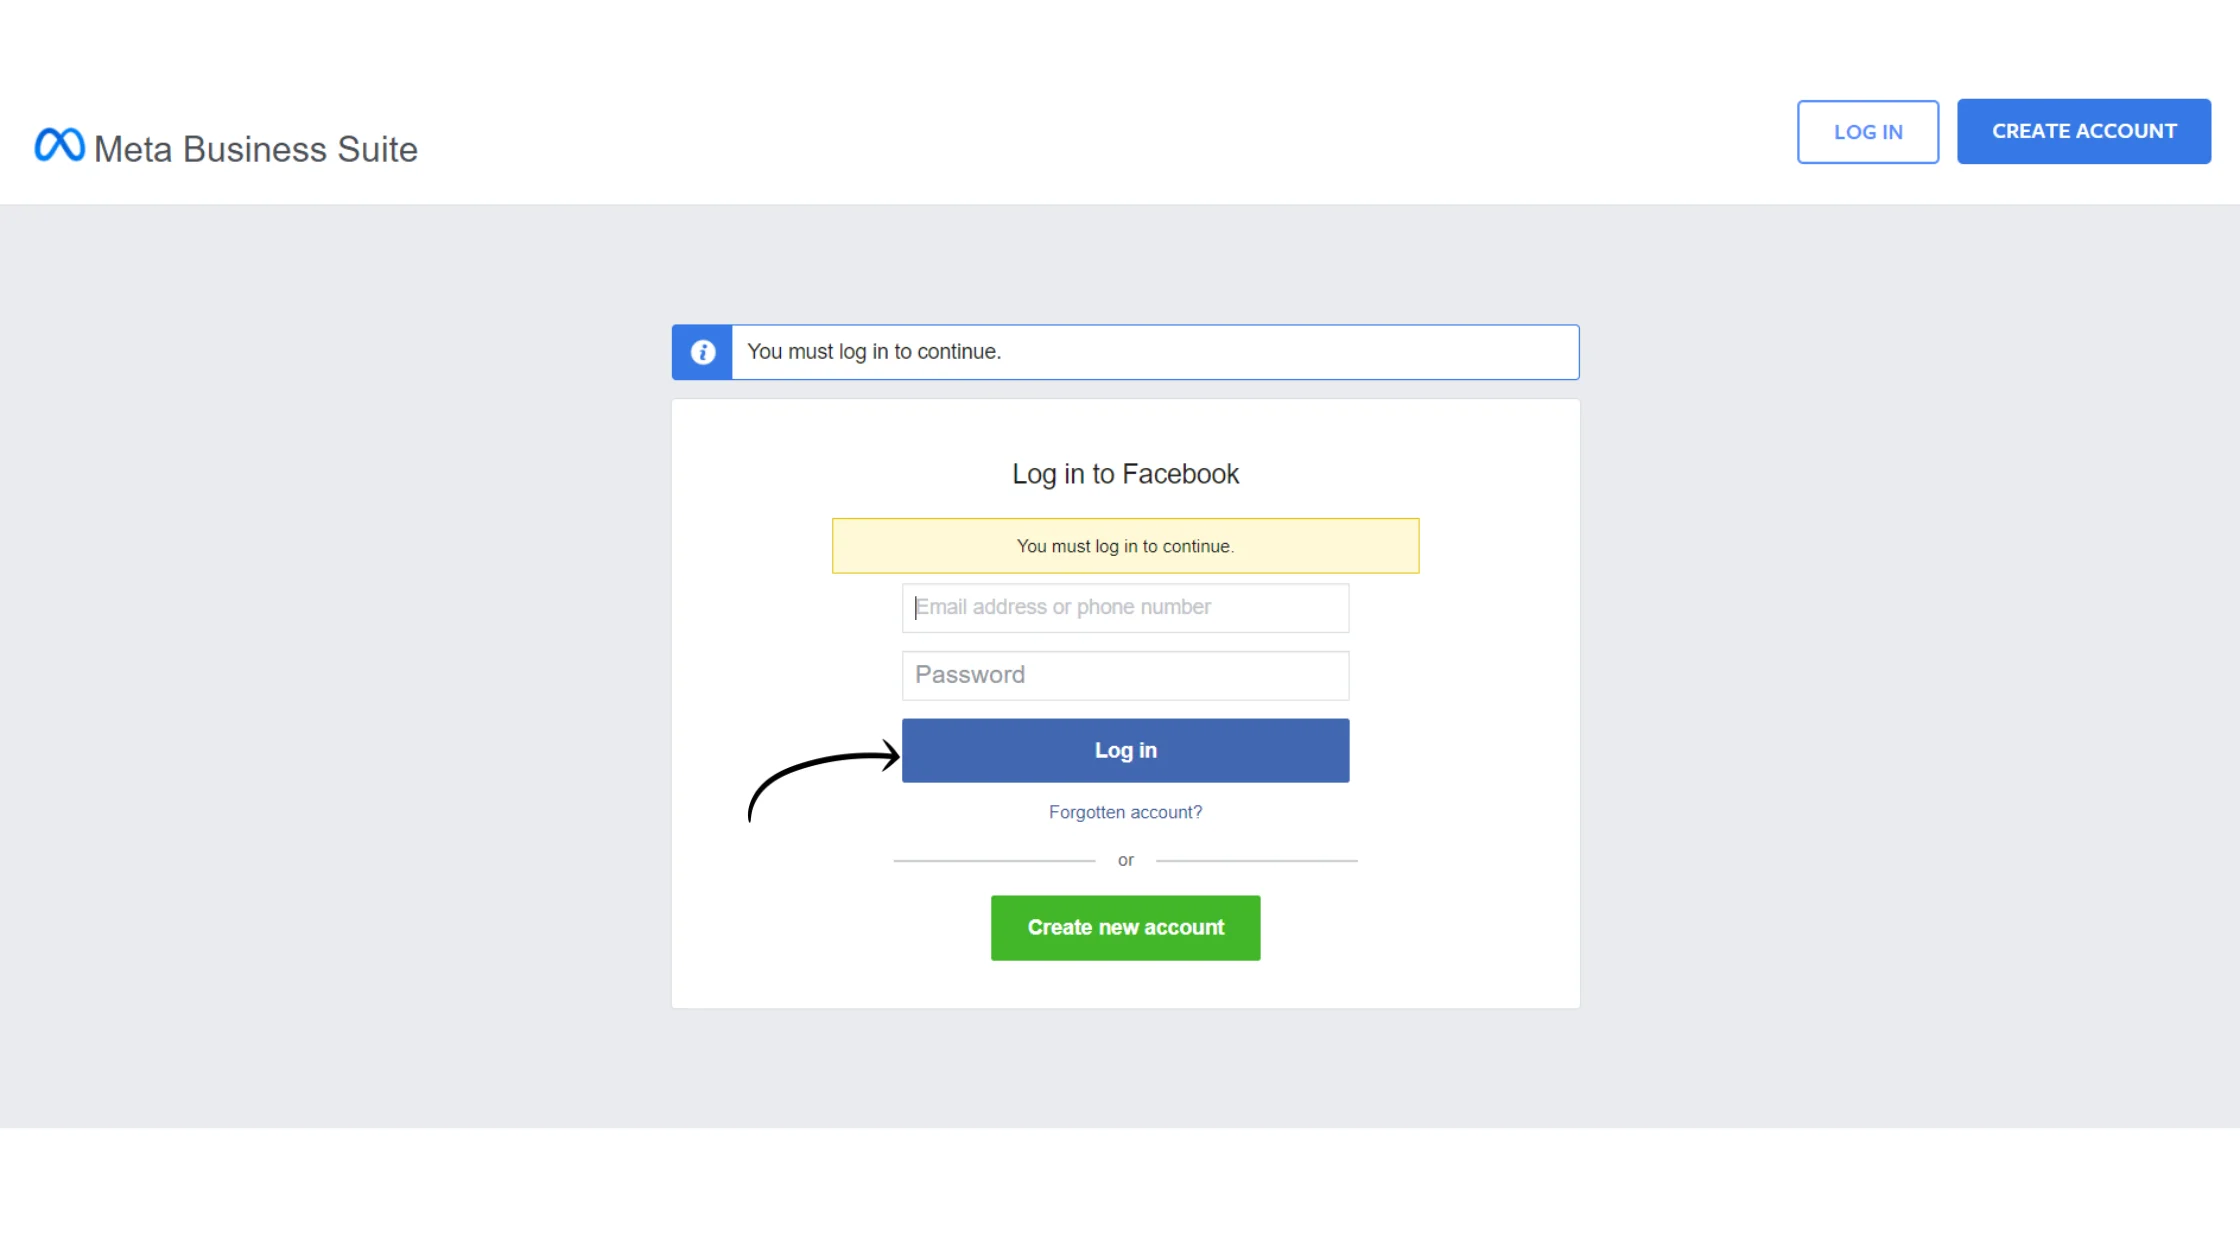
Step 3: Log in to Your Facebook Account
Enter your Facebook username/email and password
Make sure you log in using the Facebook account you want to associate with your Business Manager
This account will become the admin of the Business Manager.
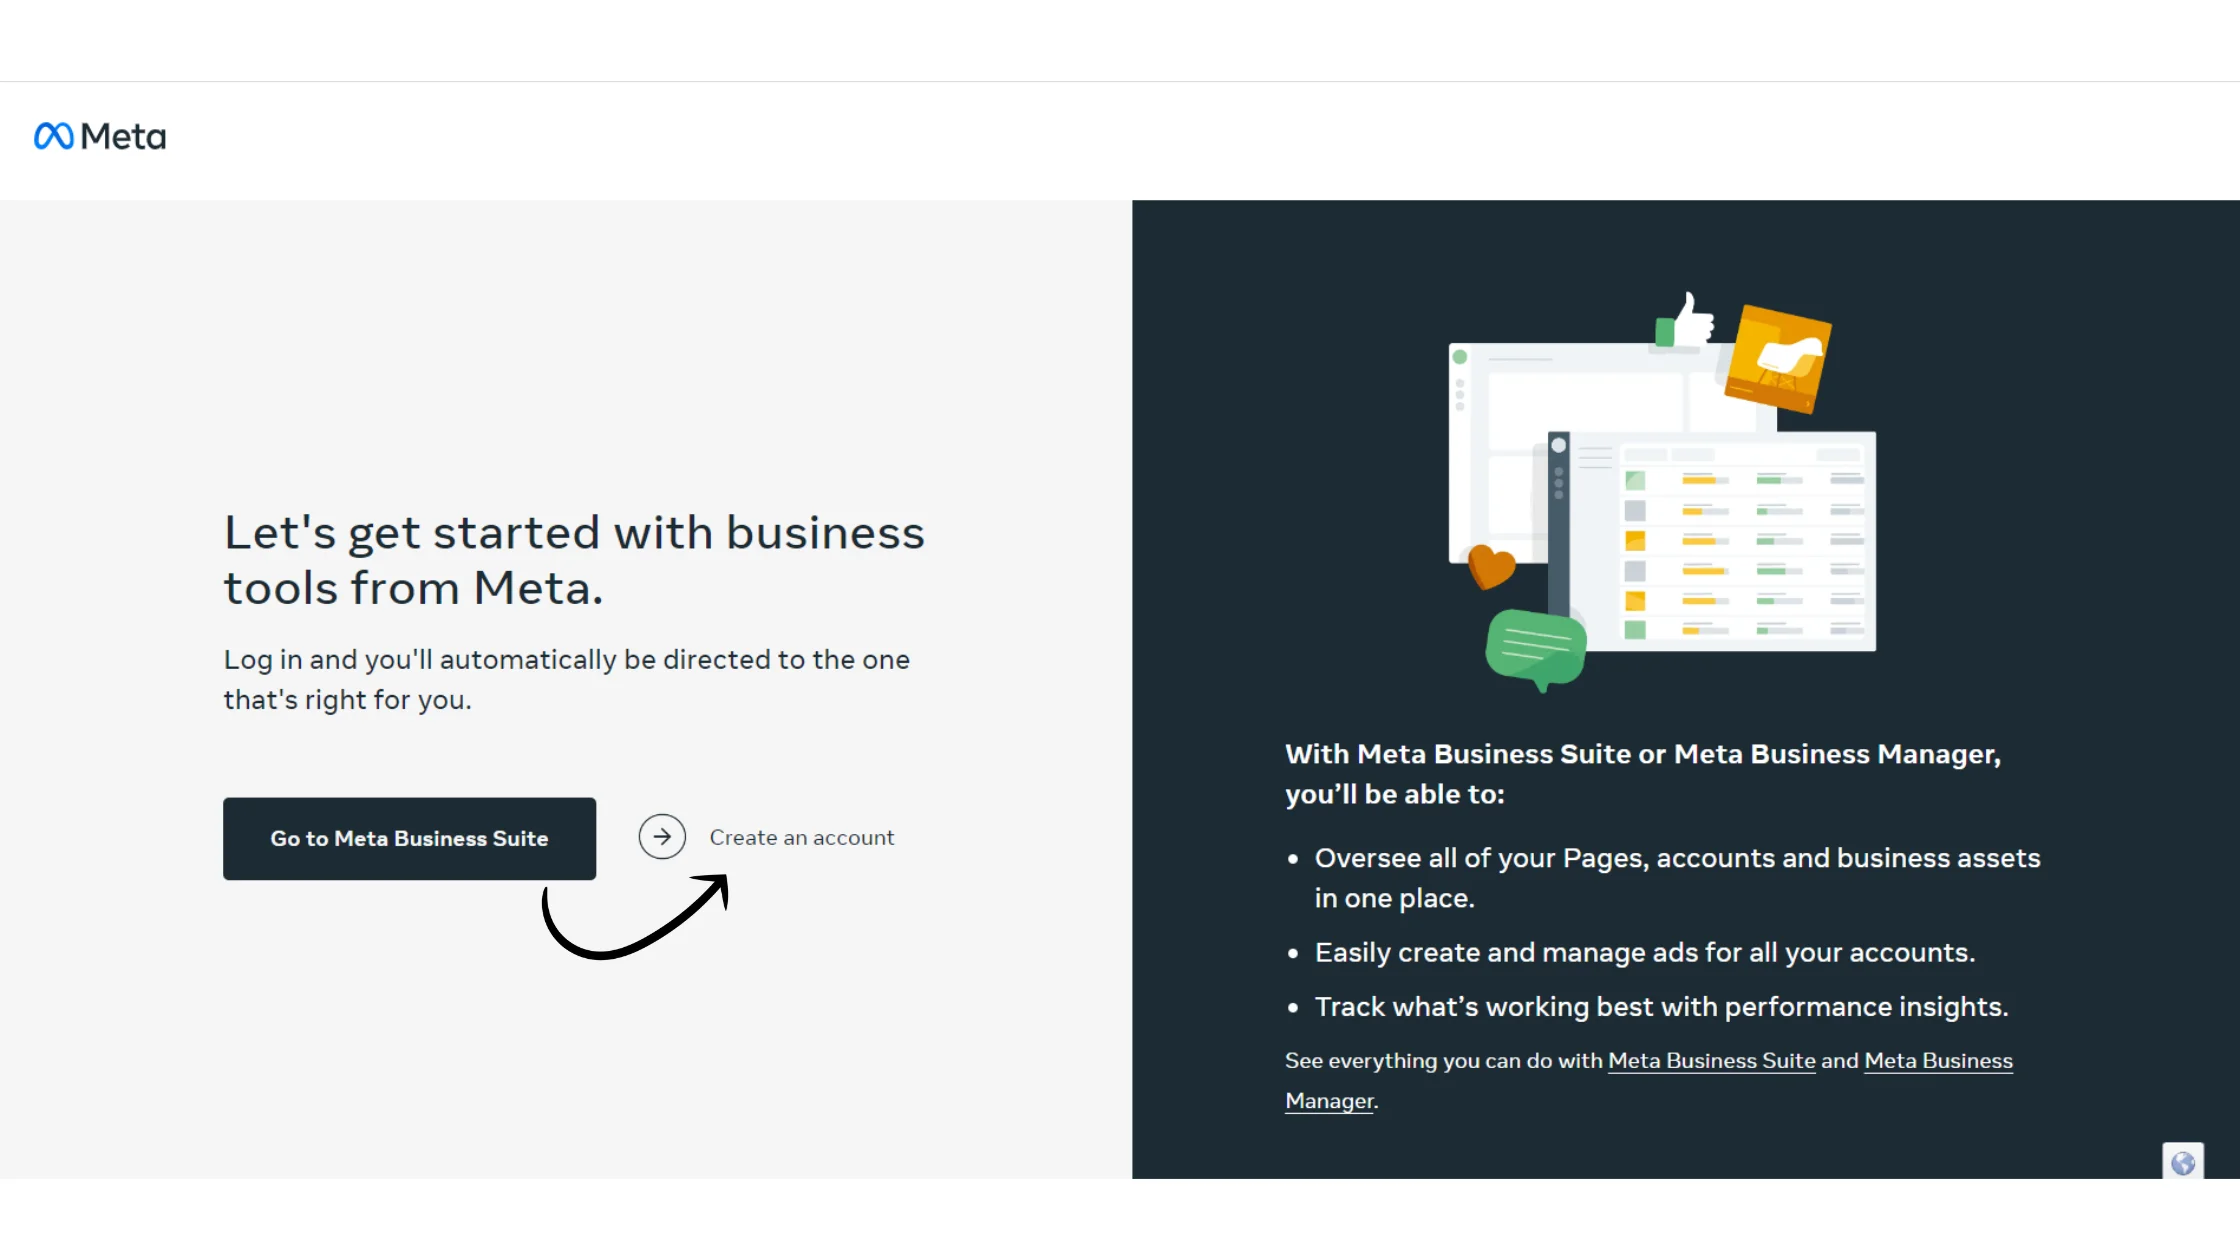
Step 4: Create a Facebook Business Account
Once logged in:
Click on “Create an account”
This will initiate the Facebook Business Manager setup process
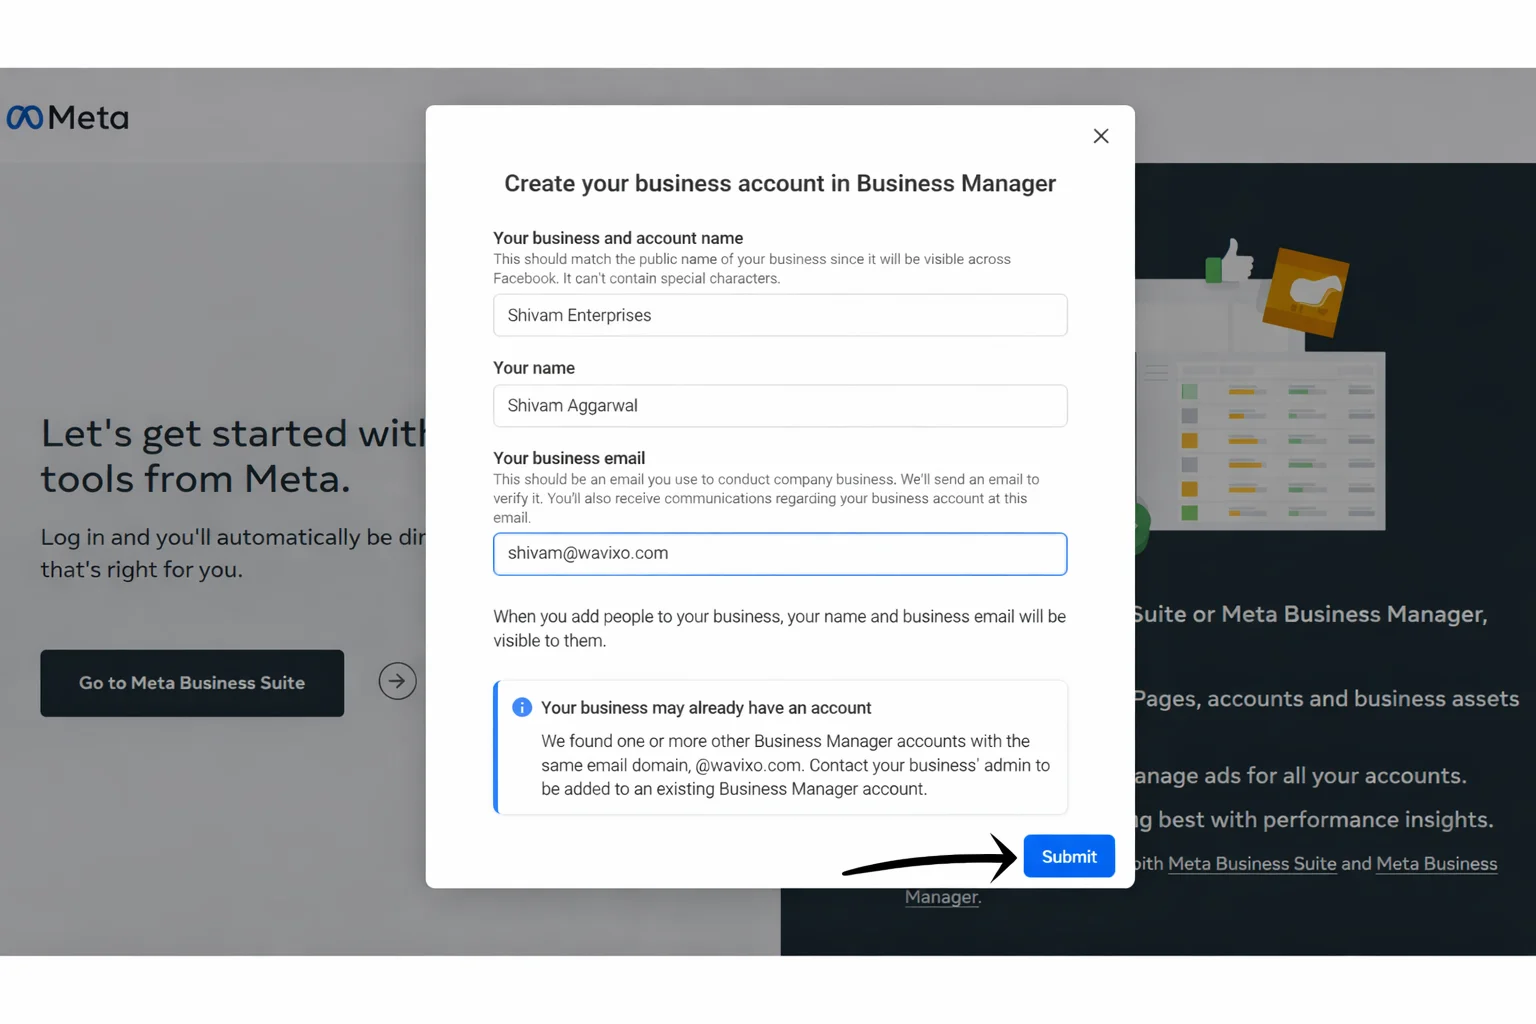
Step 5: Add Your Business Details & Submit
You’ll now be asked to provide basic business information:
Business Name
Your Name
Business Email ID
📌 Use a valid business email ID, as this will be used for future communication from Meta.
After entering the details, click Submit.
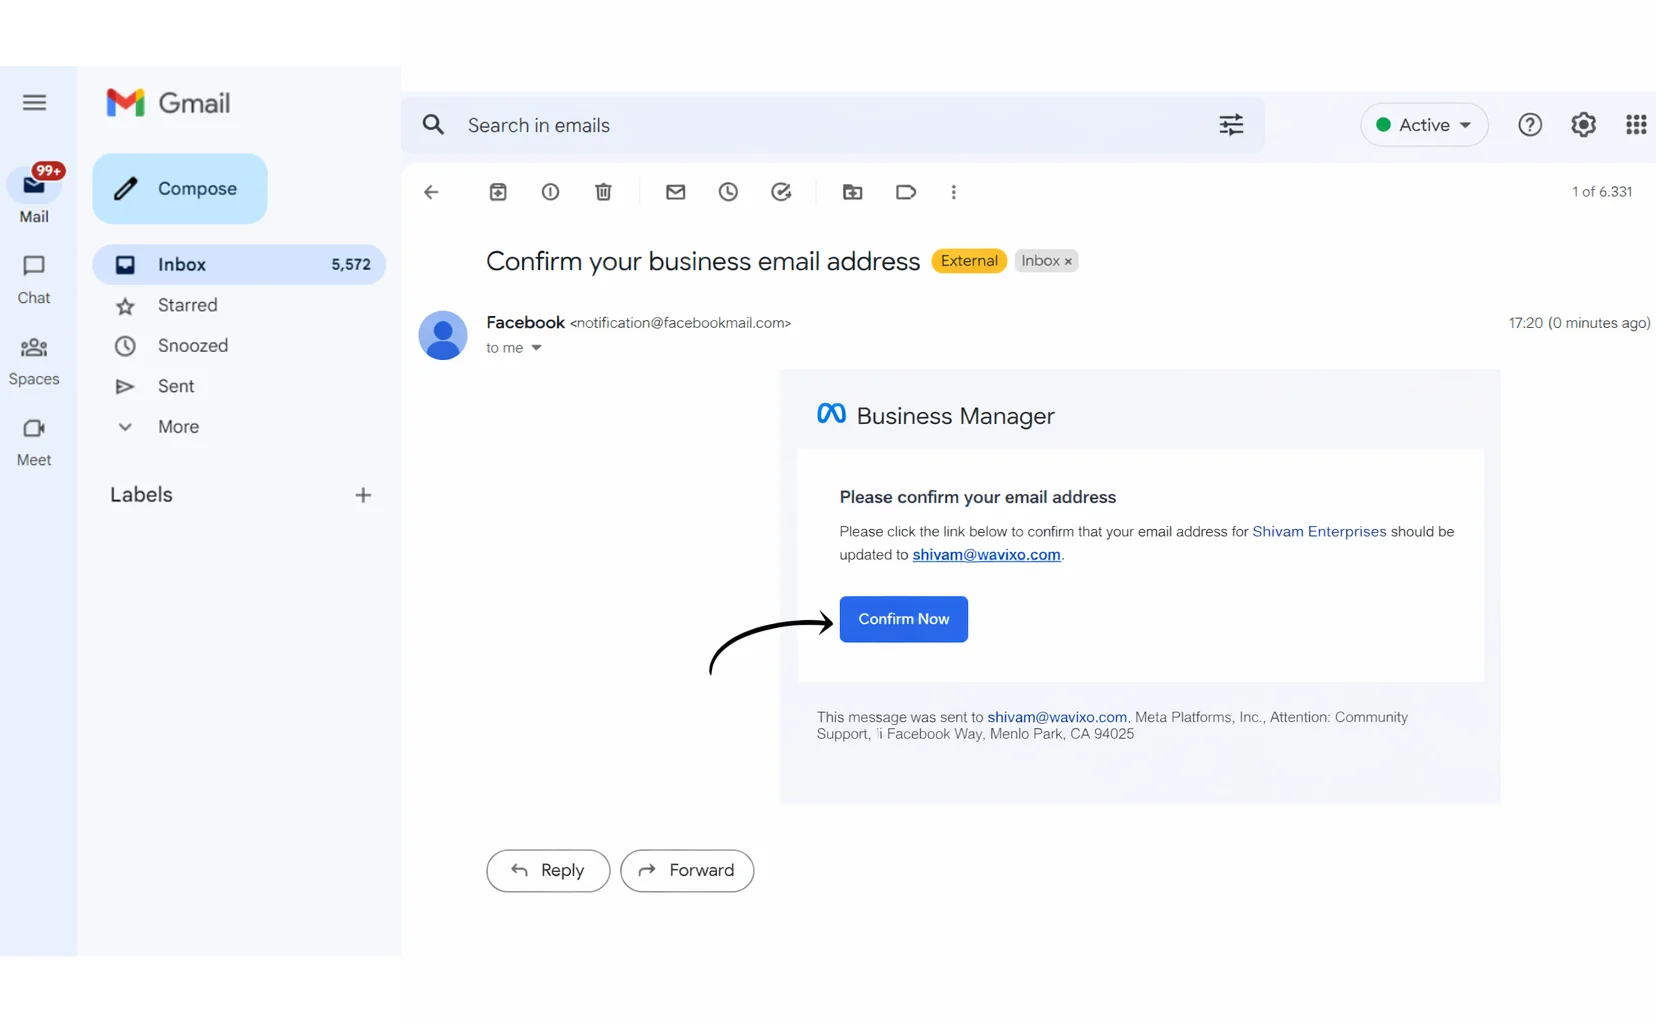
Step 6: Confirm Your Email Address
After submitting the form:
You’ll receive a confirmation email on your registered business email ID
Open the email and click “Confirm Now” to verify your email address
Email verification is mandatory to proceed further.
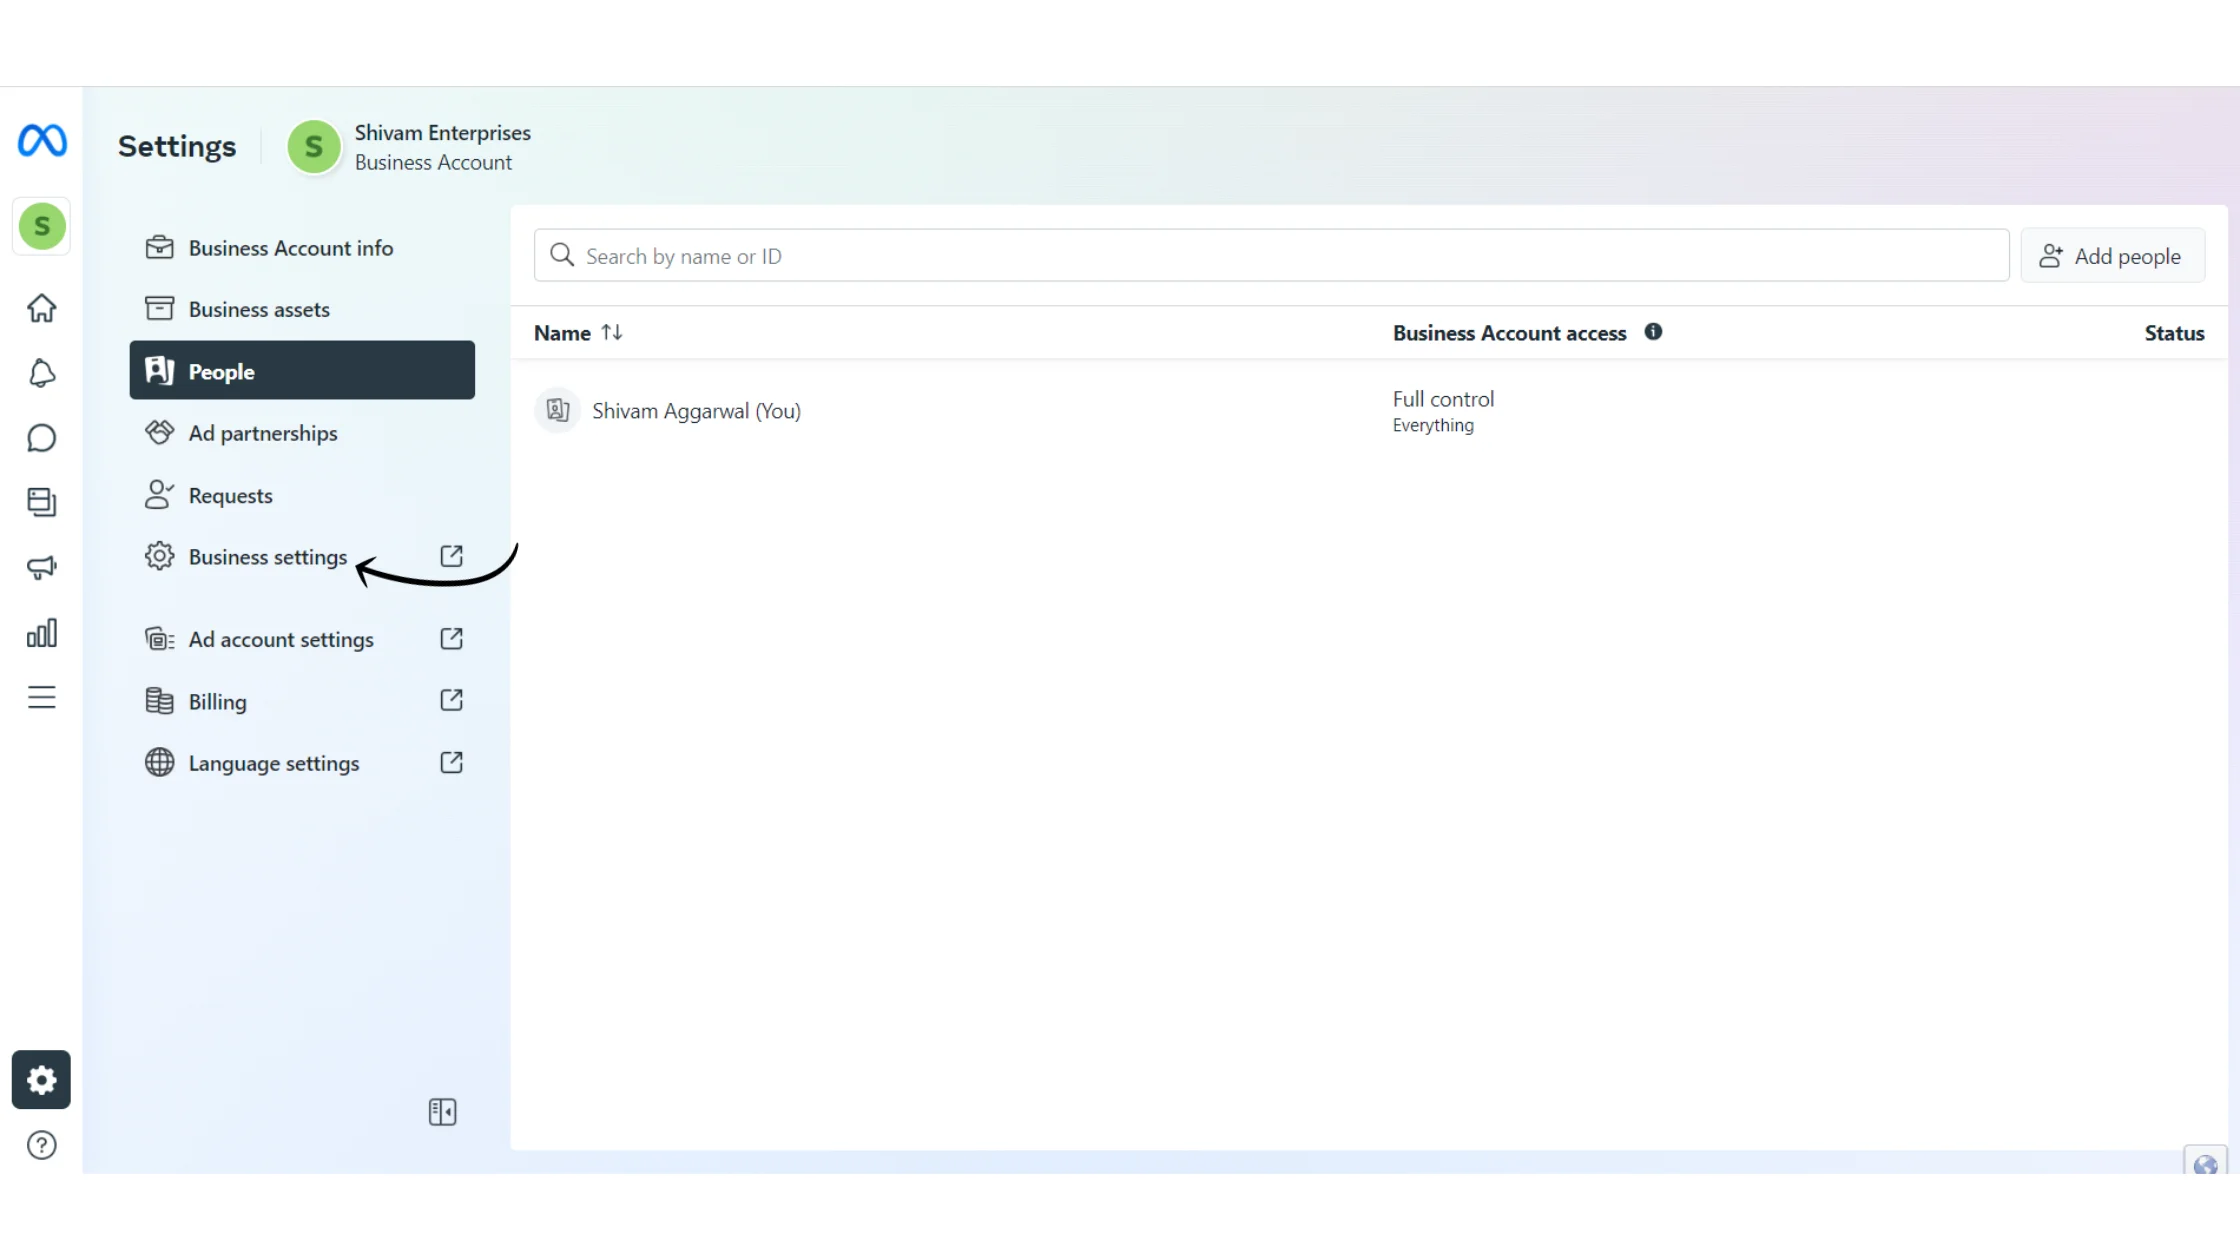
Step 7: Go to Business Settings
🎉 Your Facebook Business Manager account is now created successfully!
Next:
Go to Business Settings
Start the process to verify your Facebook Business Manager account
Verification is required to unlock full WhatsApp Business API access.
How to Get Your Facebook Business Manager Account Verified
Creating the account is only the first step.
To get complete access to WhatsApp Business API, your Business Manager must be verified.
Wavixo provides multiple resources to help you with verification.
📘 Tutorial Guide:
How to Verify Facebook Business Manager Account
This guide walks you through the complete verification process step by step.
Related Articles
How to Create a FREE Wavixo Account
How to Apply for WhatsApp Business API
What to Do If the Facebook “Start Verification” Button Is Greyed Out
How to Set Up Click-to-WhatsApp Ads Using Wavixo
Getting Your Facebook Business Manager Account Verified


Make your Productivity
more efficient. From this time.
Get the Demo and unplash your productivity. Feel Free to get the
latest Technology. Have a good time