Meta Tech Provider
Help Center - Articles Detail
How to Enable 2-Factor Authentication (2FA) for Your Wavixo Account
Two-Factor Authentication adds a second verification step at login — a time-based code from an authenticator app — so that a compromised password alone is not enough to access your account. Here is how to turn it on in Wavixo.
Steps to Enable 2FA
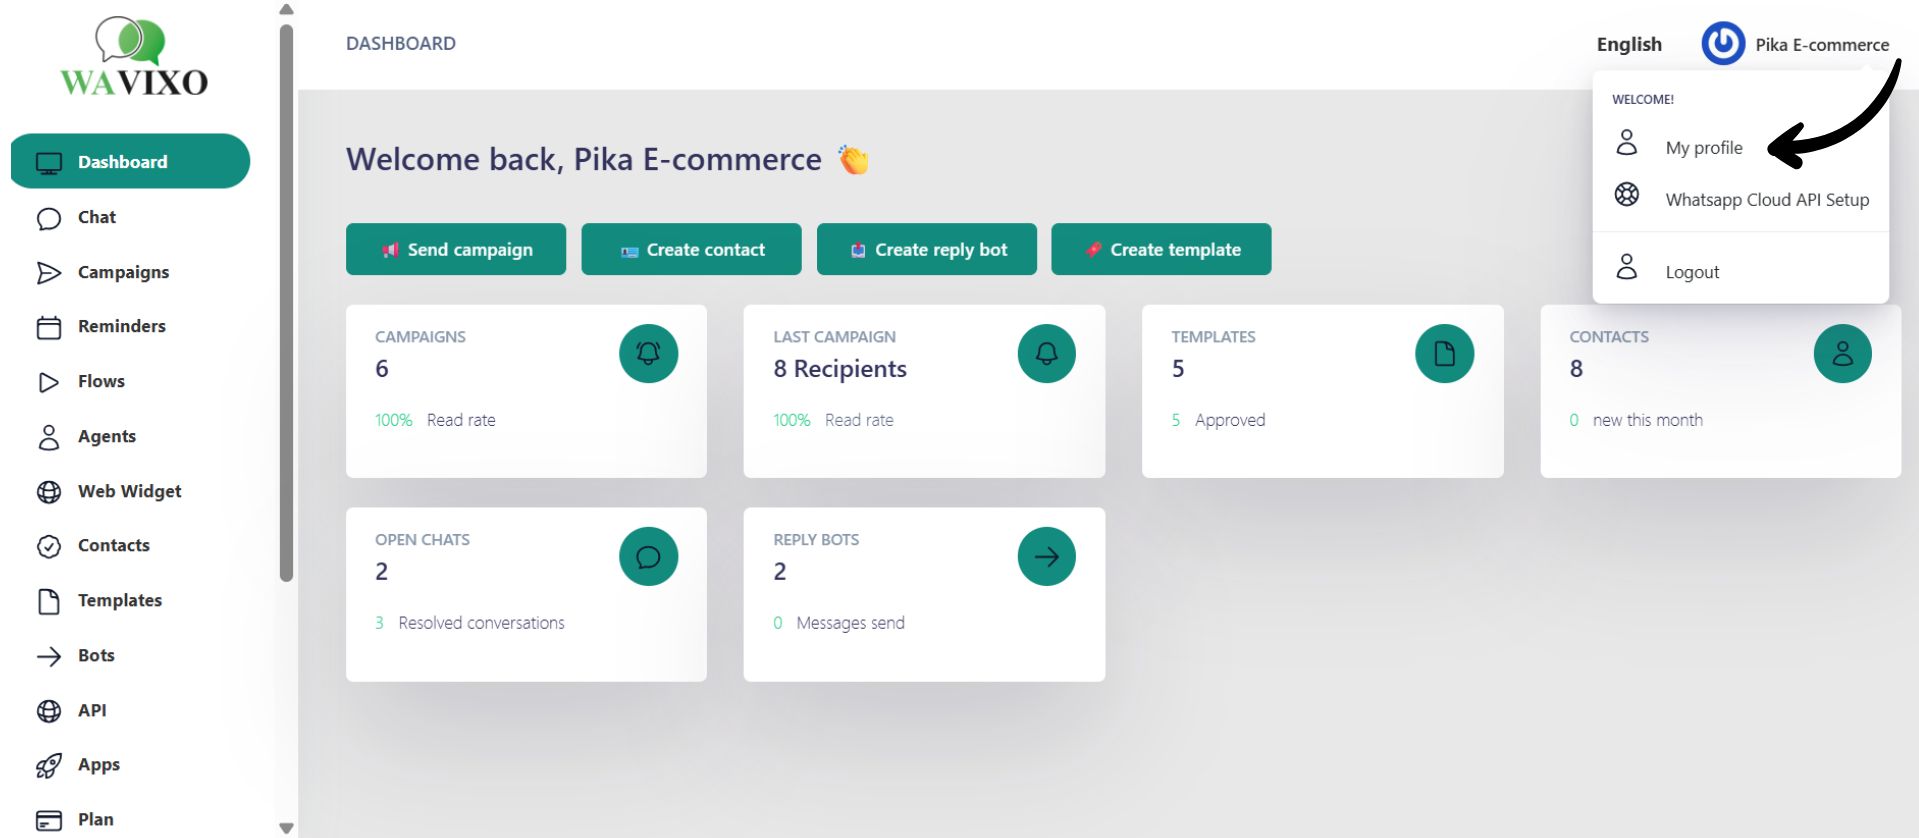
Step 1: Open Your Profile Settings
Click your profile icon at the top left of the Wavixo dashboard, then select My Profile from the dropdown menu.
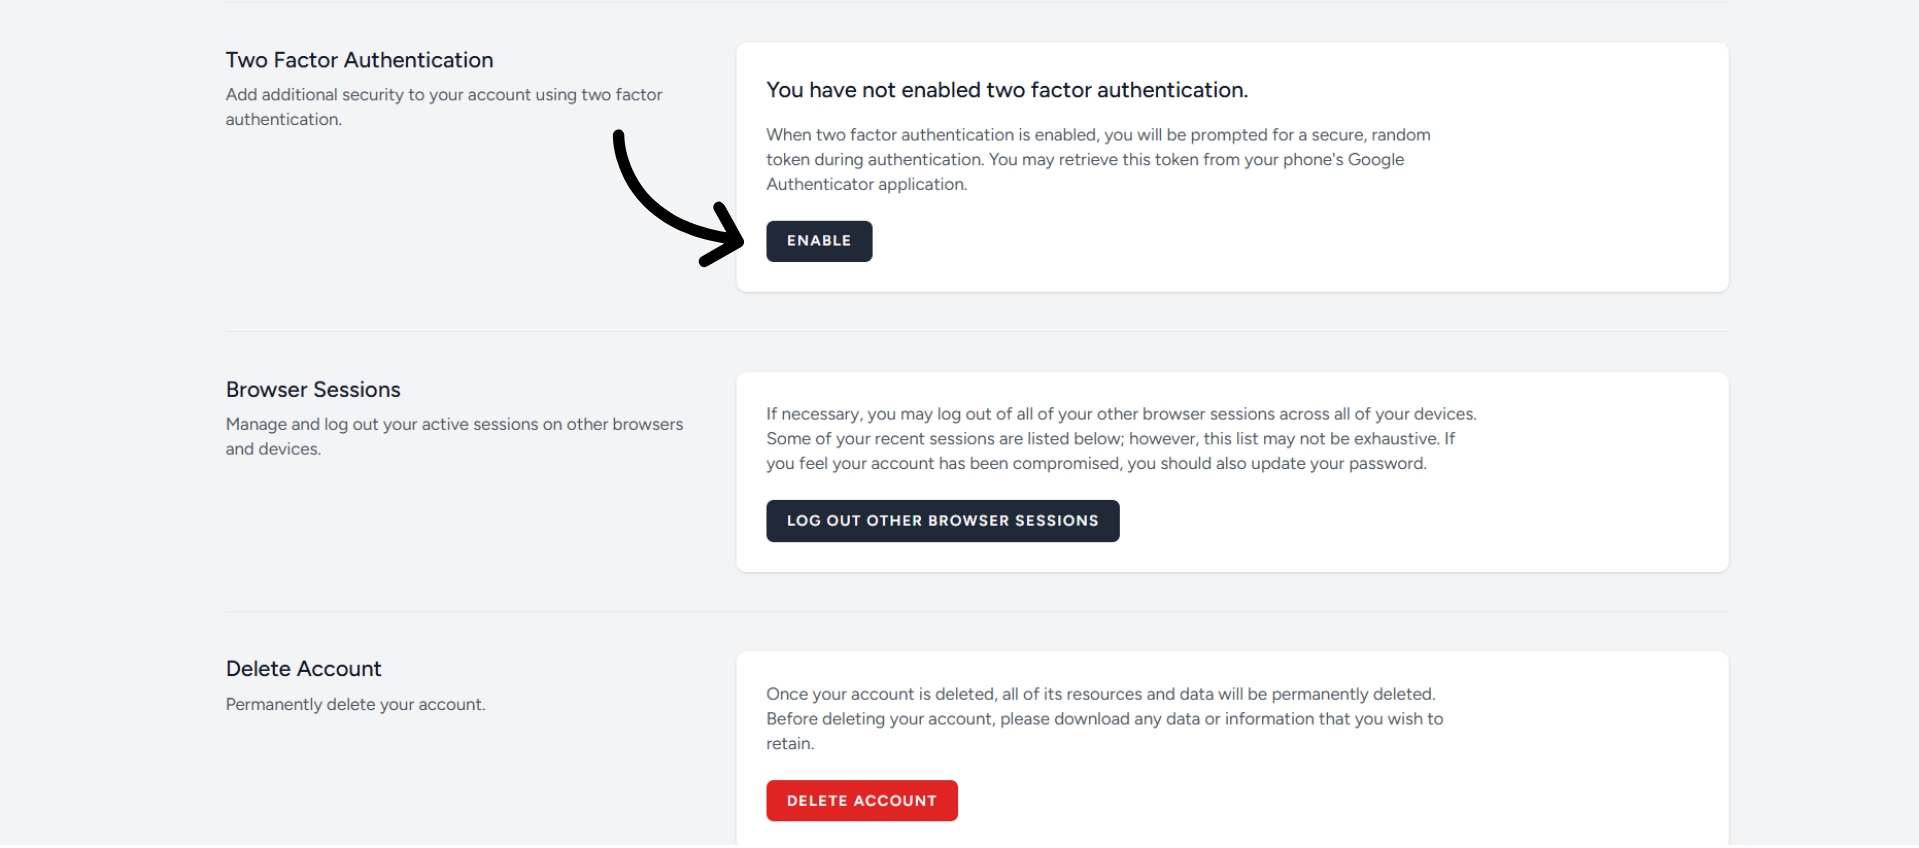
Step 2: Enable Two-Factor Authentication
Scroll down to the Two-Factor Authentication section and click Enable. You will be asked to enter your current password to confirm your identity before proceeding.
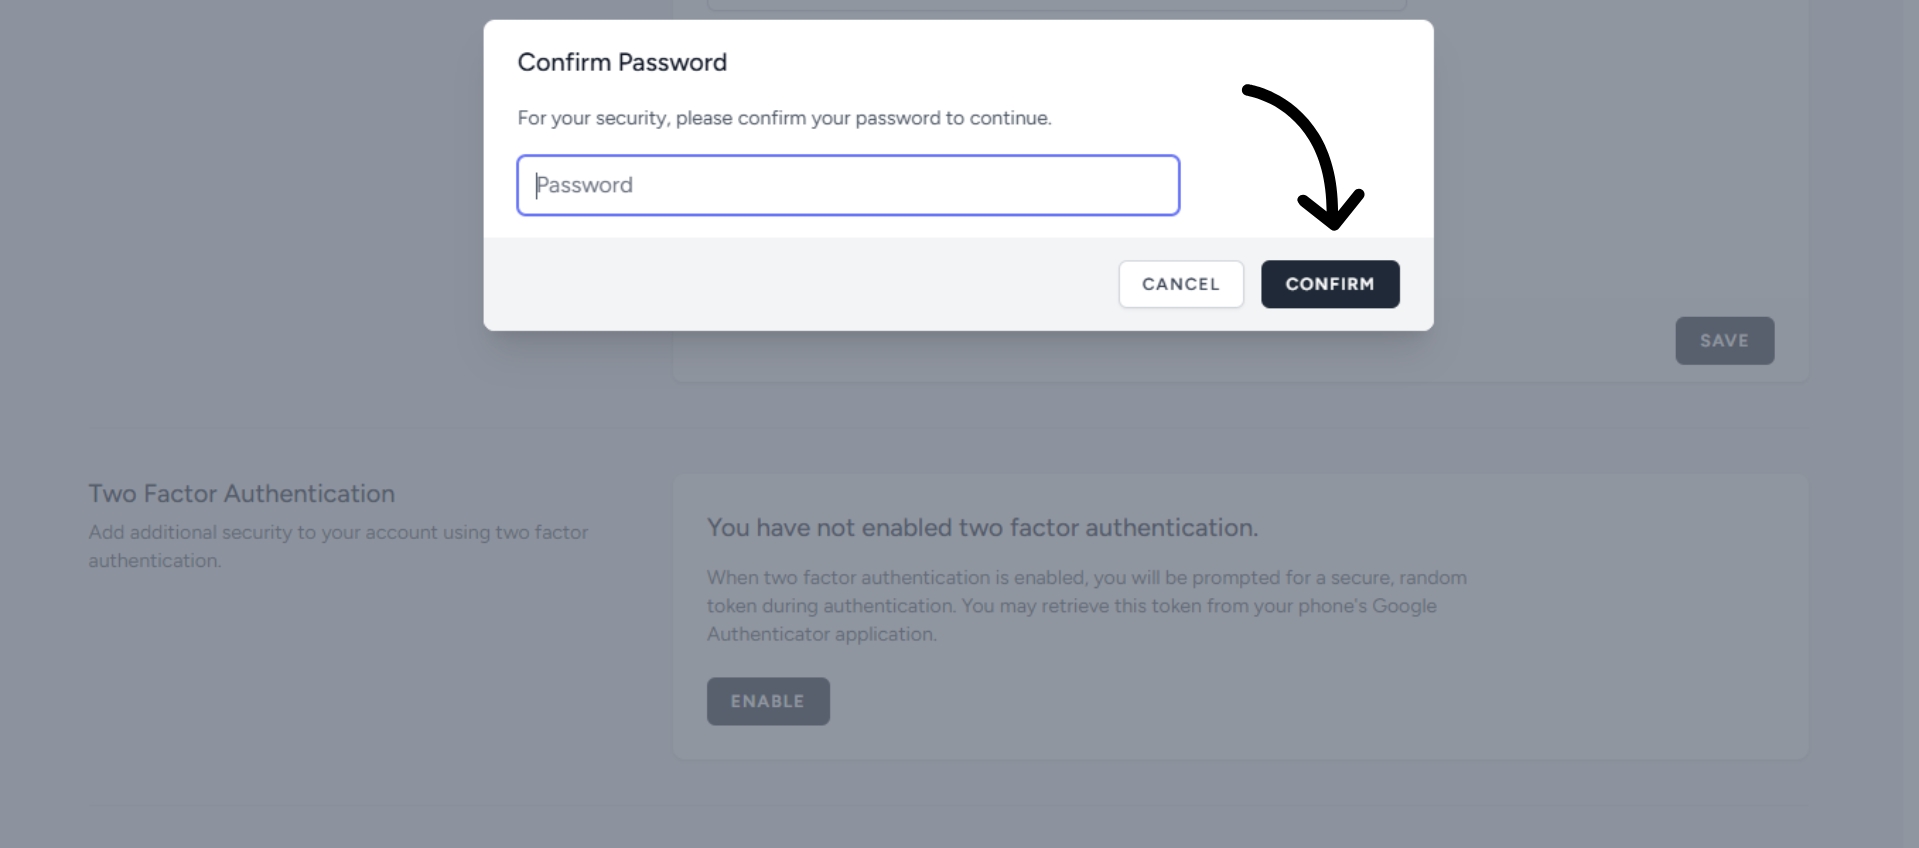
Step 3: Enter Your Password
Enter your current account password to verify your identity and continue to the next step.
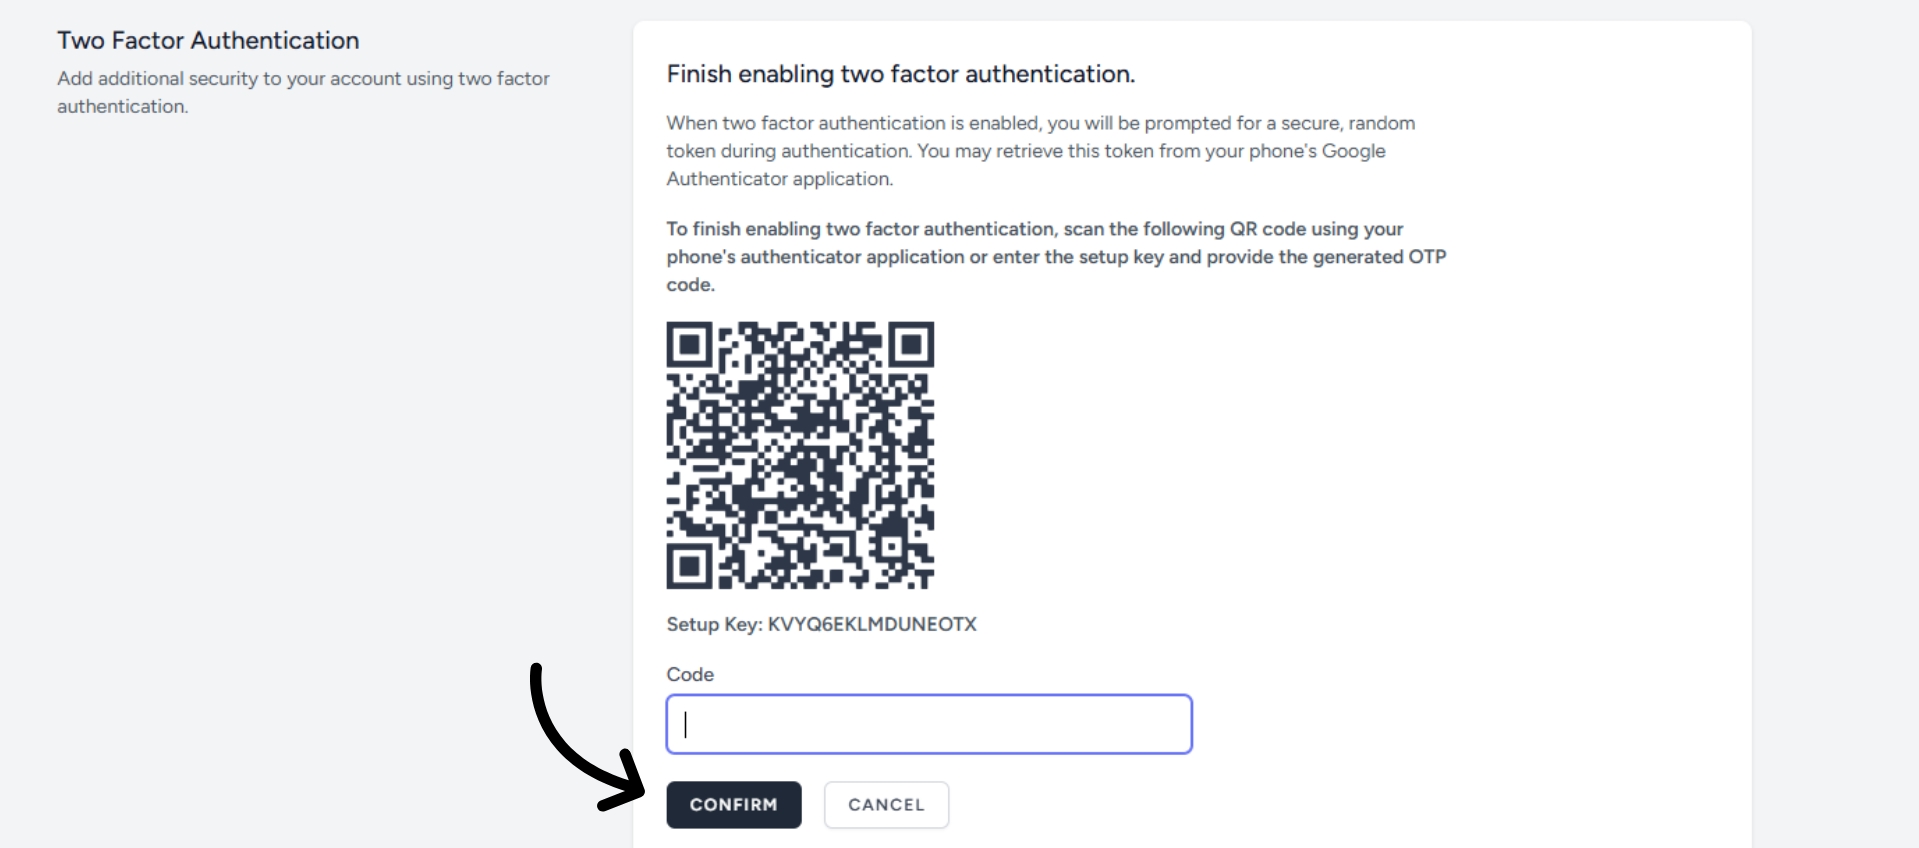
Step 4: Scan the QR Code
A QR code will appear on screen. Open your authenticator app (such as Google Authenticator) and scan it. The app will begin generating time-based codes for your Wavixo account.
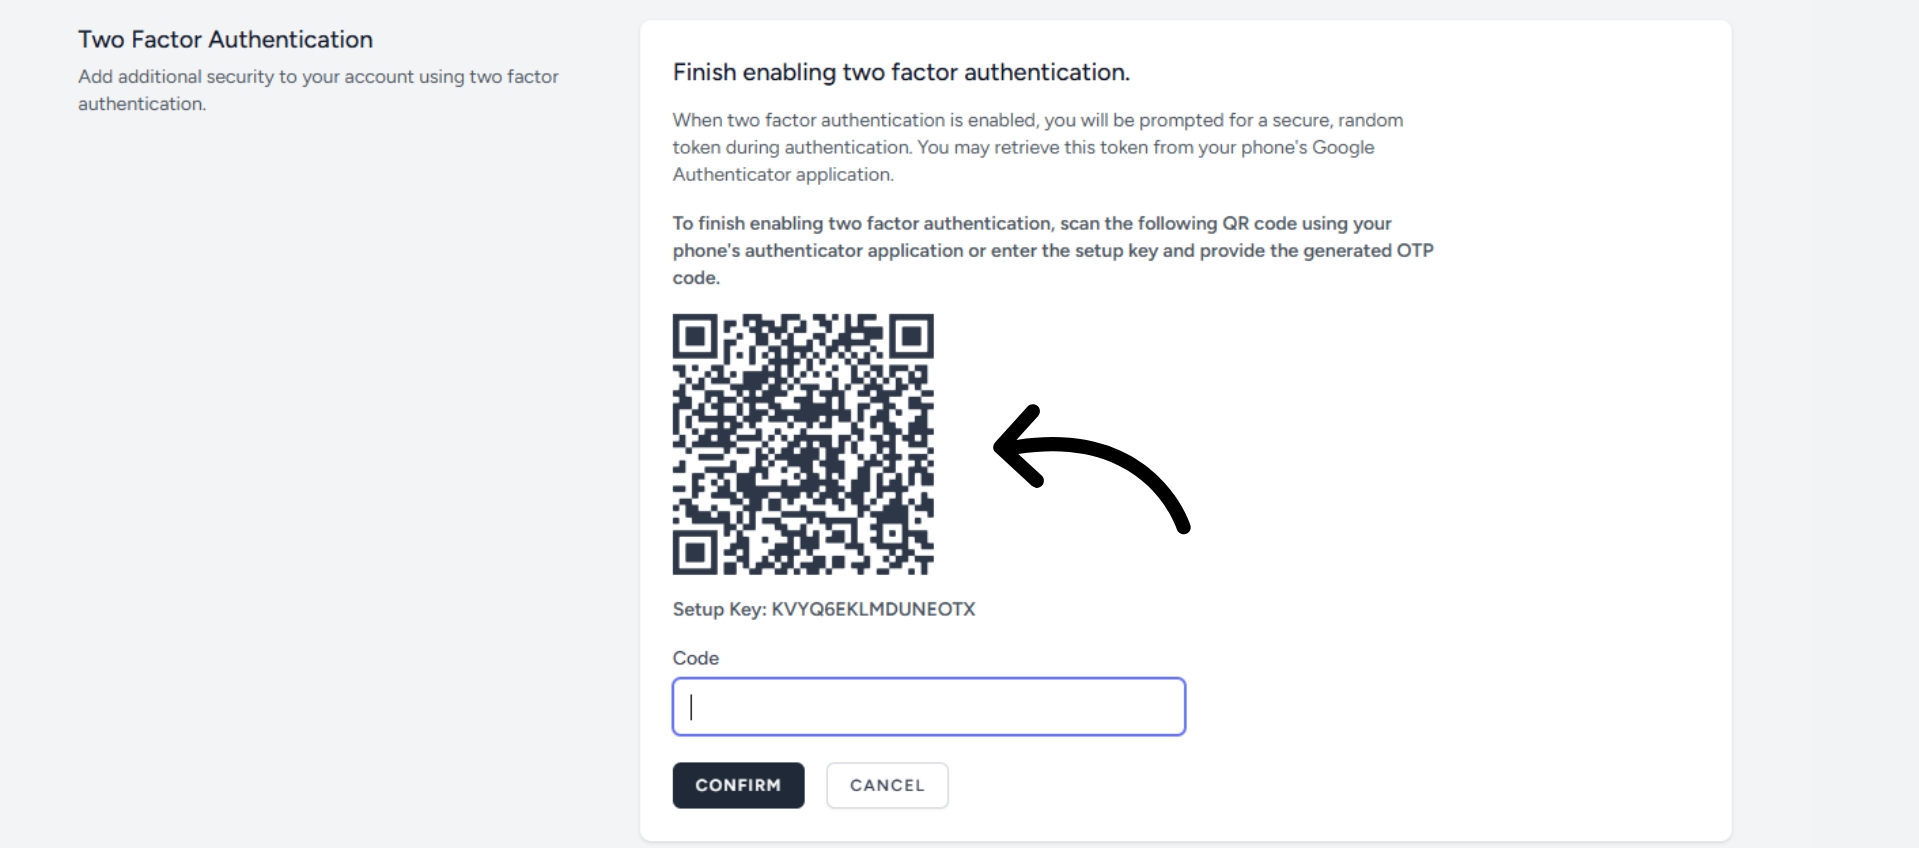
Step 5: Enter the Code and Confirm
Copy the verification code from your authenticator app, enter it in the required field, and click Confirm. 2FA is now active on your account.
A Few Reminders
Keep your authenticator app accessible. You will need it every time you log in. If you lose access to the app, recovering your account will require additional steps.
Never share your verification codes. These codes are single-use and time-sensitive — treat them with the same care as your password.
Enable 2FA for all team members. Any agent or manager with access to your Wavixo account should set up 2FA on their own login to keep the entire account secure.
Make your Productivity
more efficient. From this time.
Get the Demo and unplash your productivity. Feel Free to get the
latest Technology. Have a good time