Meta Tech Provider
Help Center - Articles Detail
How to Transfer Chats from One Agent to Another in the Wavixo App
Not every conversation should stay with the agent who picks it up first. When a query needs a specialist — a sales agent, technical rep, or account manager — Wavixo lets you reassign the chat in seconds without losing any context.
Steps to Transfer a Chat
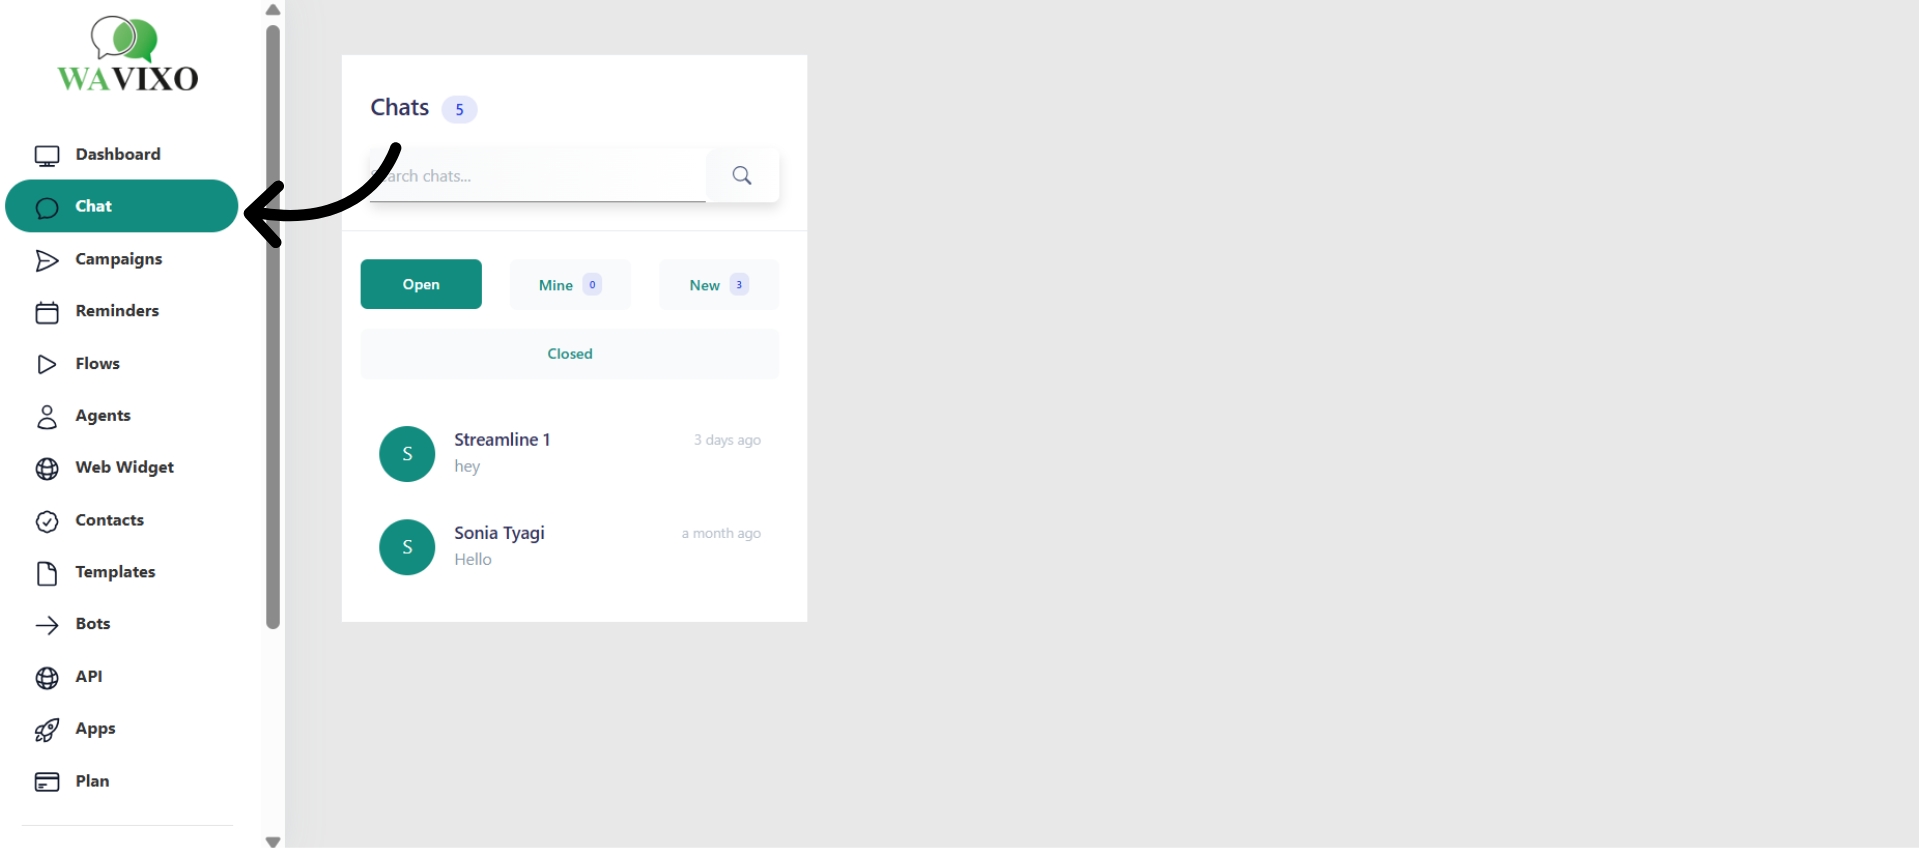
Step 1: Open the Chats Section
Click Chats in the left navigation bar of your Wavixo dashboard. This displays all ongoing conversations.
Step 2: Select the Conversation to Transfer
Click on the chat you want to reassign. The full conversation thread will open.
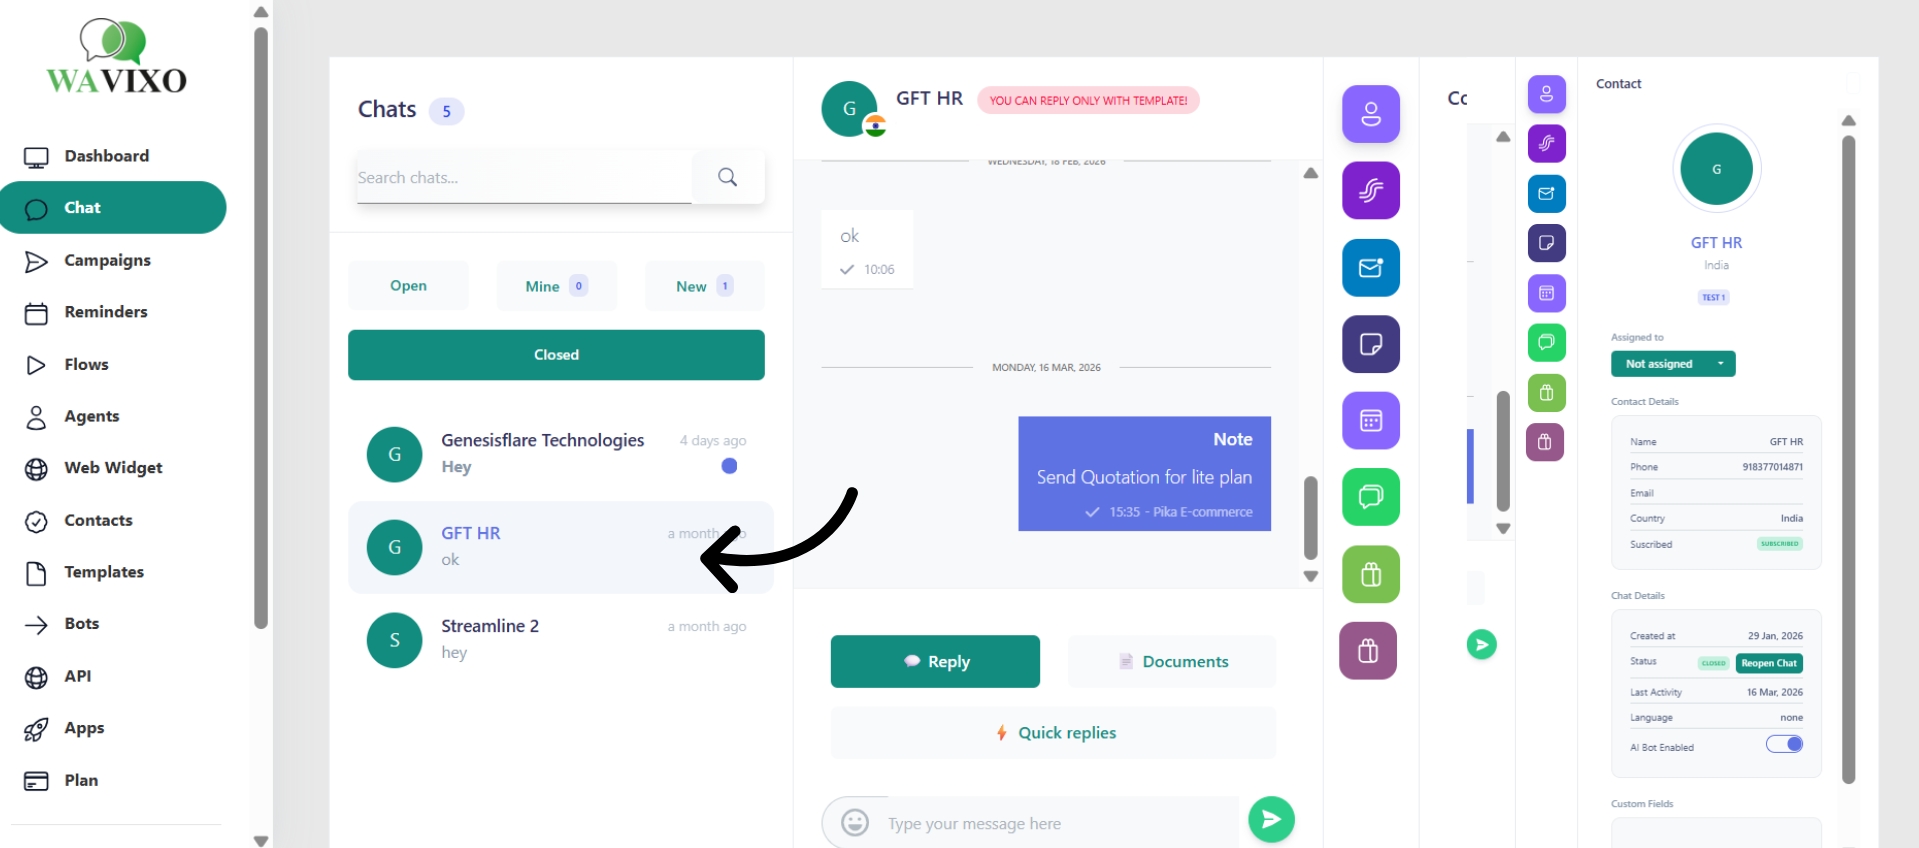
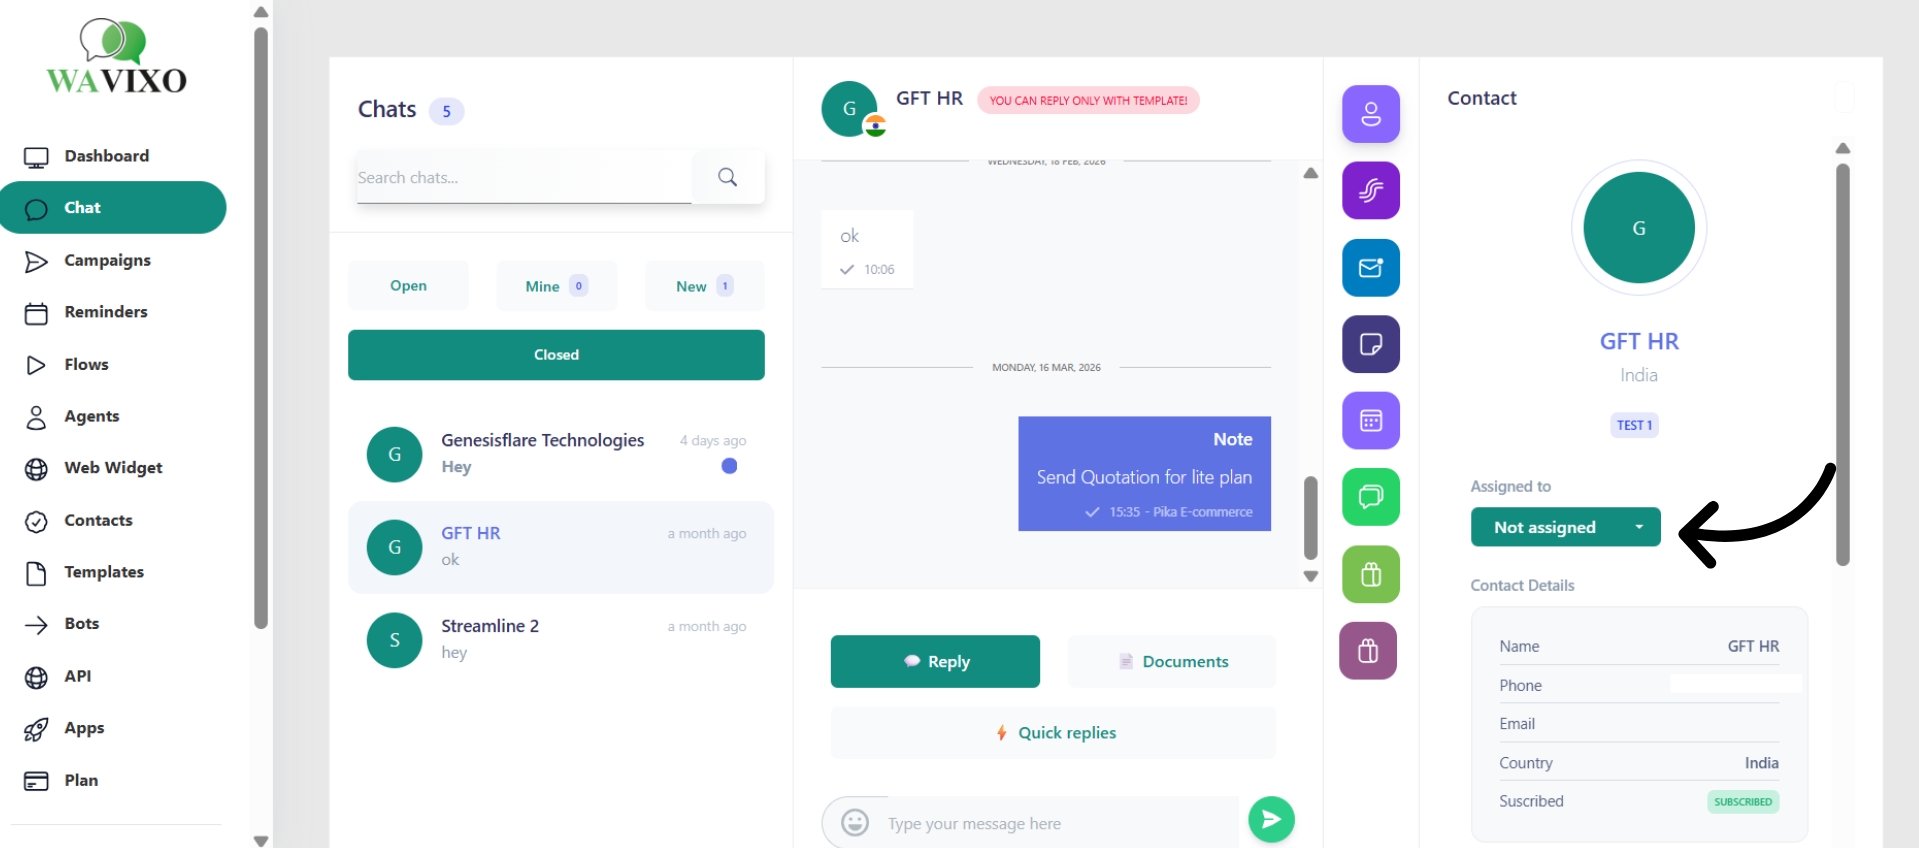
Step 3: Click "Not Assigned"
Inside the chat window, click the Not Assigned option. A dropdown will appear listing all available agents.
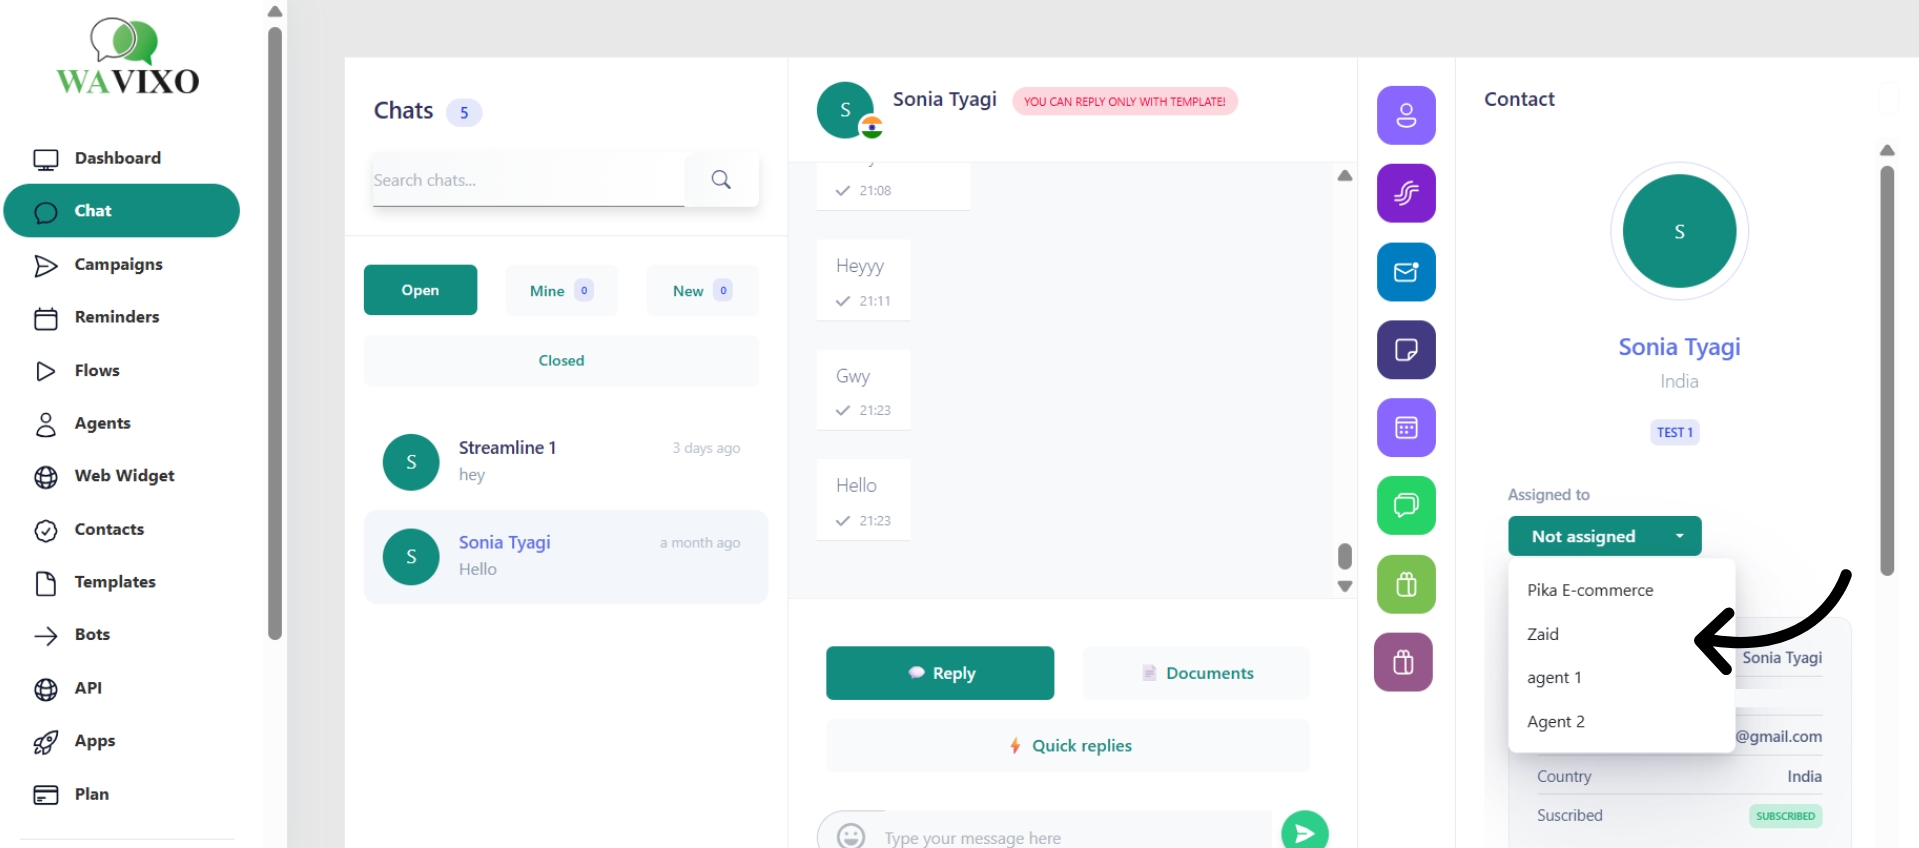
Step 4: Choose the Agent
Select the agent best suited for the query. The chat is immediately transferred and becomes visible in their queue.
Tips for a Smooth Handover
Add a note before transferring. A quick internal note summarizing the issue saves the receiving agent from having to read through the full conversation history.
Get it right the first time. Multiple transfers create a fragmented experience for the customer. Pick the most appropriate agent upfront.
Let the customer know. A brief message informing them of the transfer sets expectations and keeps the conversation professional.
Make your Productivity
more efficient. From this time.
Get the Demo and unplash your productivity. Feel Free to get the
latest Technology. Have a good time