Meta Tech Provider
Help Center - Articles Detail
What If the Facebook “Start Verification”
Button Is Greyed Out or Not Visible? (Using Wavixo)
A complete troubleshooting guide to enable Facebook Business Manager verification.
Overview
If you’re trying to verify your Facebook Business Manager account and notice that the “Start Verification” button is either:
Greyed out and not clickable
Completely missing
Don’t worry — this is a very common issue.
In most cases, this happens because the Business Information in your Facebook Business Manager account is incomplete.
Once the missing details are added correctly, the Start Verification button becomes visible and clickable.
This guide walks you through all the required steps to fix the issue and enable Facebook Business verification.
Why Does This Happen?
If your Facebook Business Manager account is not fully set up, you may face one of these situations:
The business appears greyed out when applying for verification
The “Start Verification” button does not appear at all
Both issues are resolved by completing your Business Manager setup properly.
How to Enable the “Start Verification” Button
Go to the Facebook Business Manager portal.
Step 1: Go to Facebook Business Security Center
Open the Facebook Business Security Center
You may notice that the Start Verification button is currently missing
This confirms that additional setup is required.
Step 2: Attach a Facebook Page to Your Business Manager
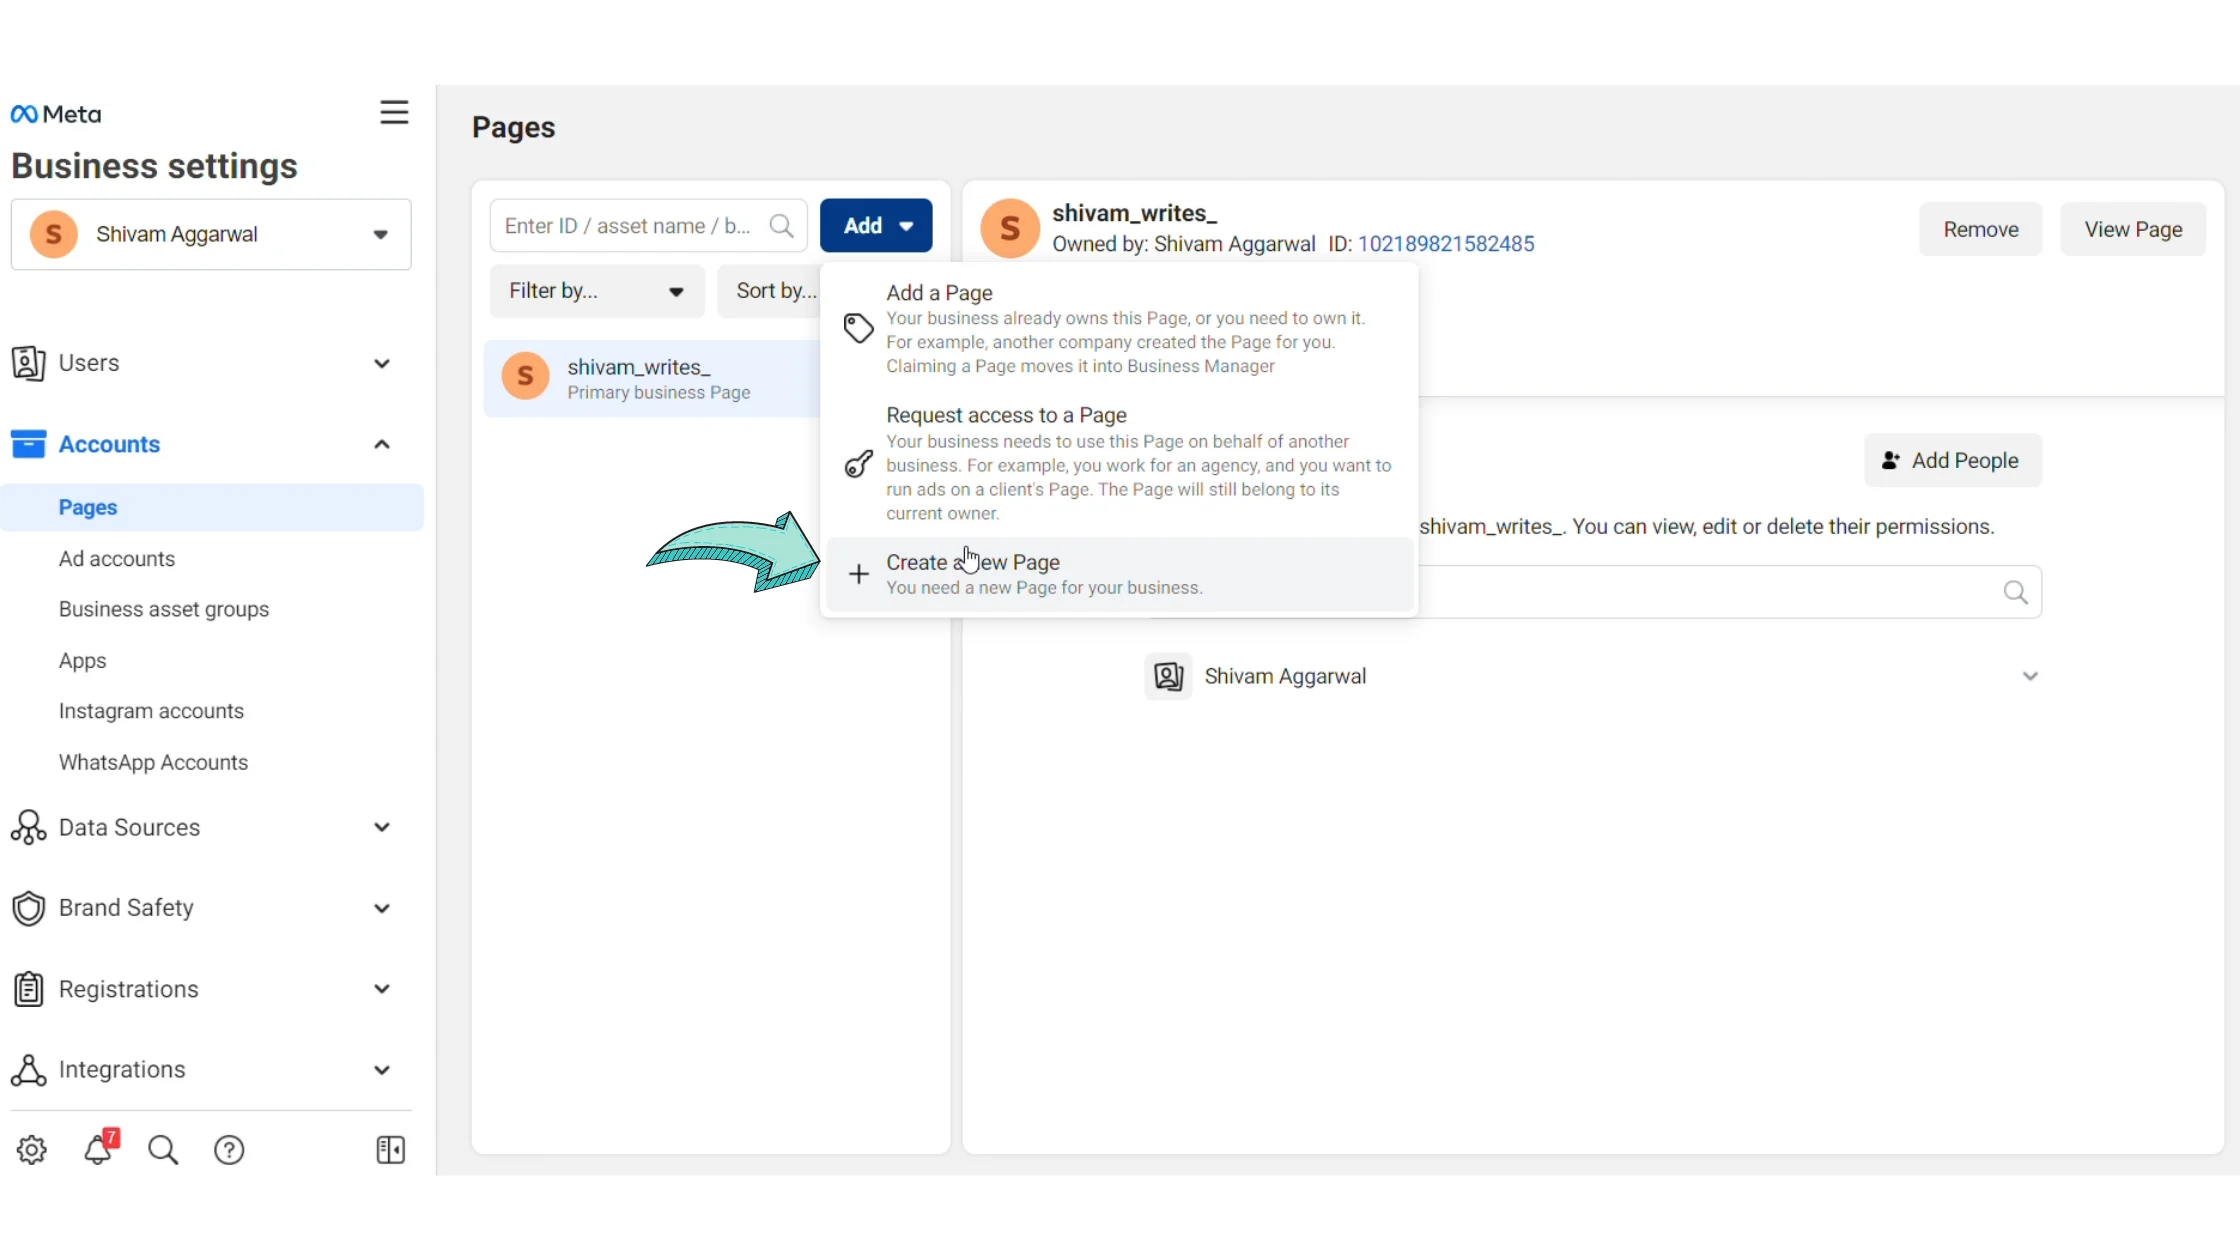
Go to Business Settings → Pages
Add your Facebook Page to the Business Manager account
📌 Important:
You must be an admin of the Facebook Page
If you already have a page added, you can skip this step
Without an attached Facebook Page, Business verification cannot be completed.
Step 3: Go to Apps Section
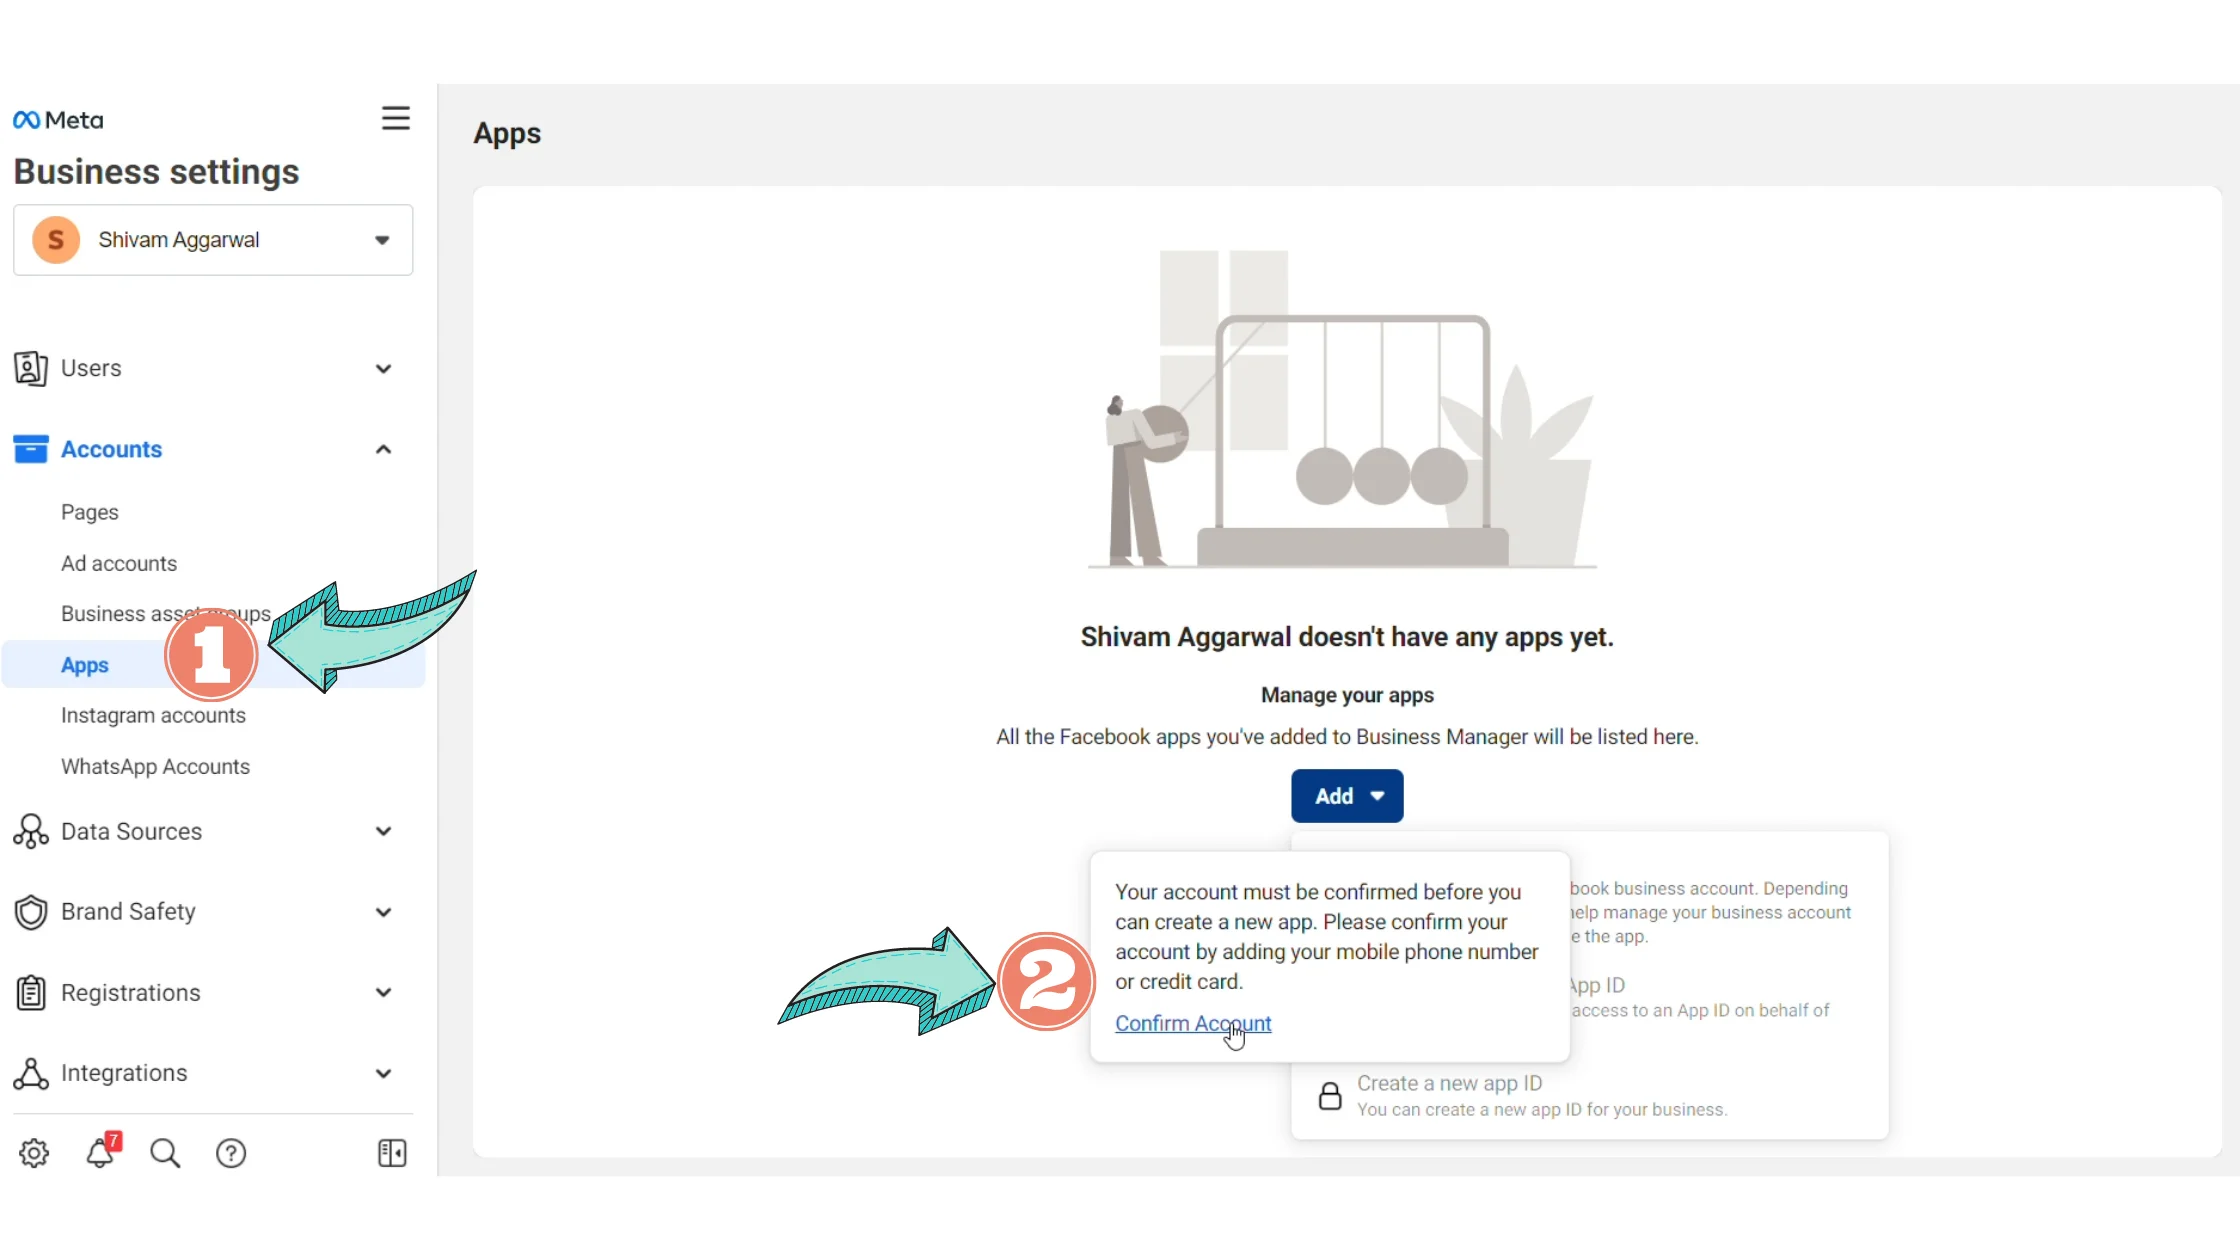
Navigate to Business Settings → Apps
Click on the Add button
If the “Create a new App ID” option appears locked:
Hover over it
Click Confirm Account to unlock the option
This will open a new confirmation flow in a separate tab.
Step 4: Confirm Your Facebook Account
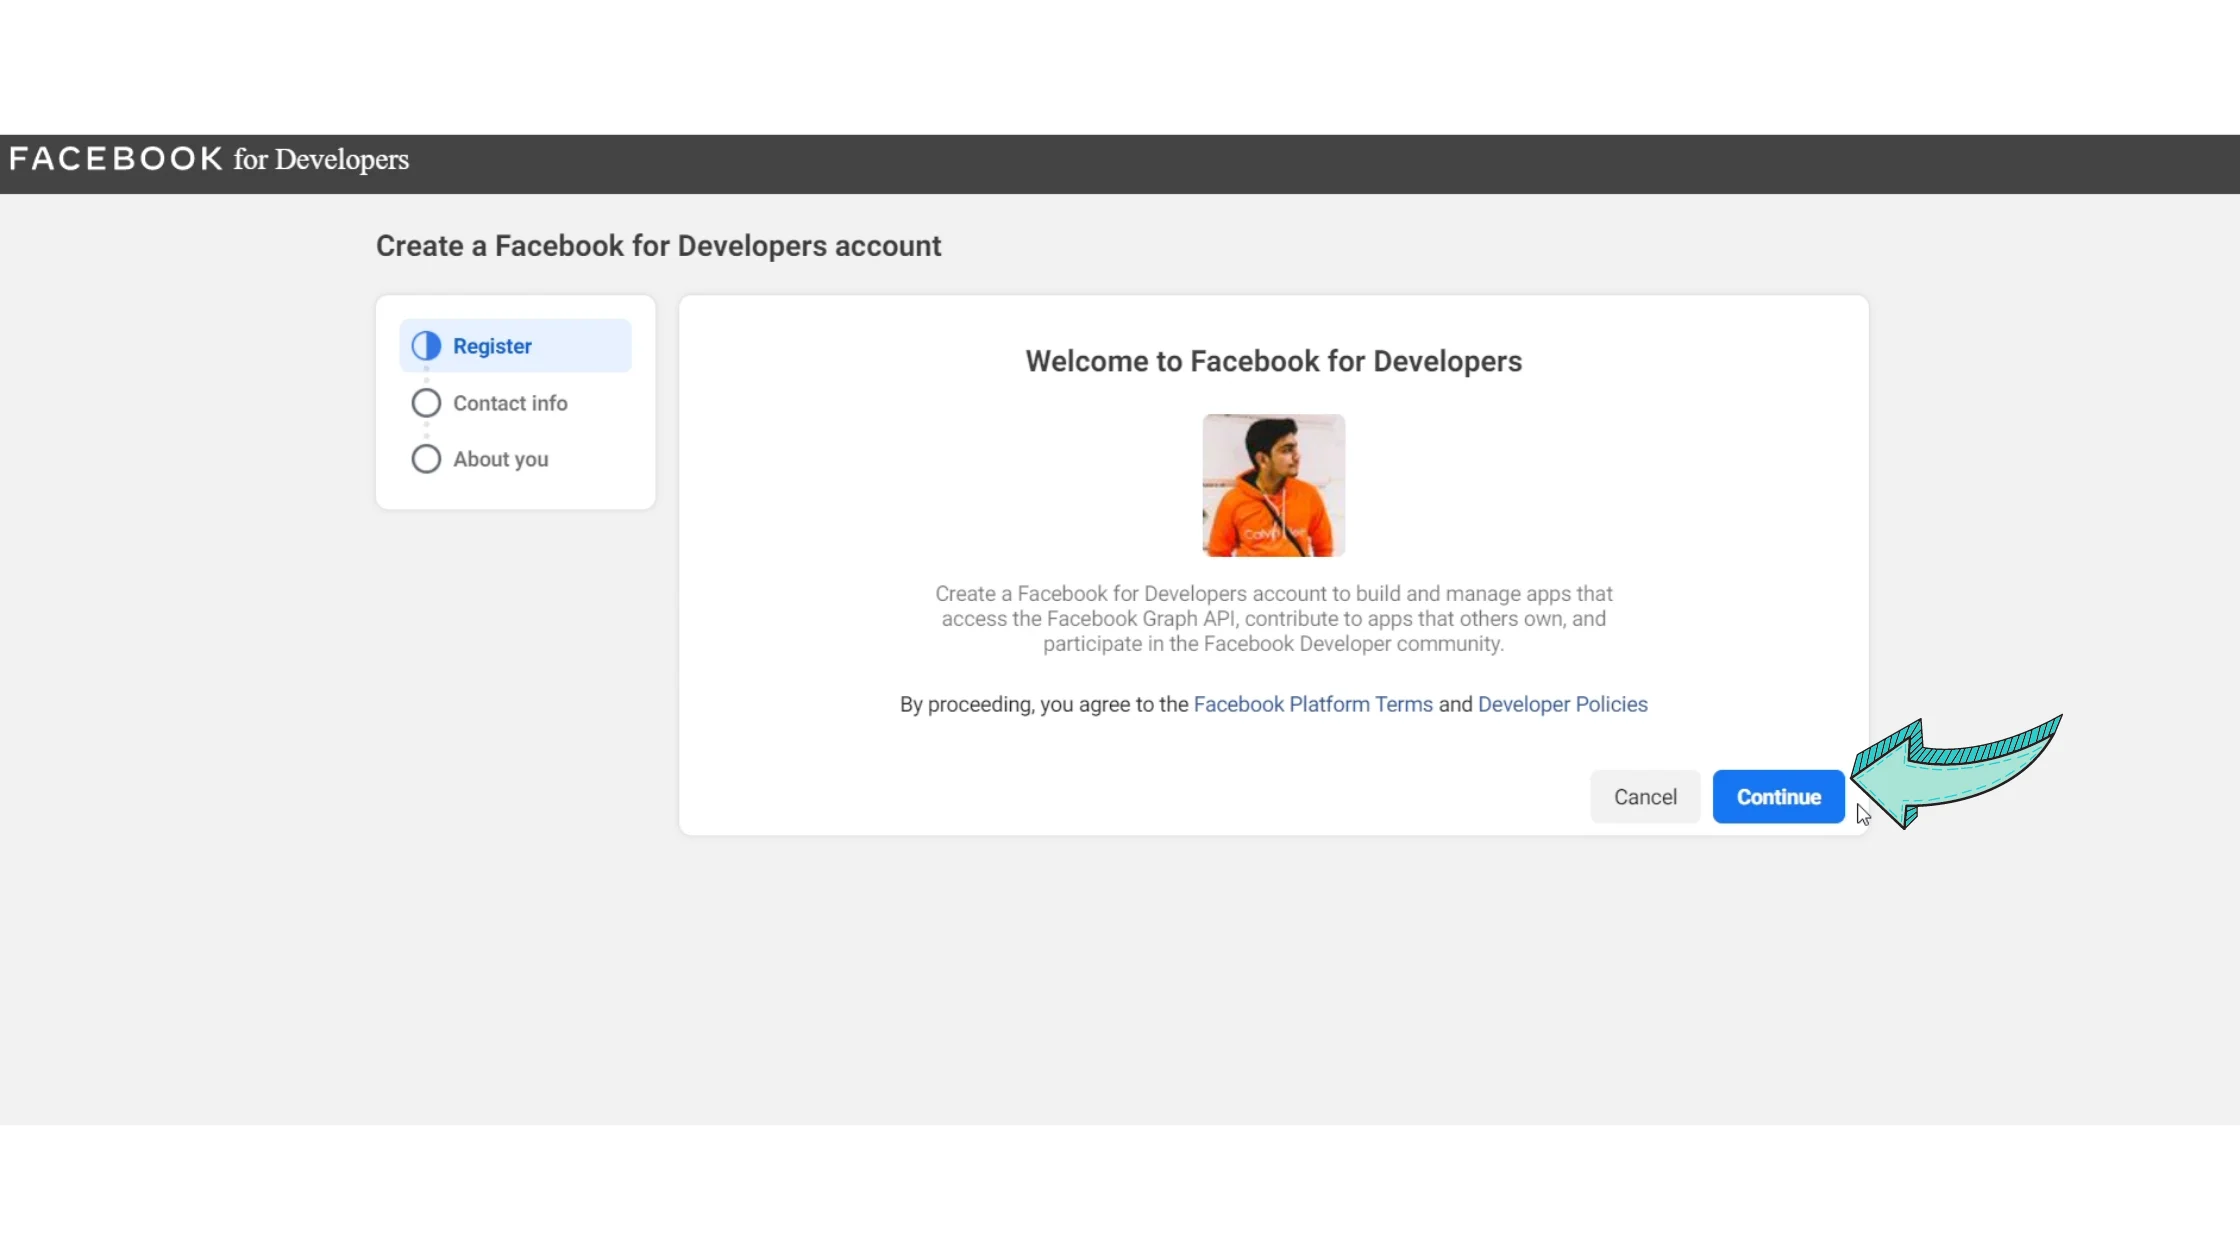
In the new window:
Click Continue
Check the “I agree” box
Confirm your email address
Enter a valid business email ID
Choose the role that best describes you (for example: Owner & Founder)
Click Complete Registration
This step confirms your developer access.
Step 5: Create a Facebook App
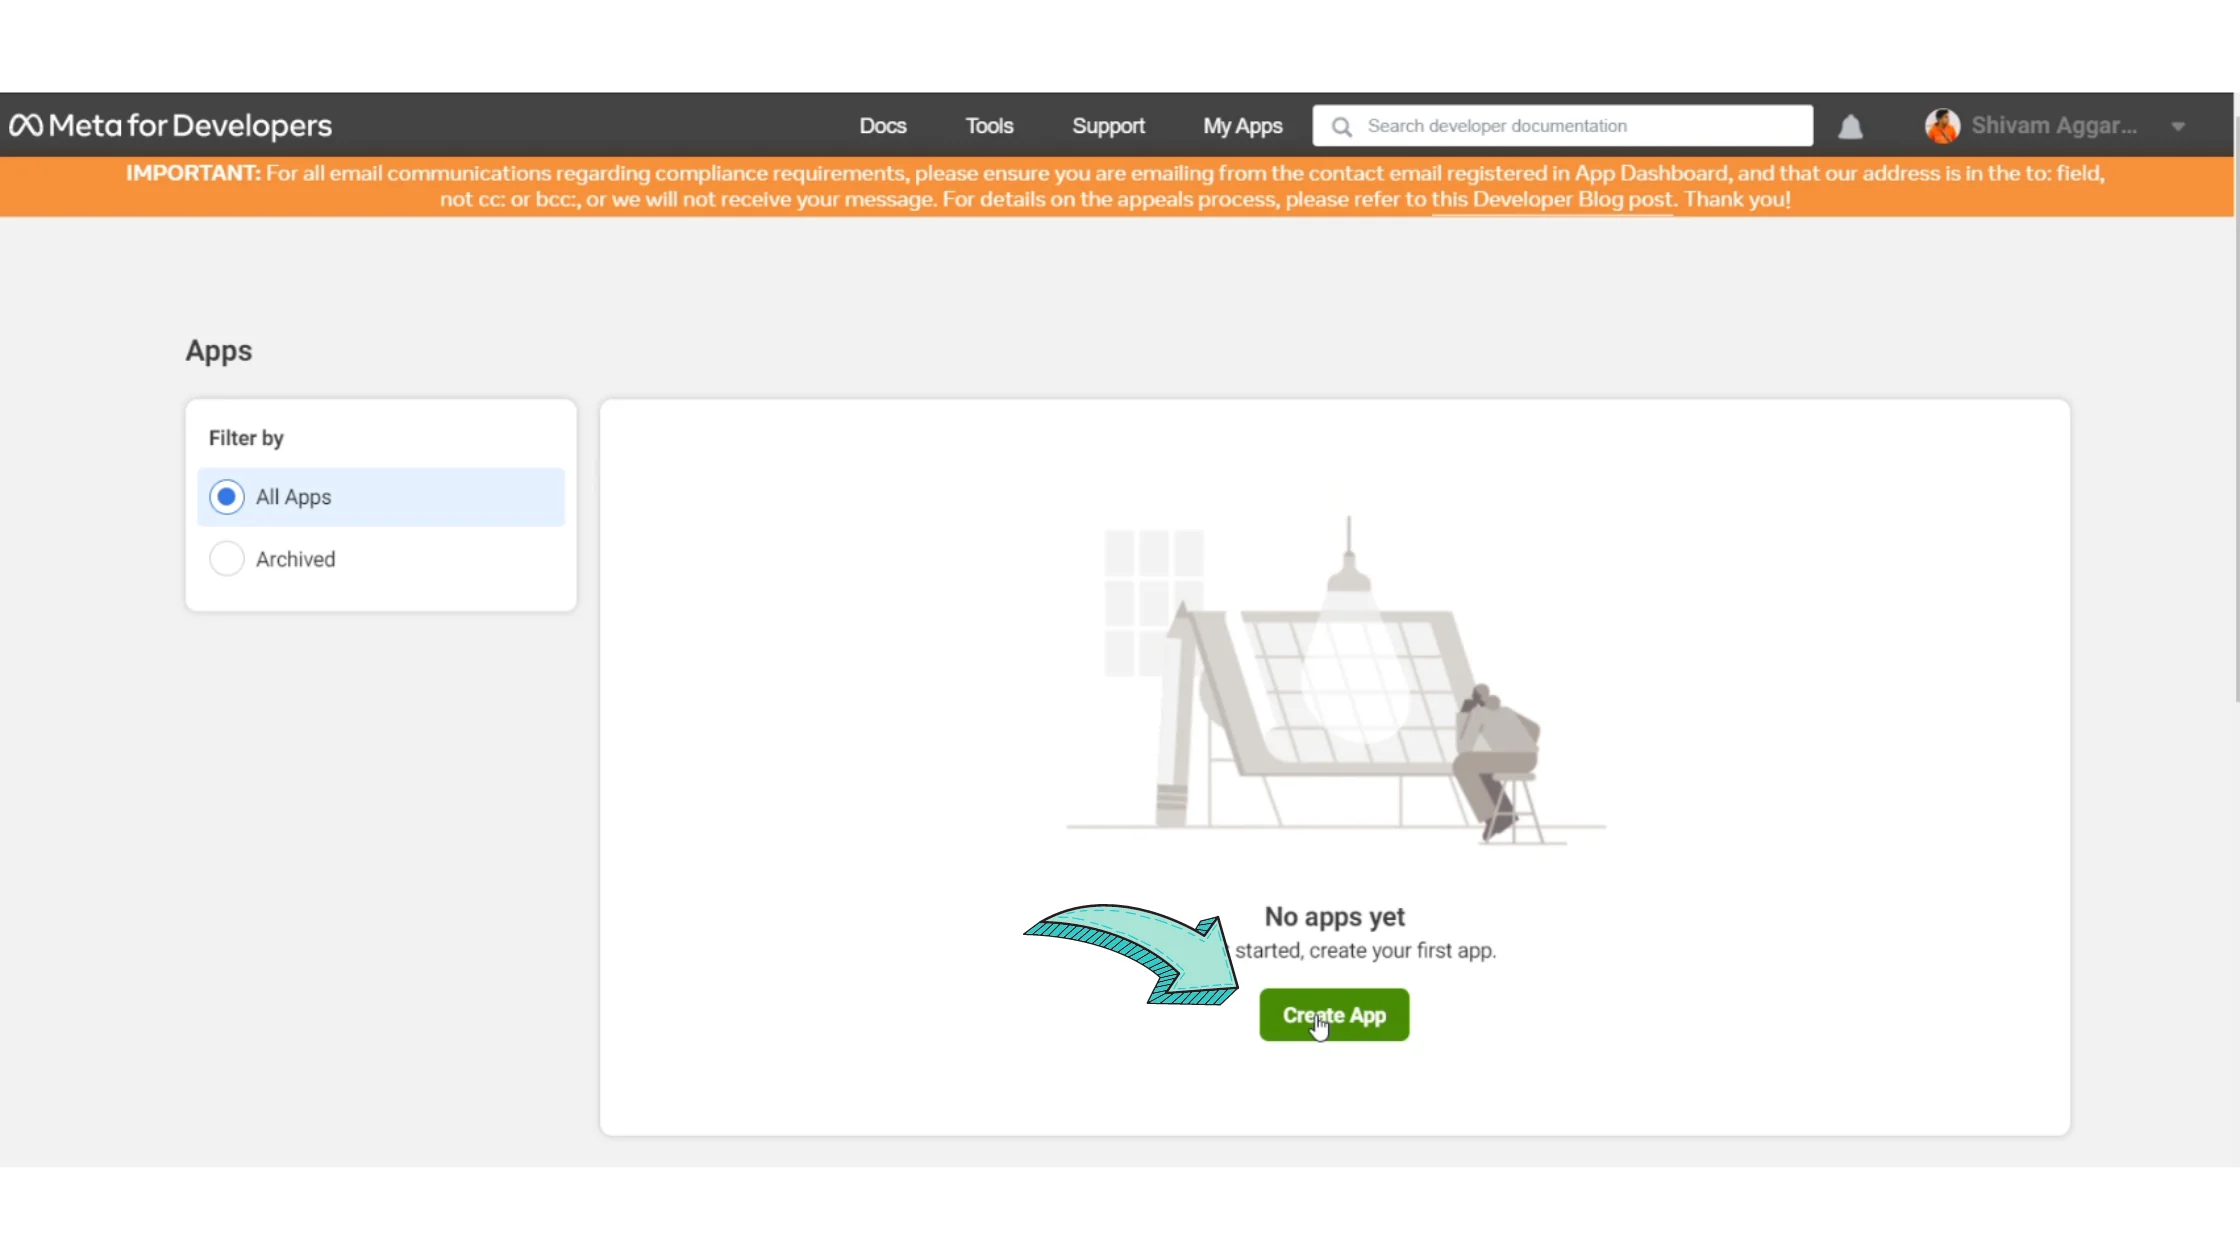
Click Create App
Proceed to the next step when redirected
Step 6: Choose the App Type
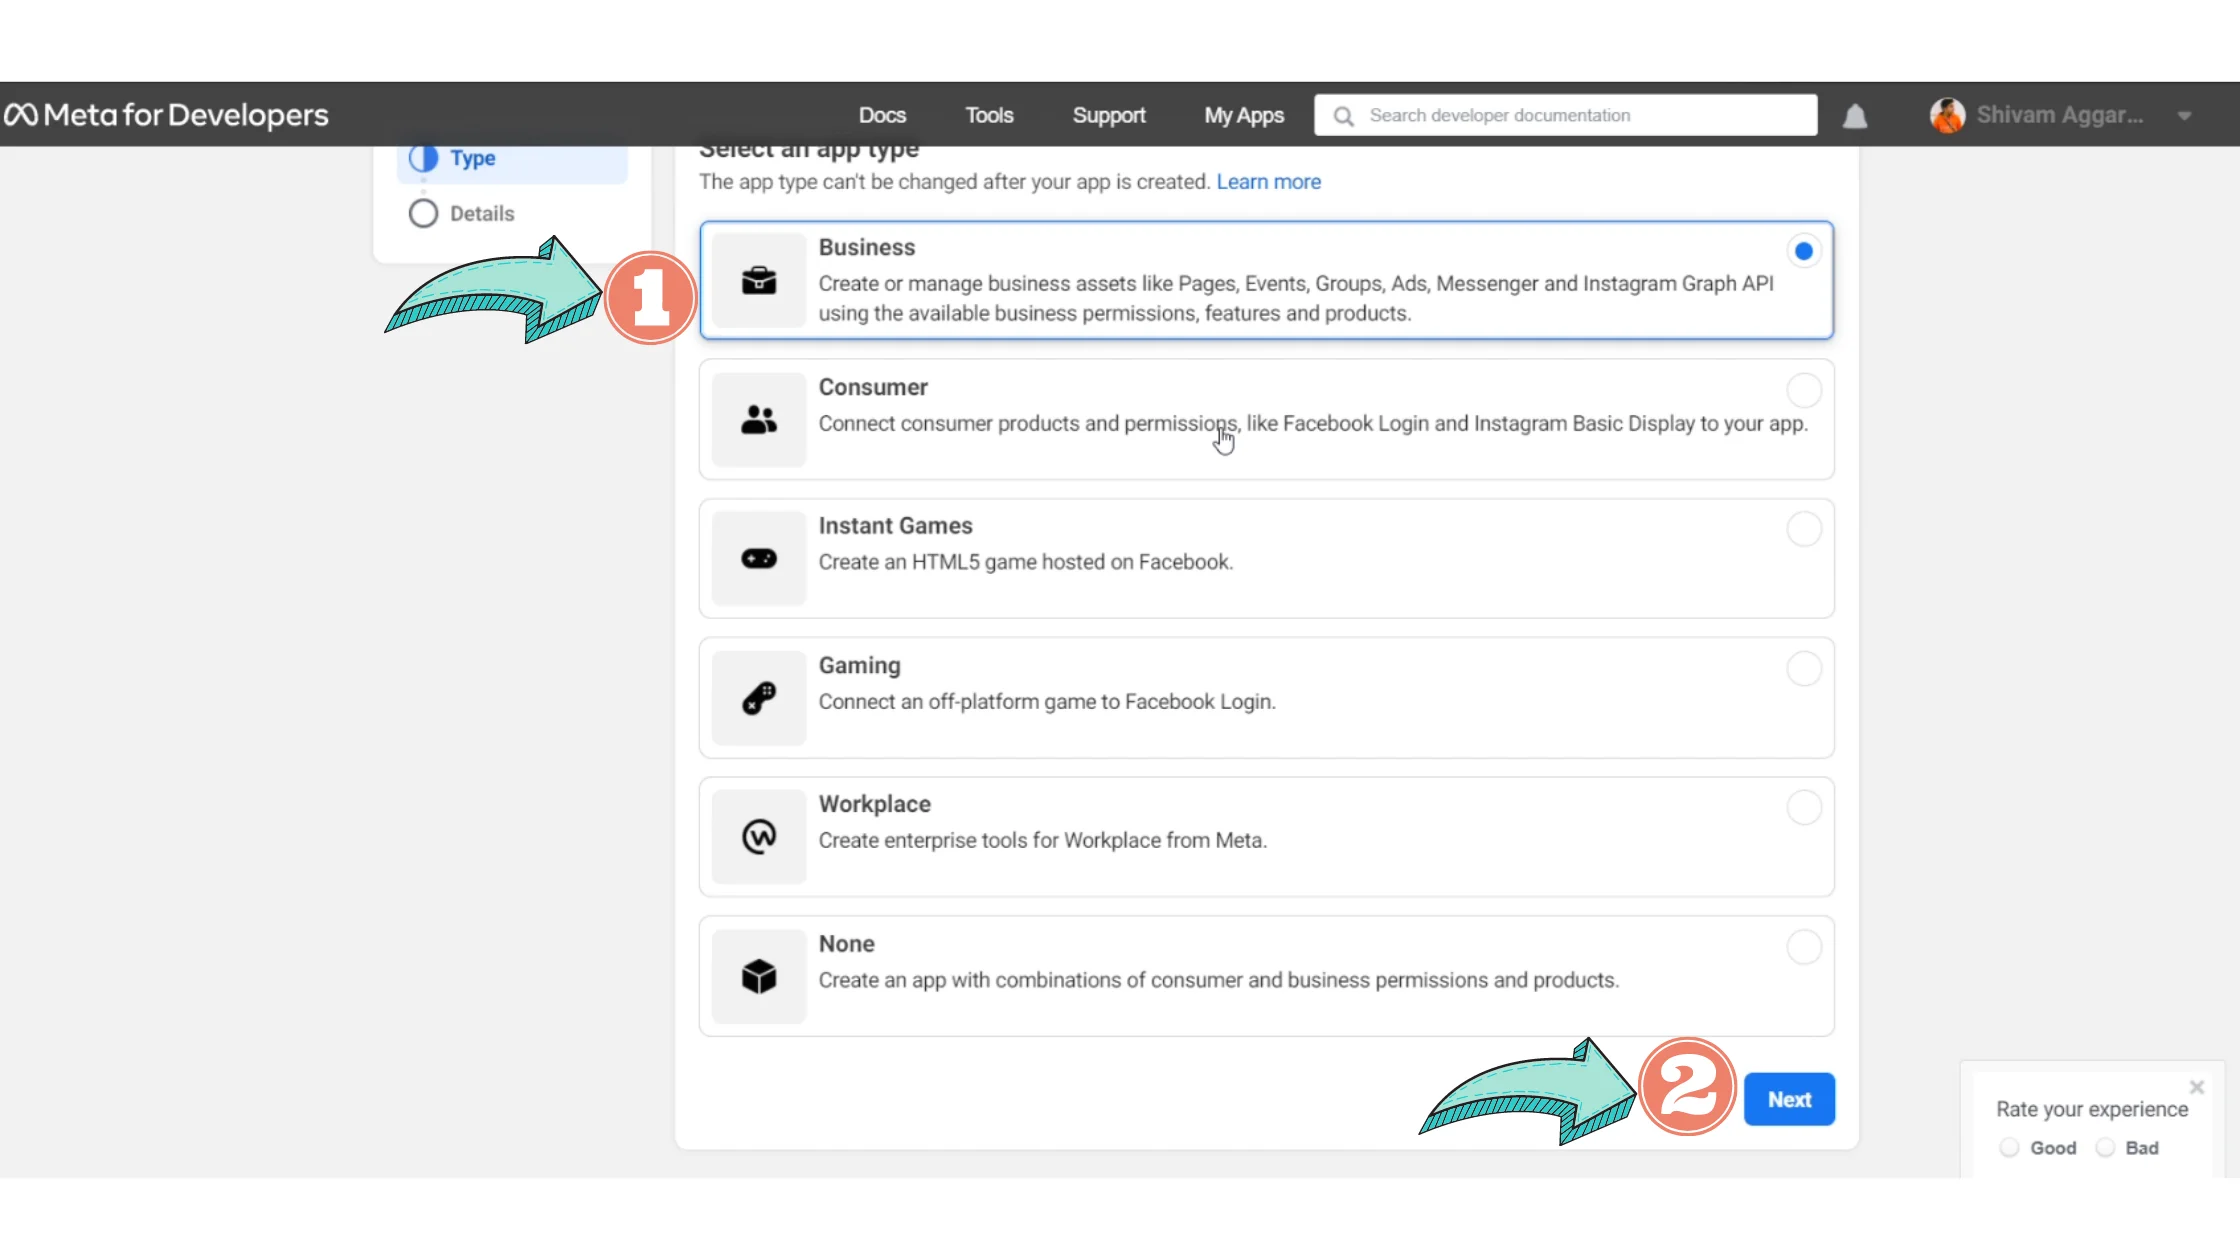
Select the Business app type (recommended)
Click Next
Step 7: Add Business Display Name
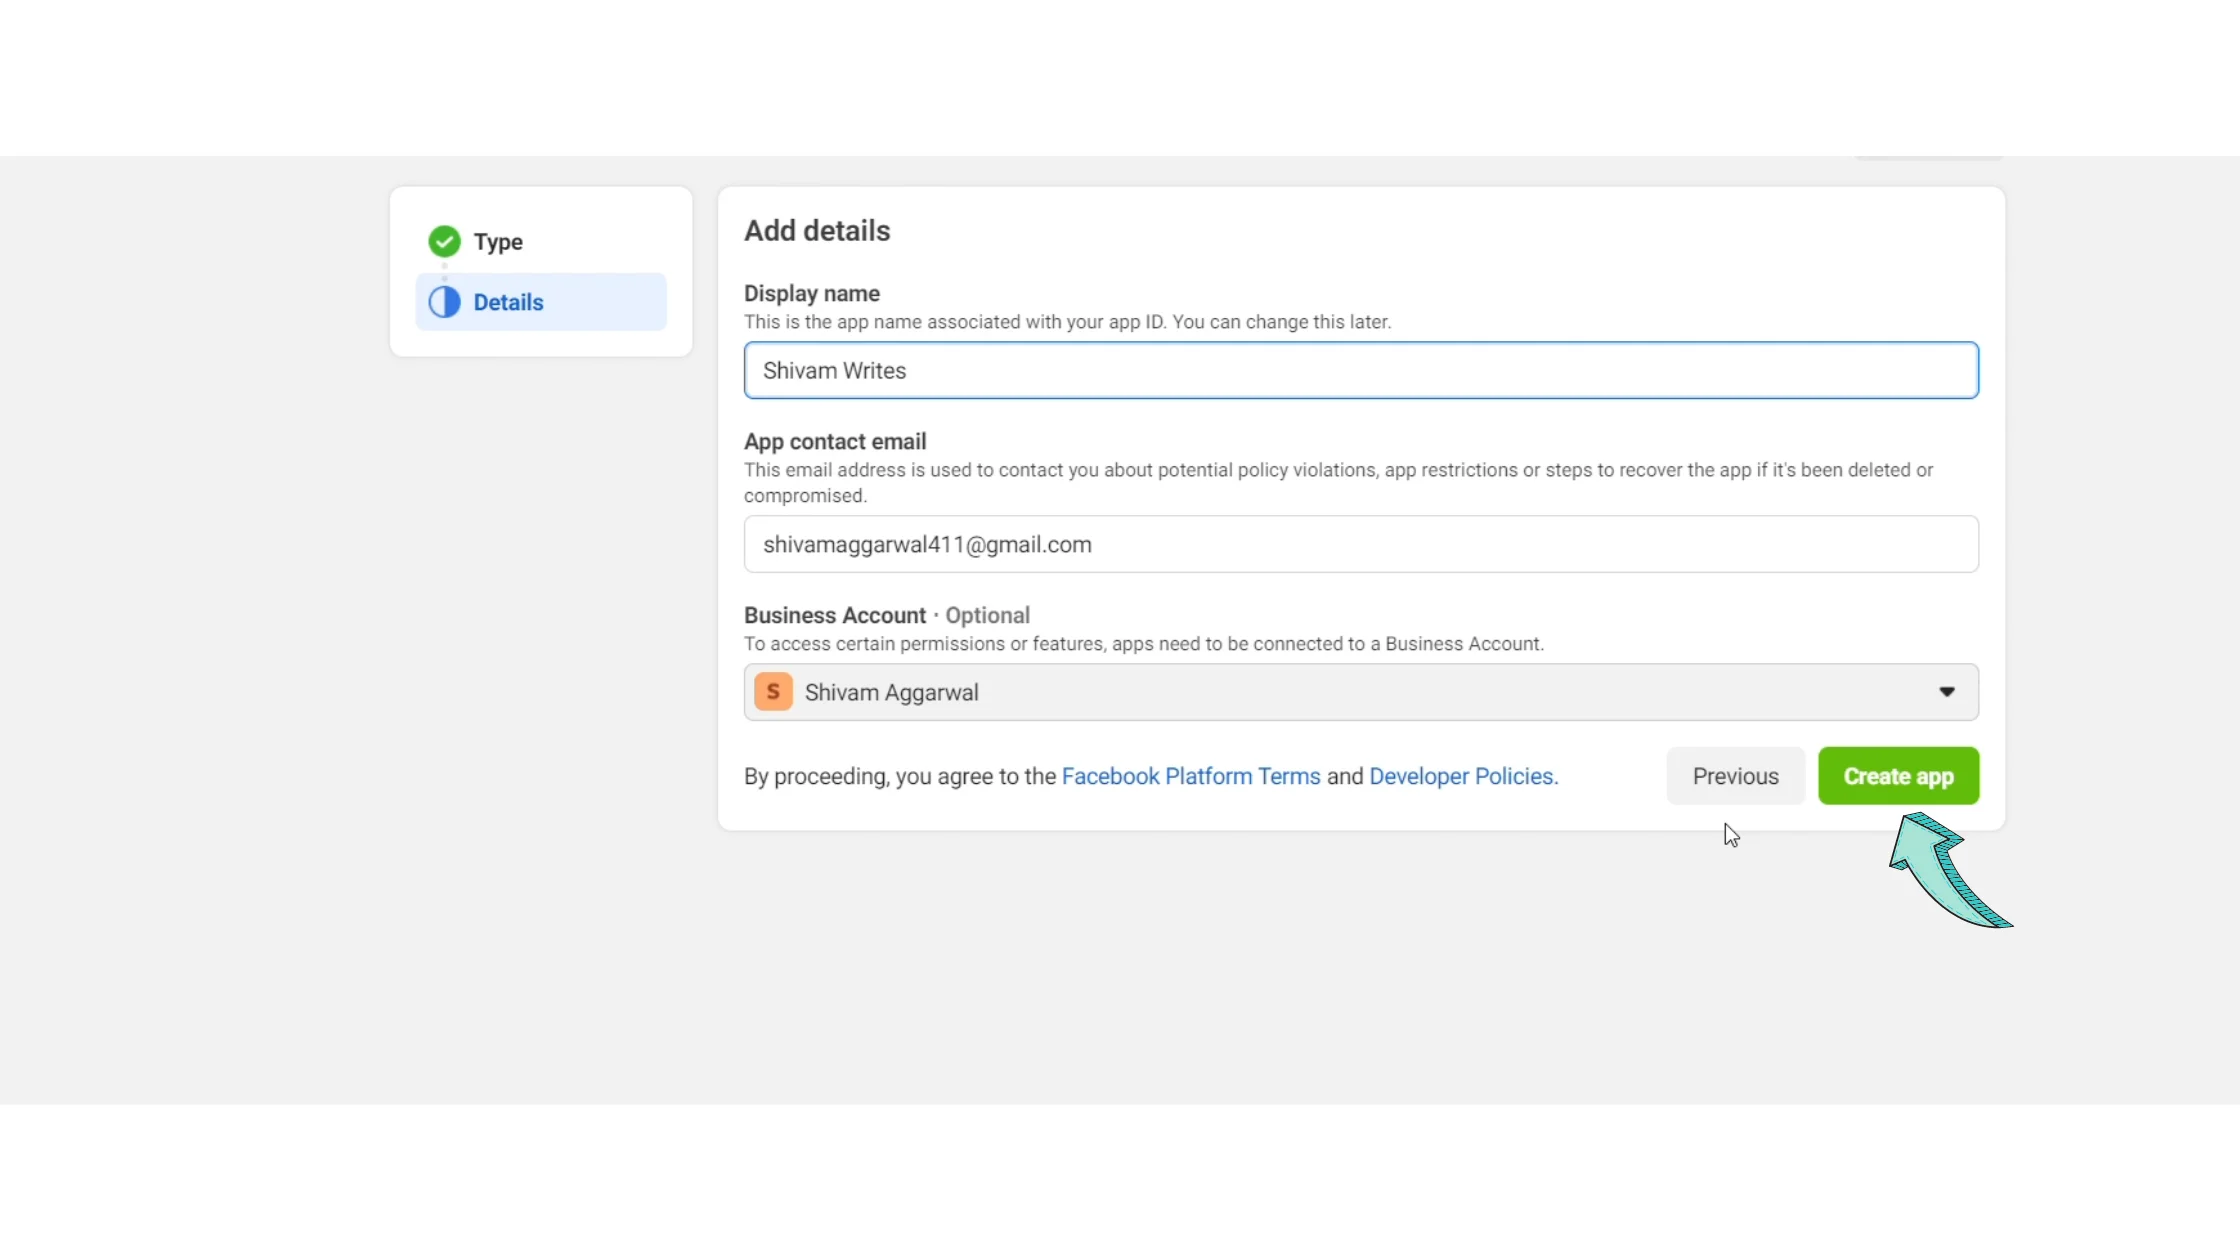
Enter a Business Display Name
This is not your final WhatsApp display name
It is only the name associated with your App ID
Then:
Add your email address
Click Create App
Enter your Facebook password to confirm
Step 8: App Successfully Created

Once the app is created:
Go to business.facebook.com/settings
Open the Security Center
Refresh the page
✅ In most cases, the Start Verification button will now appear.
If it’s still not visible, continue with the next steps.
Step 9: Go to App Review

Open App Review
Click on Permissions and Features
Step 10: Request Advanced Access
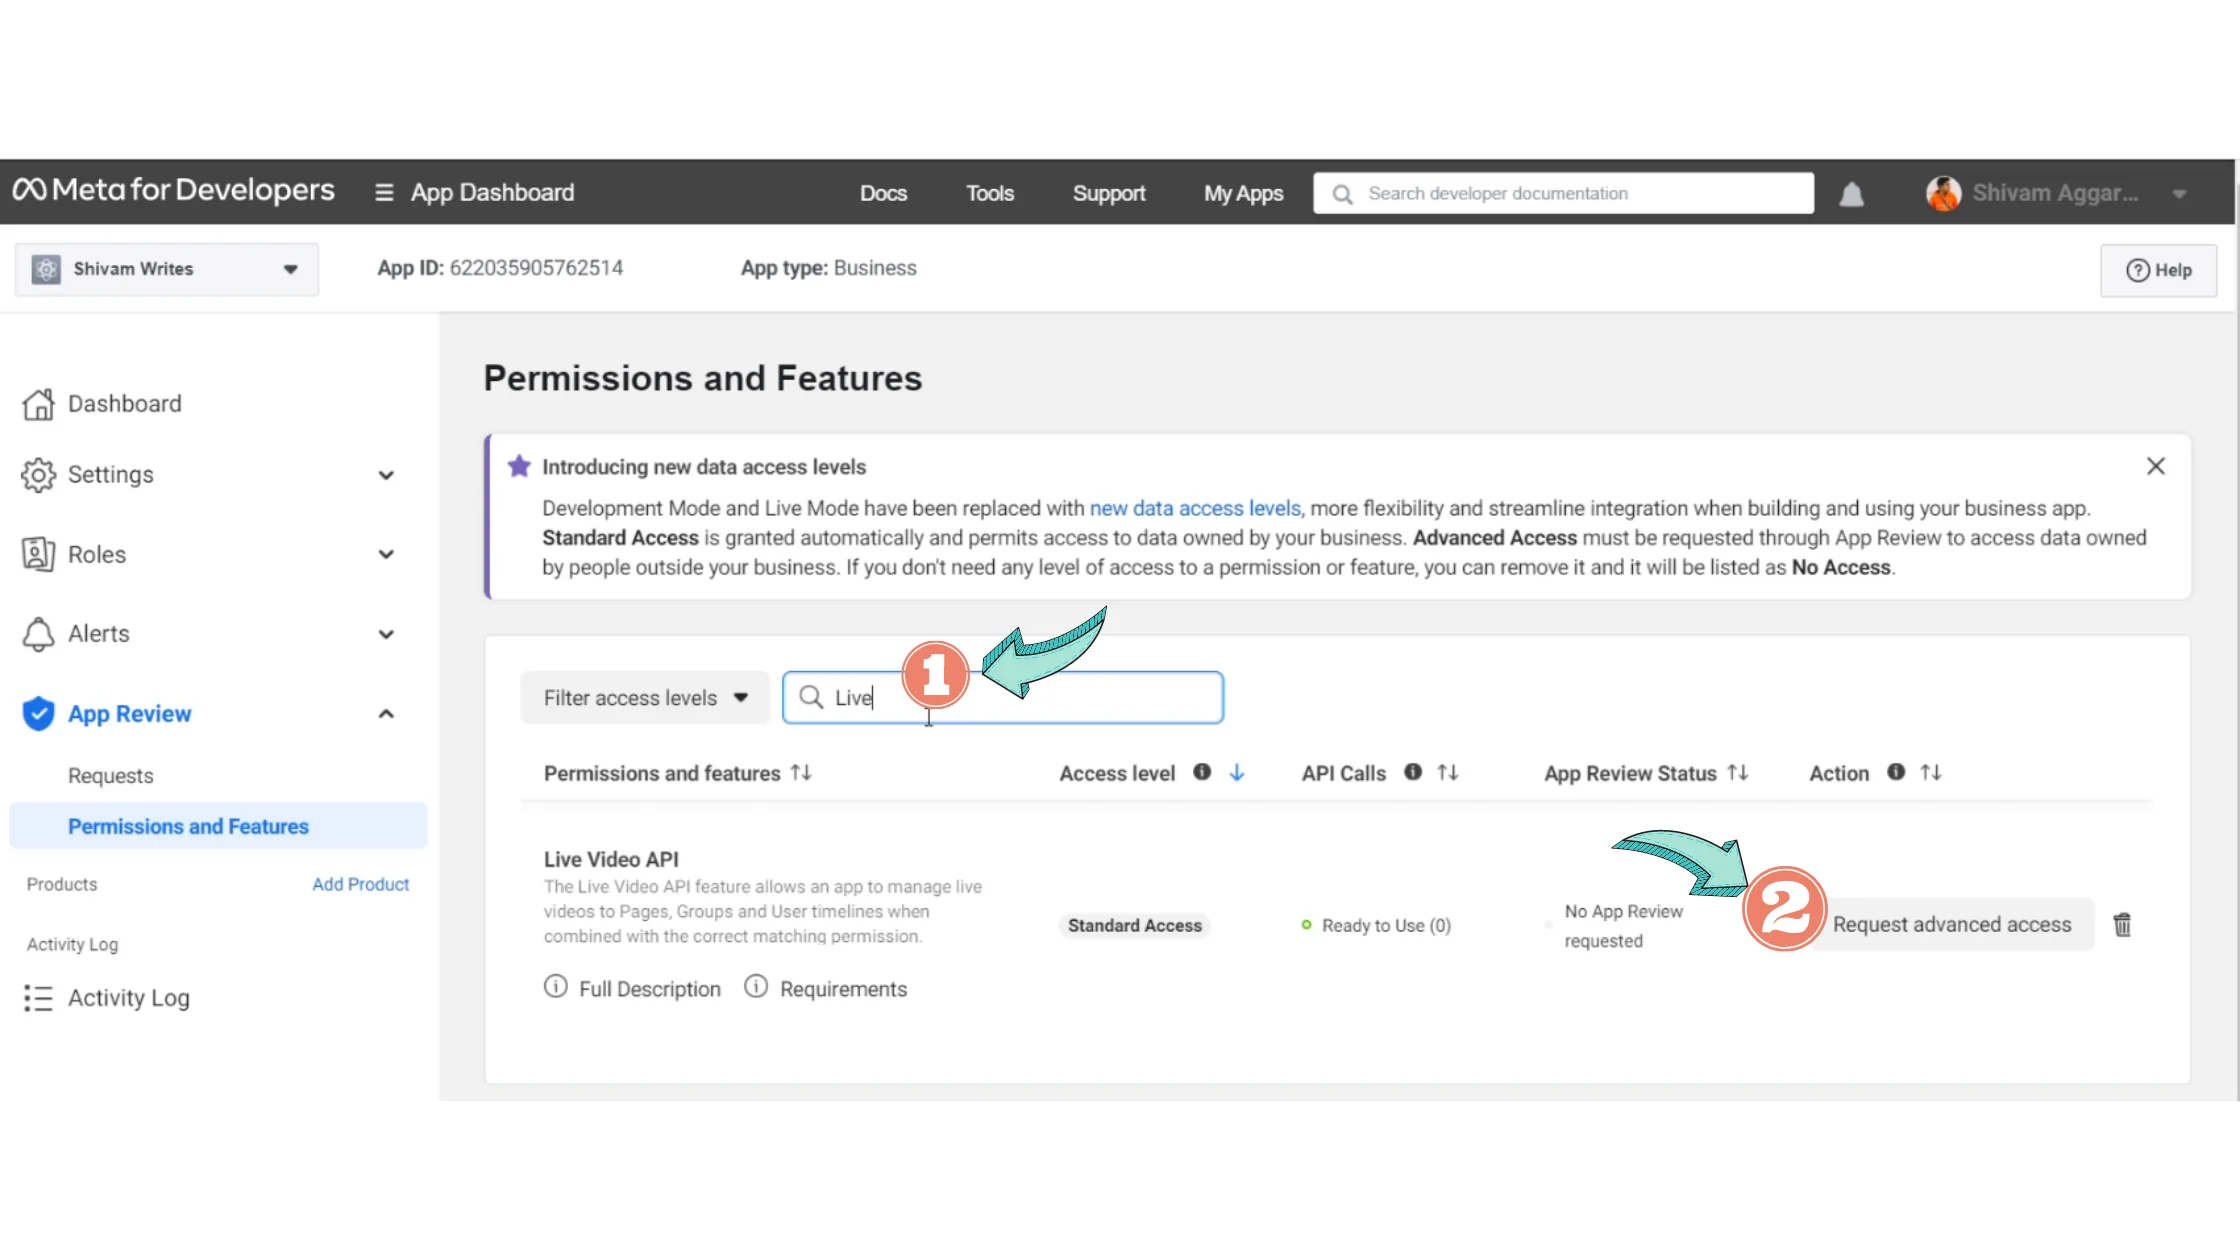
Search for Live Video API
Click Request Advanced Access
Step 11: Continue the Request
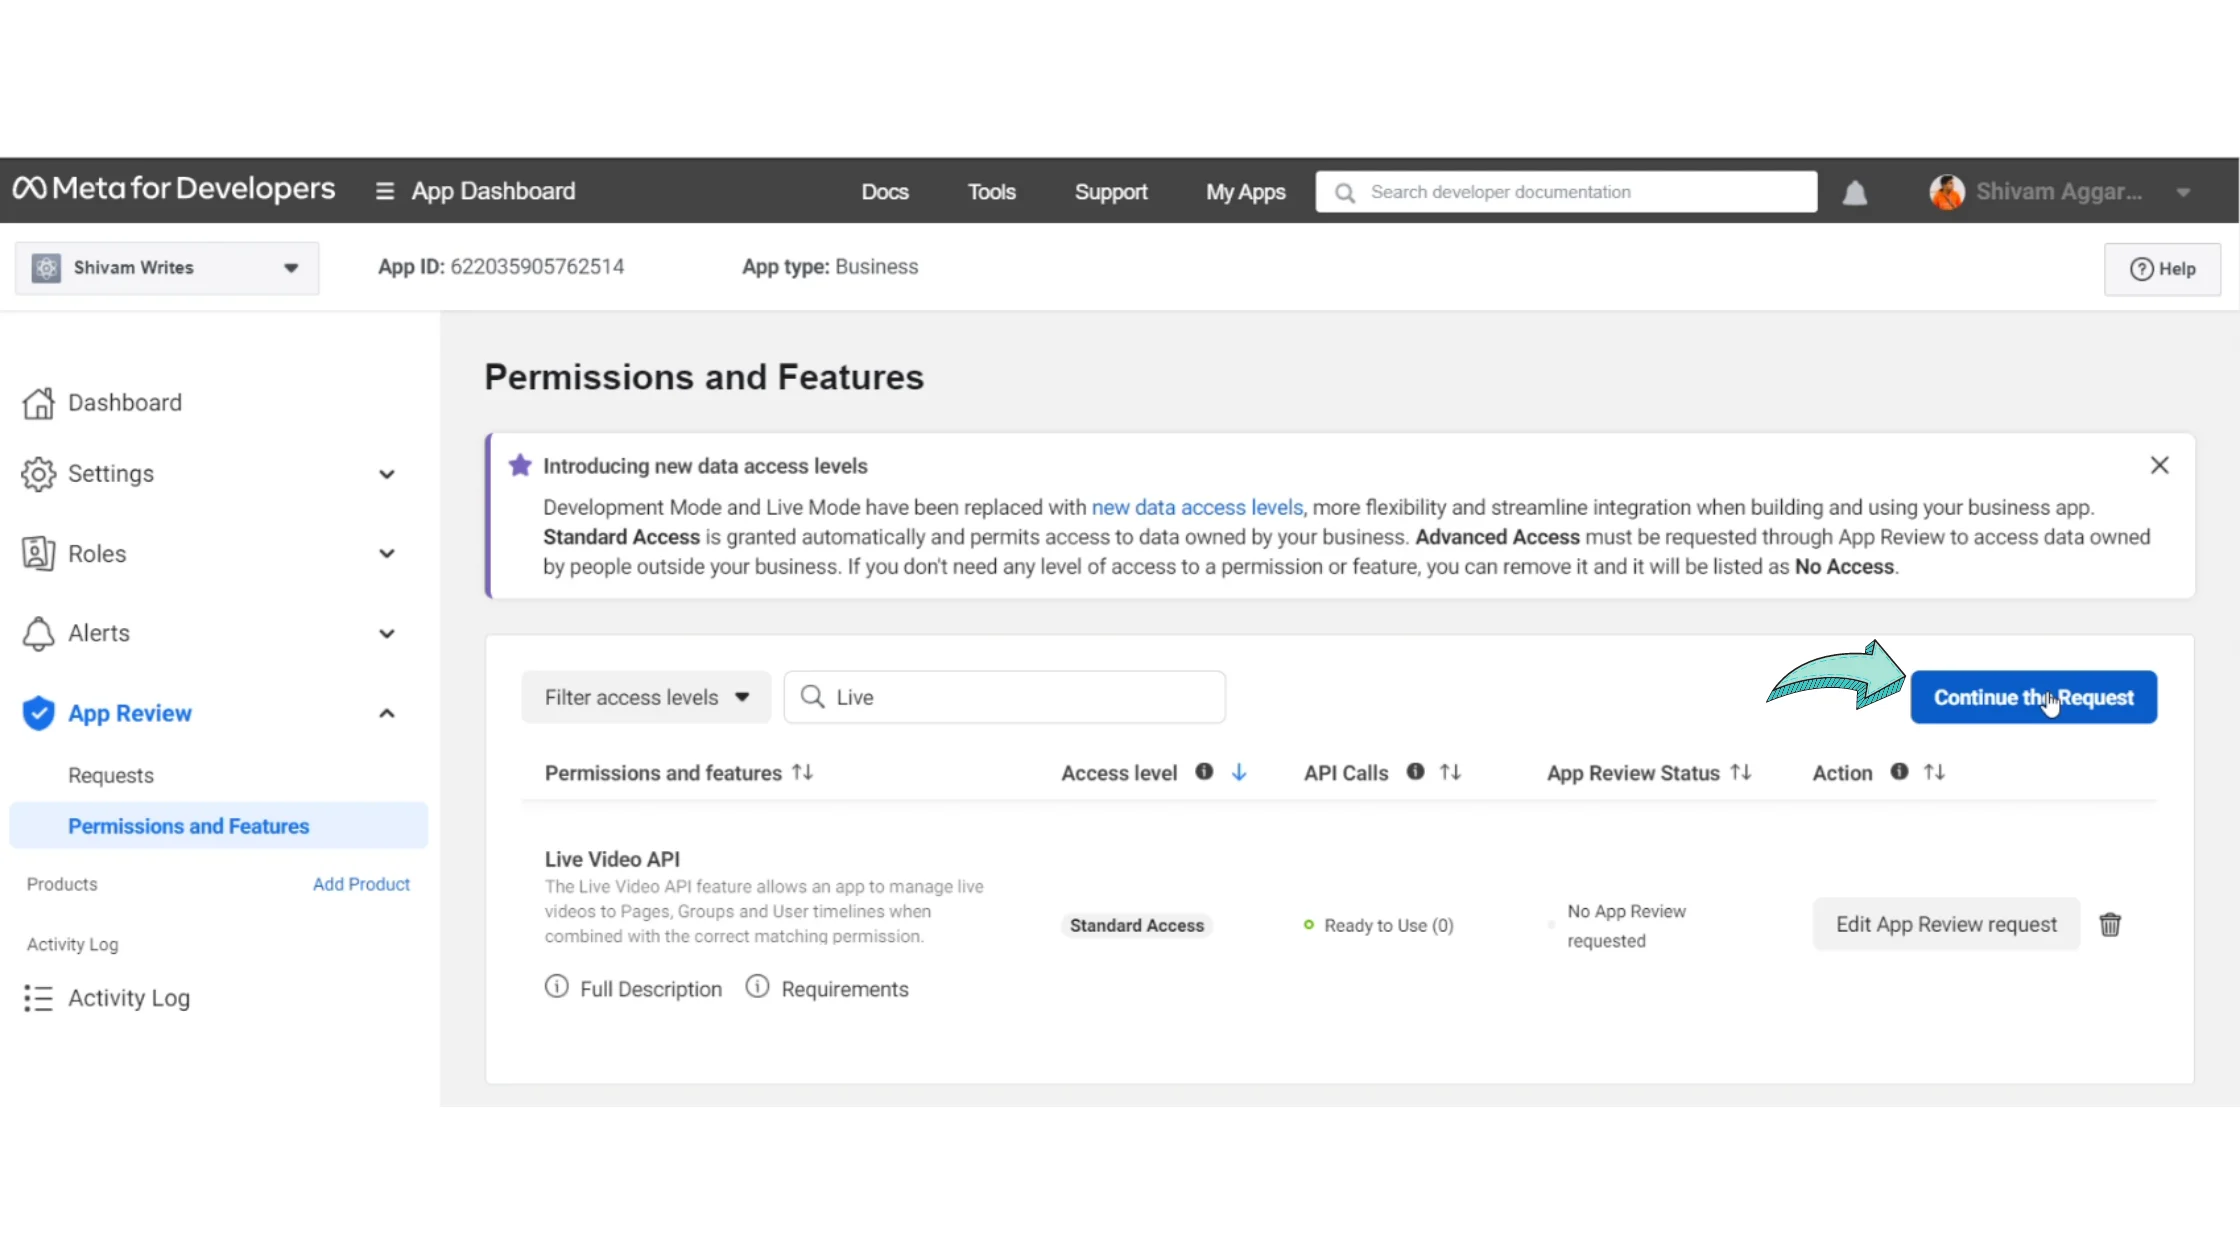
Click Continue the request
Proceed to review your app settings
Step 12: Review App Settings
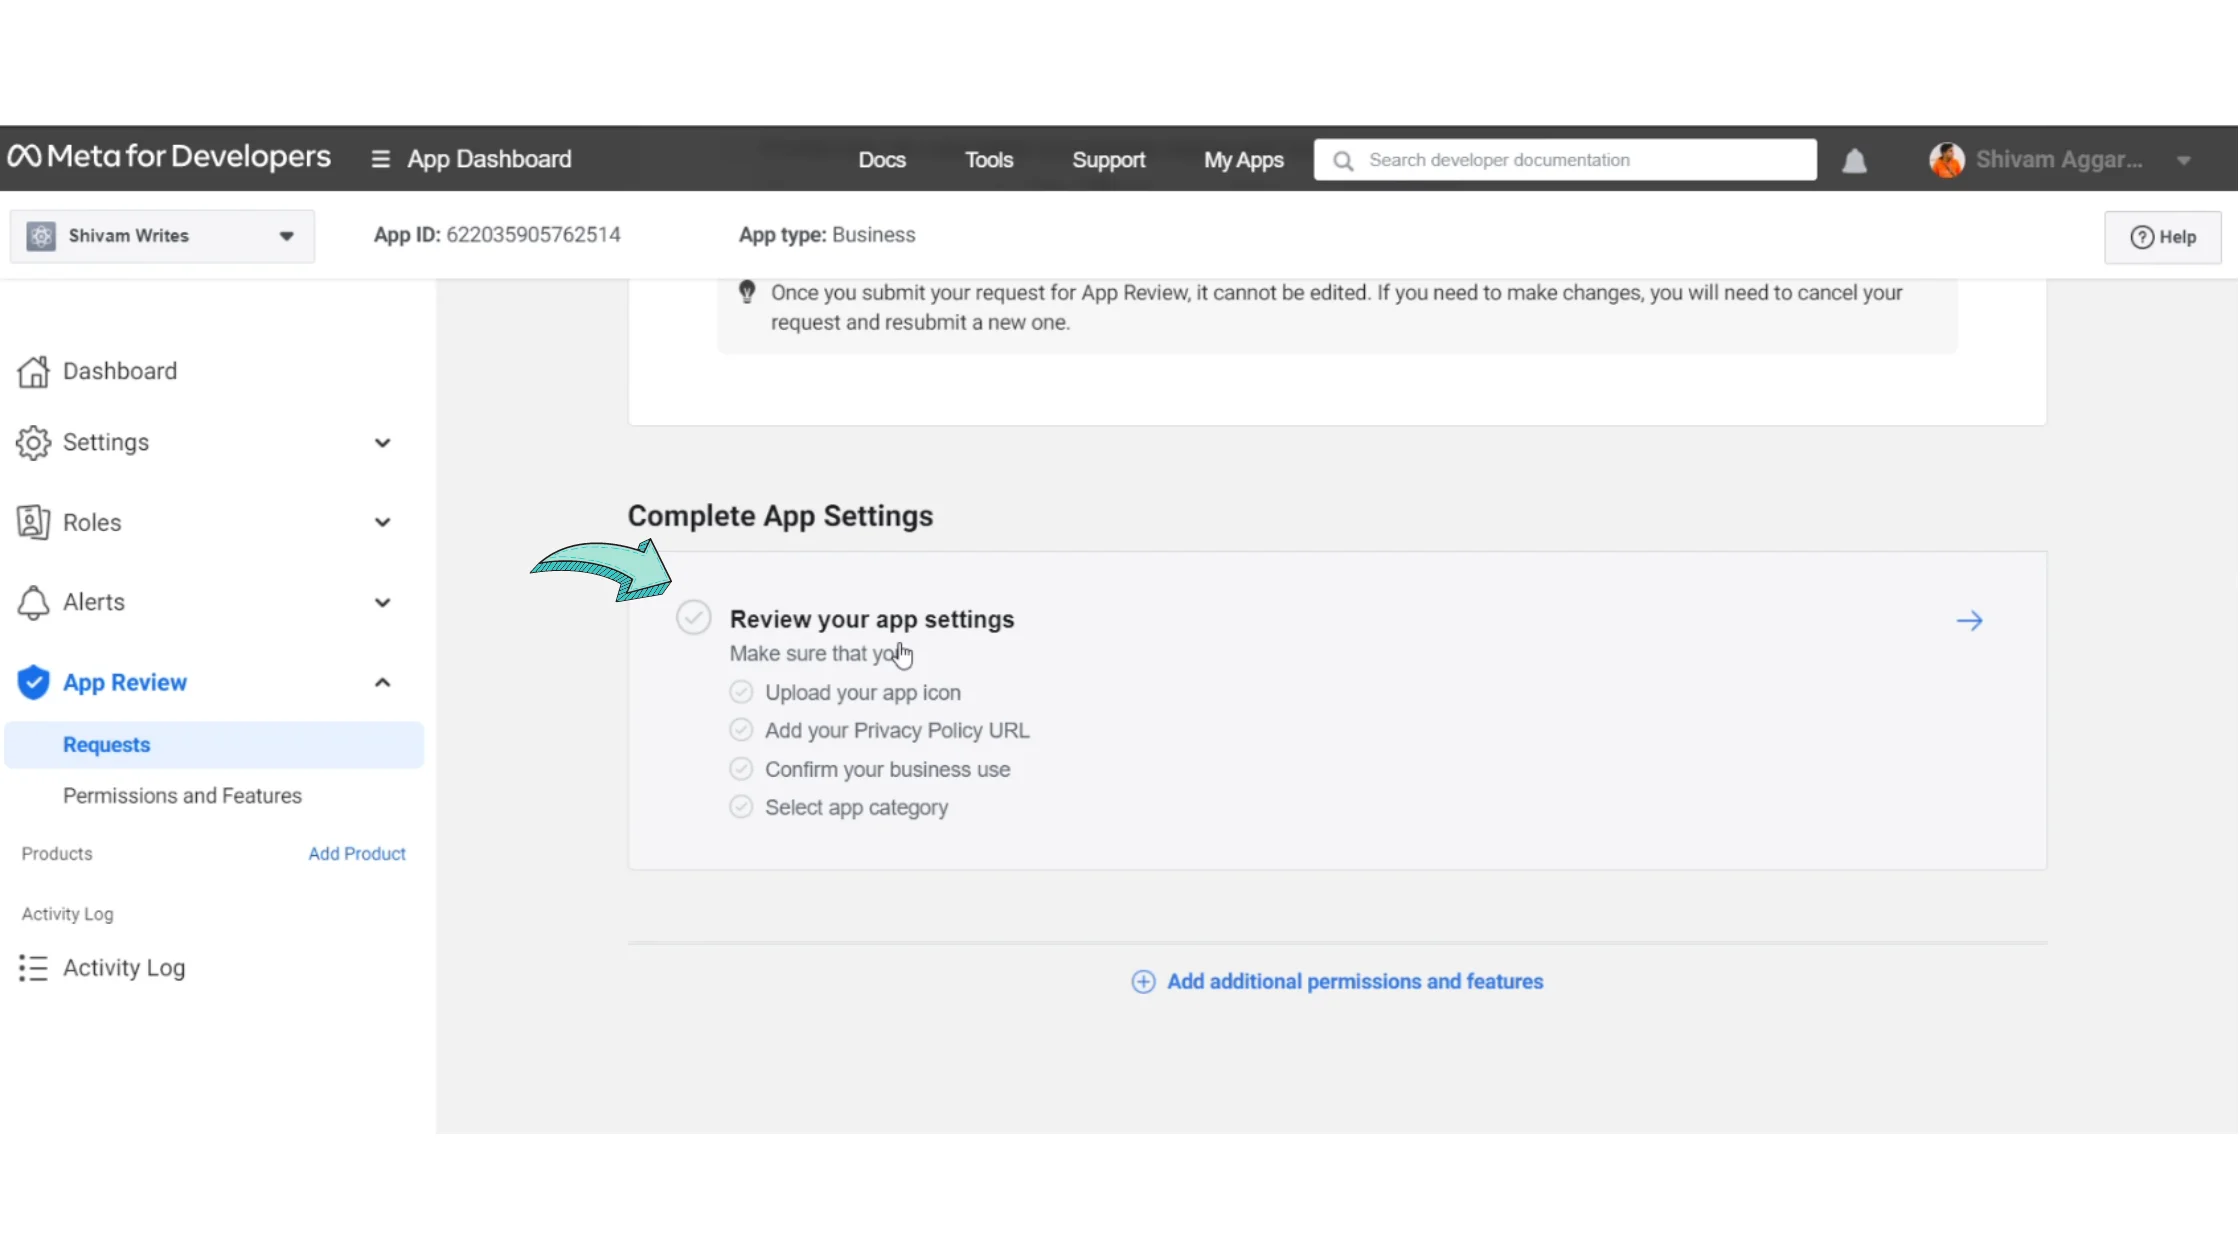
Scroll down
Click Review App Settings
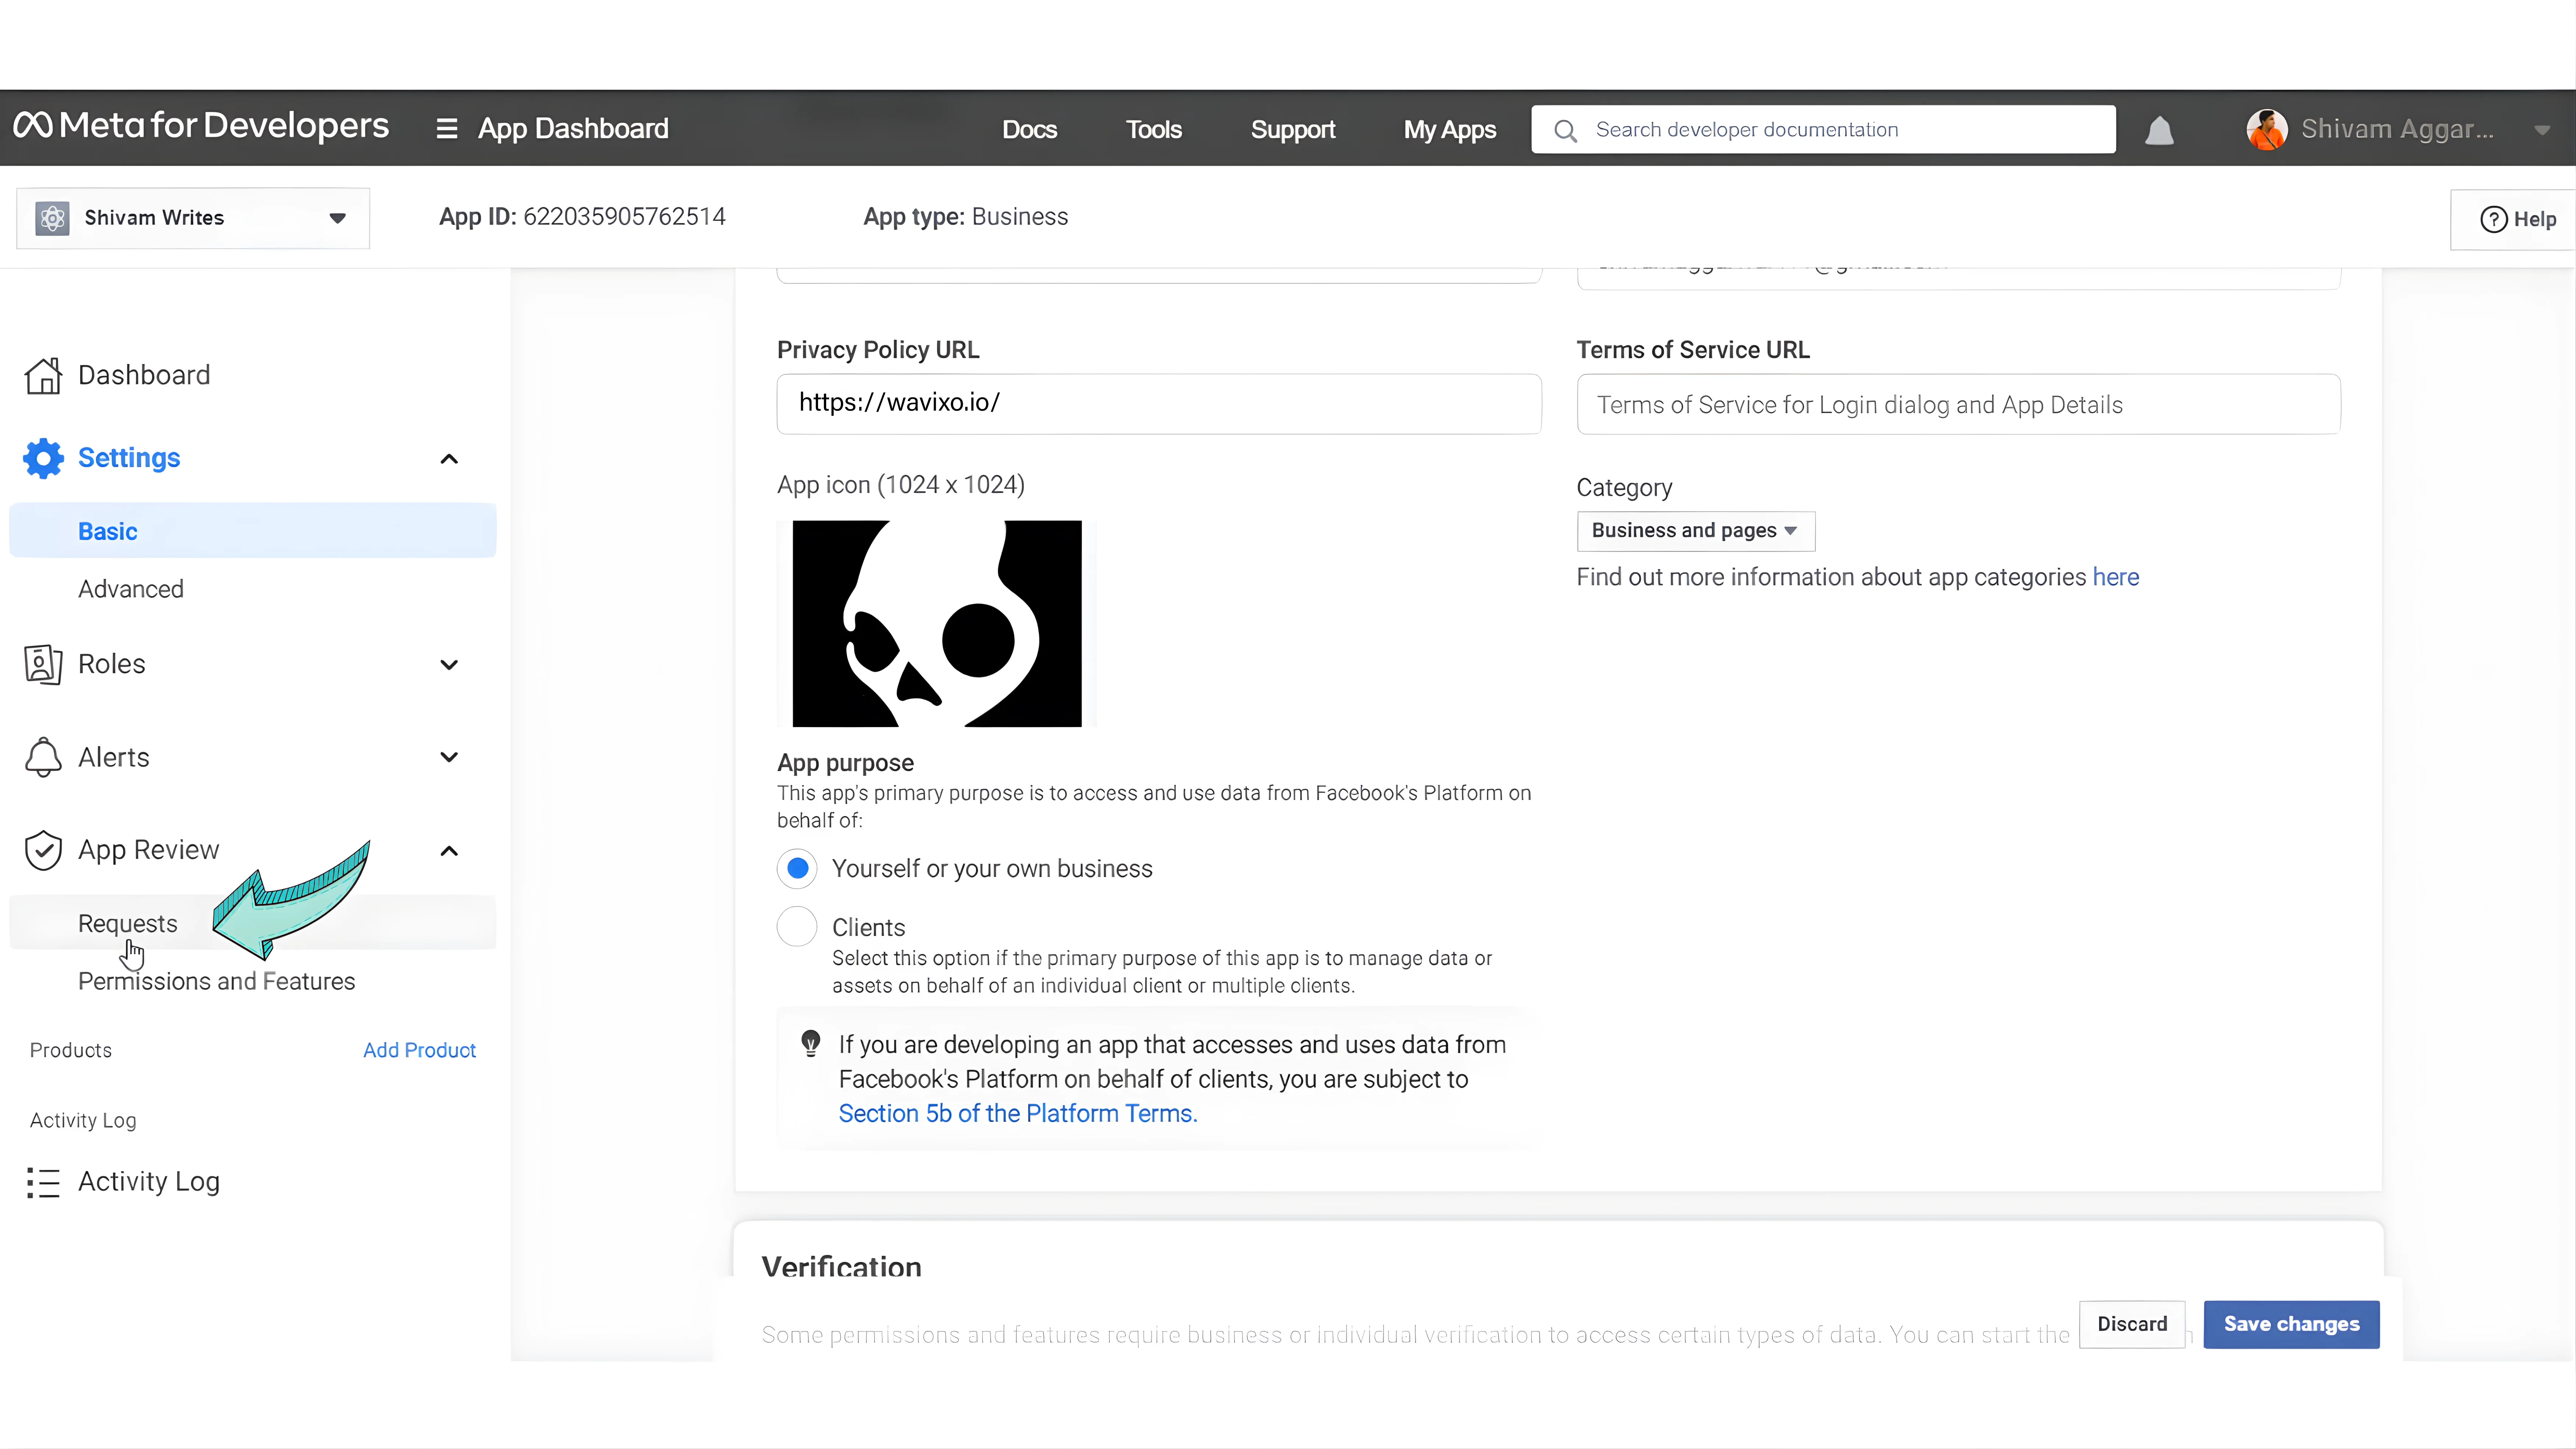
Step 13: Fill in Application Details
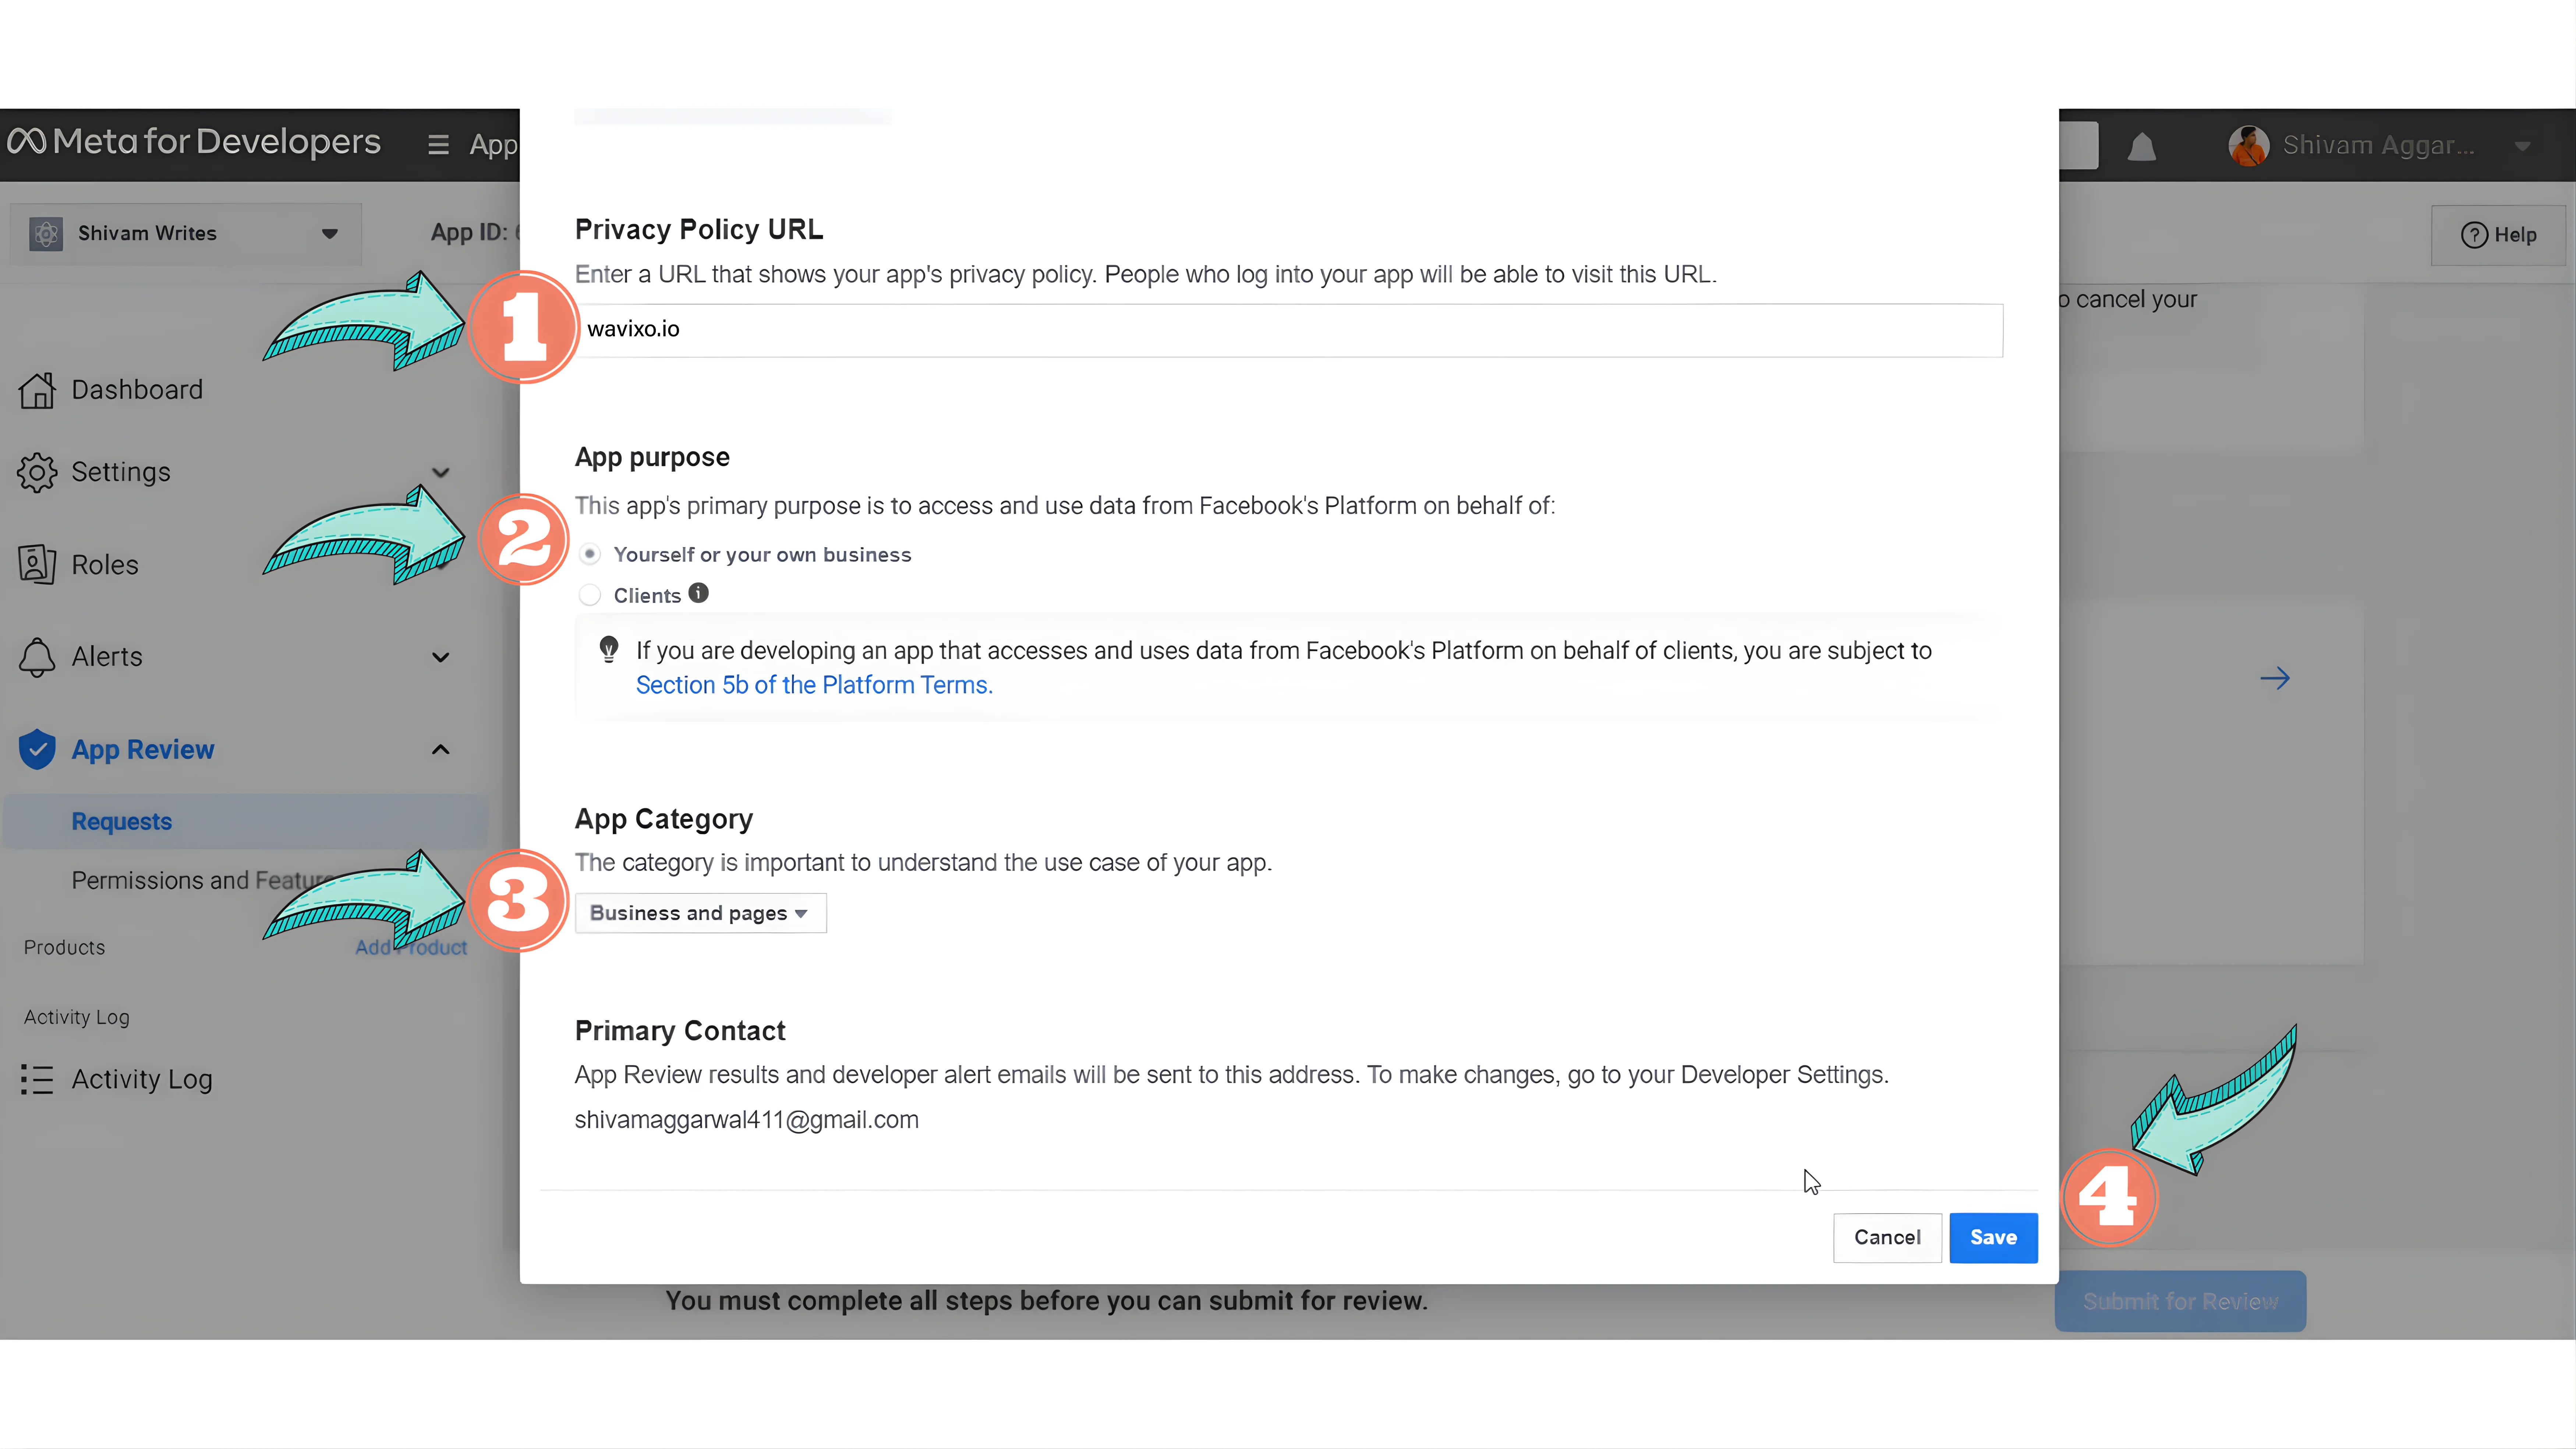
You’ll be asked to complete a few details:
Privacy Policy URL → Add your website URL
App Category → Select Business and Pages
You may skip adding a website icon at this stage
Click Save & Submit.
Step 14: Go to Basic Settings
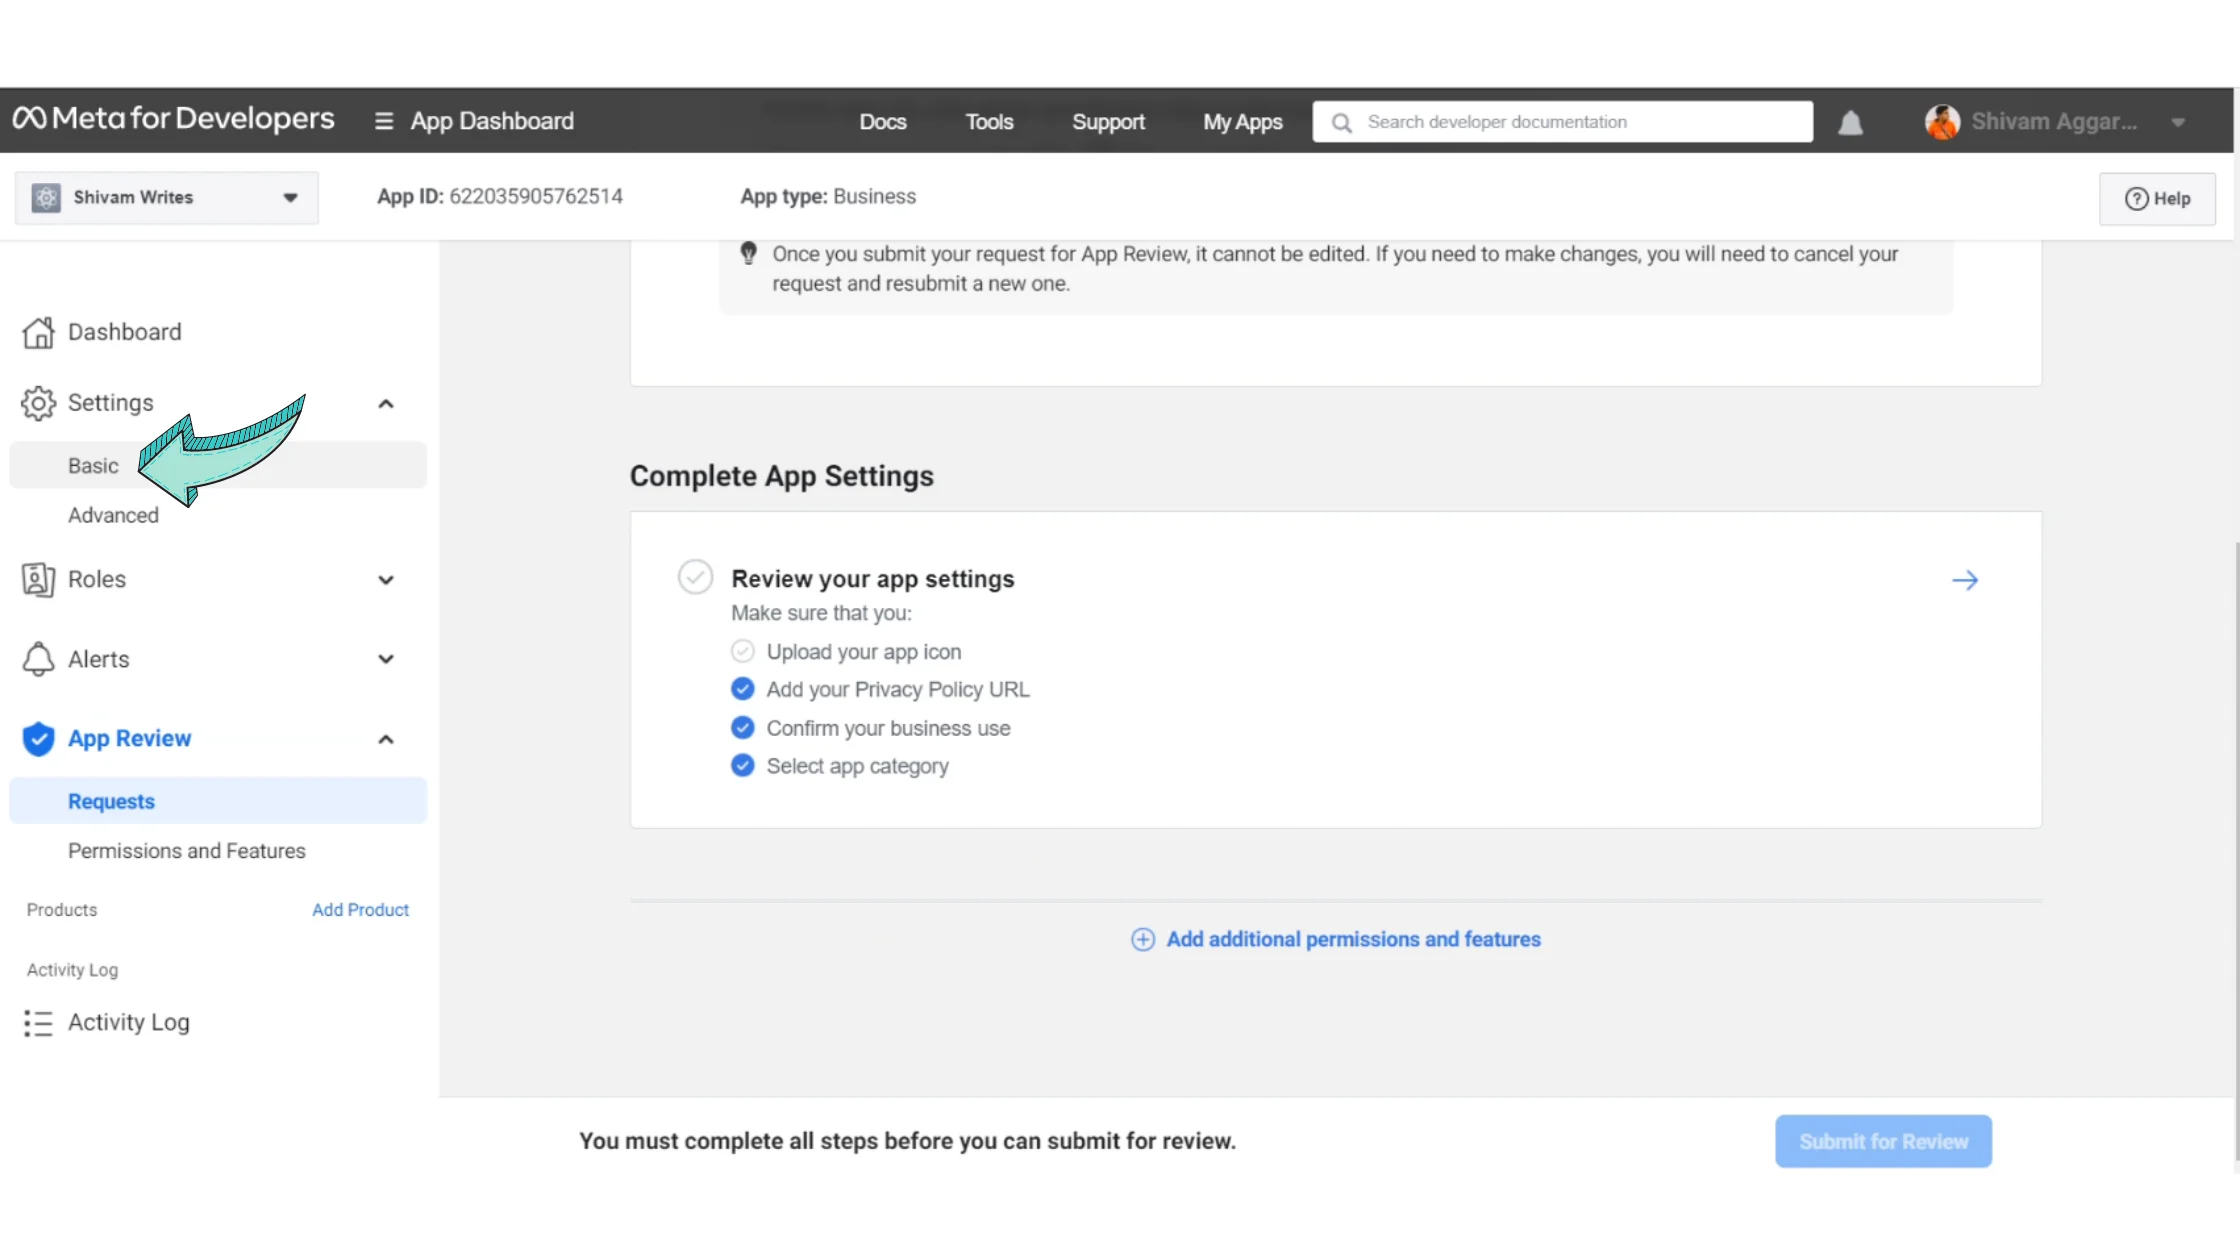
Navigate to Settings → Basic
Step 15: Add App Icon
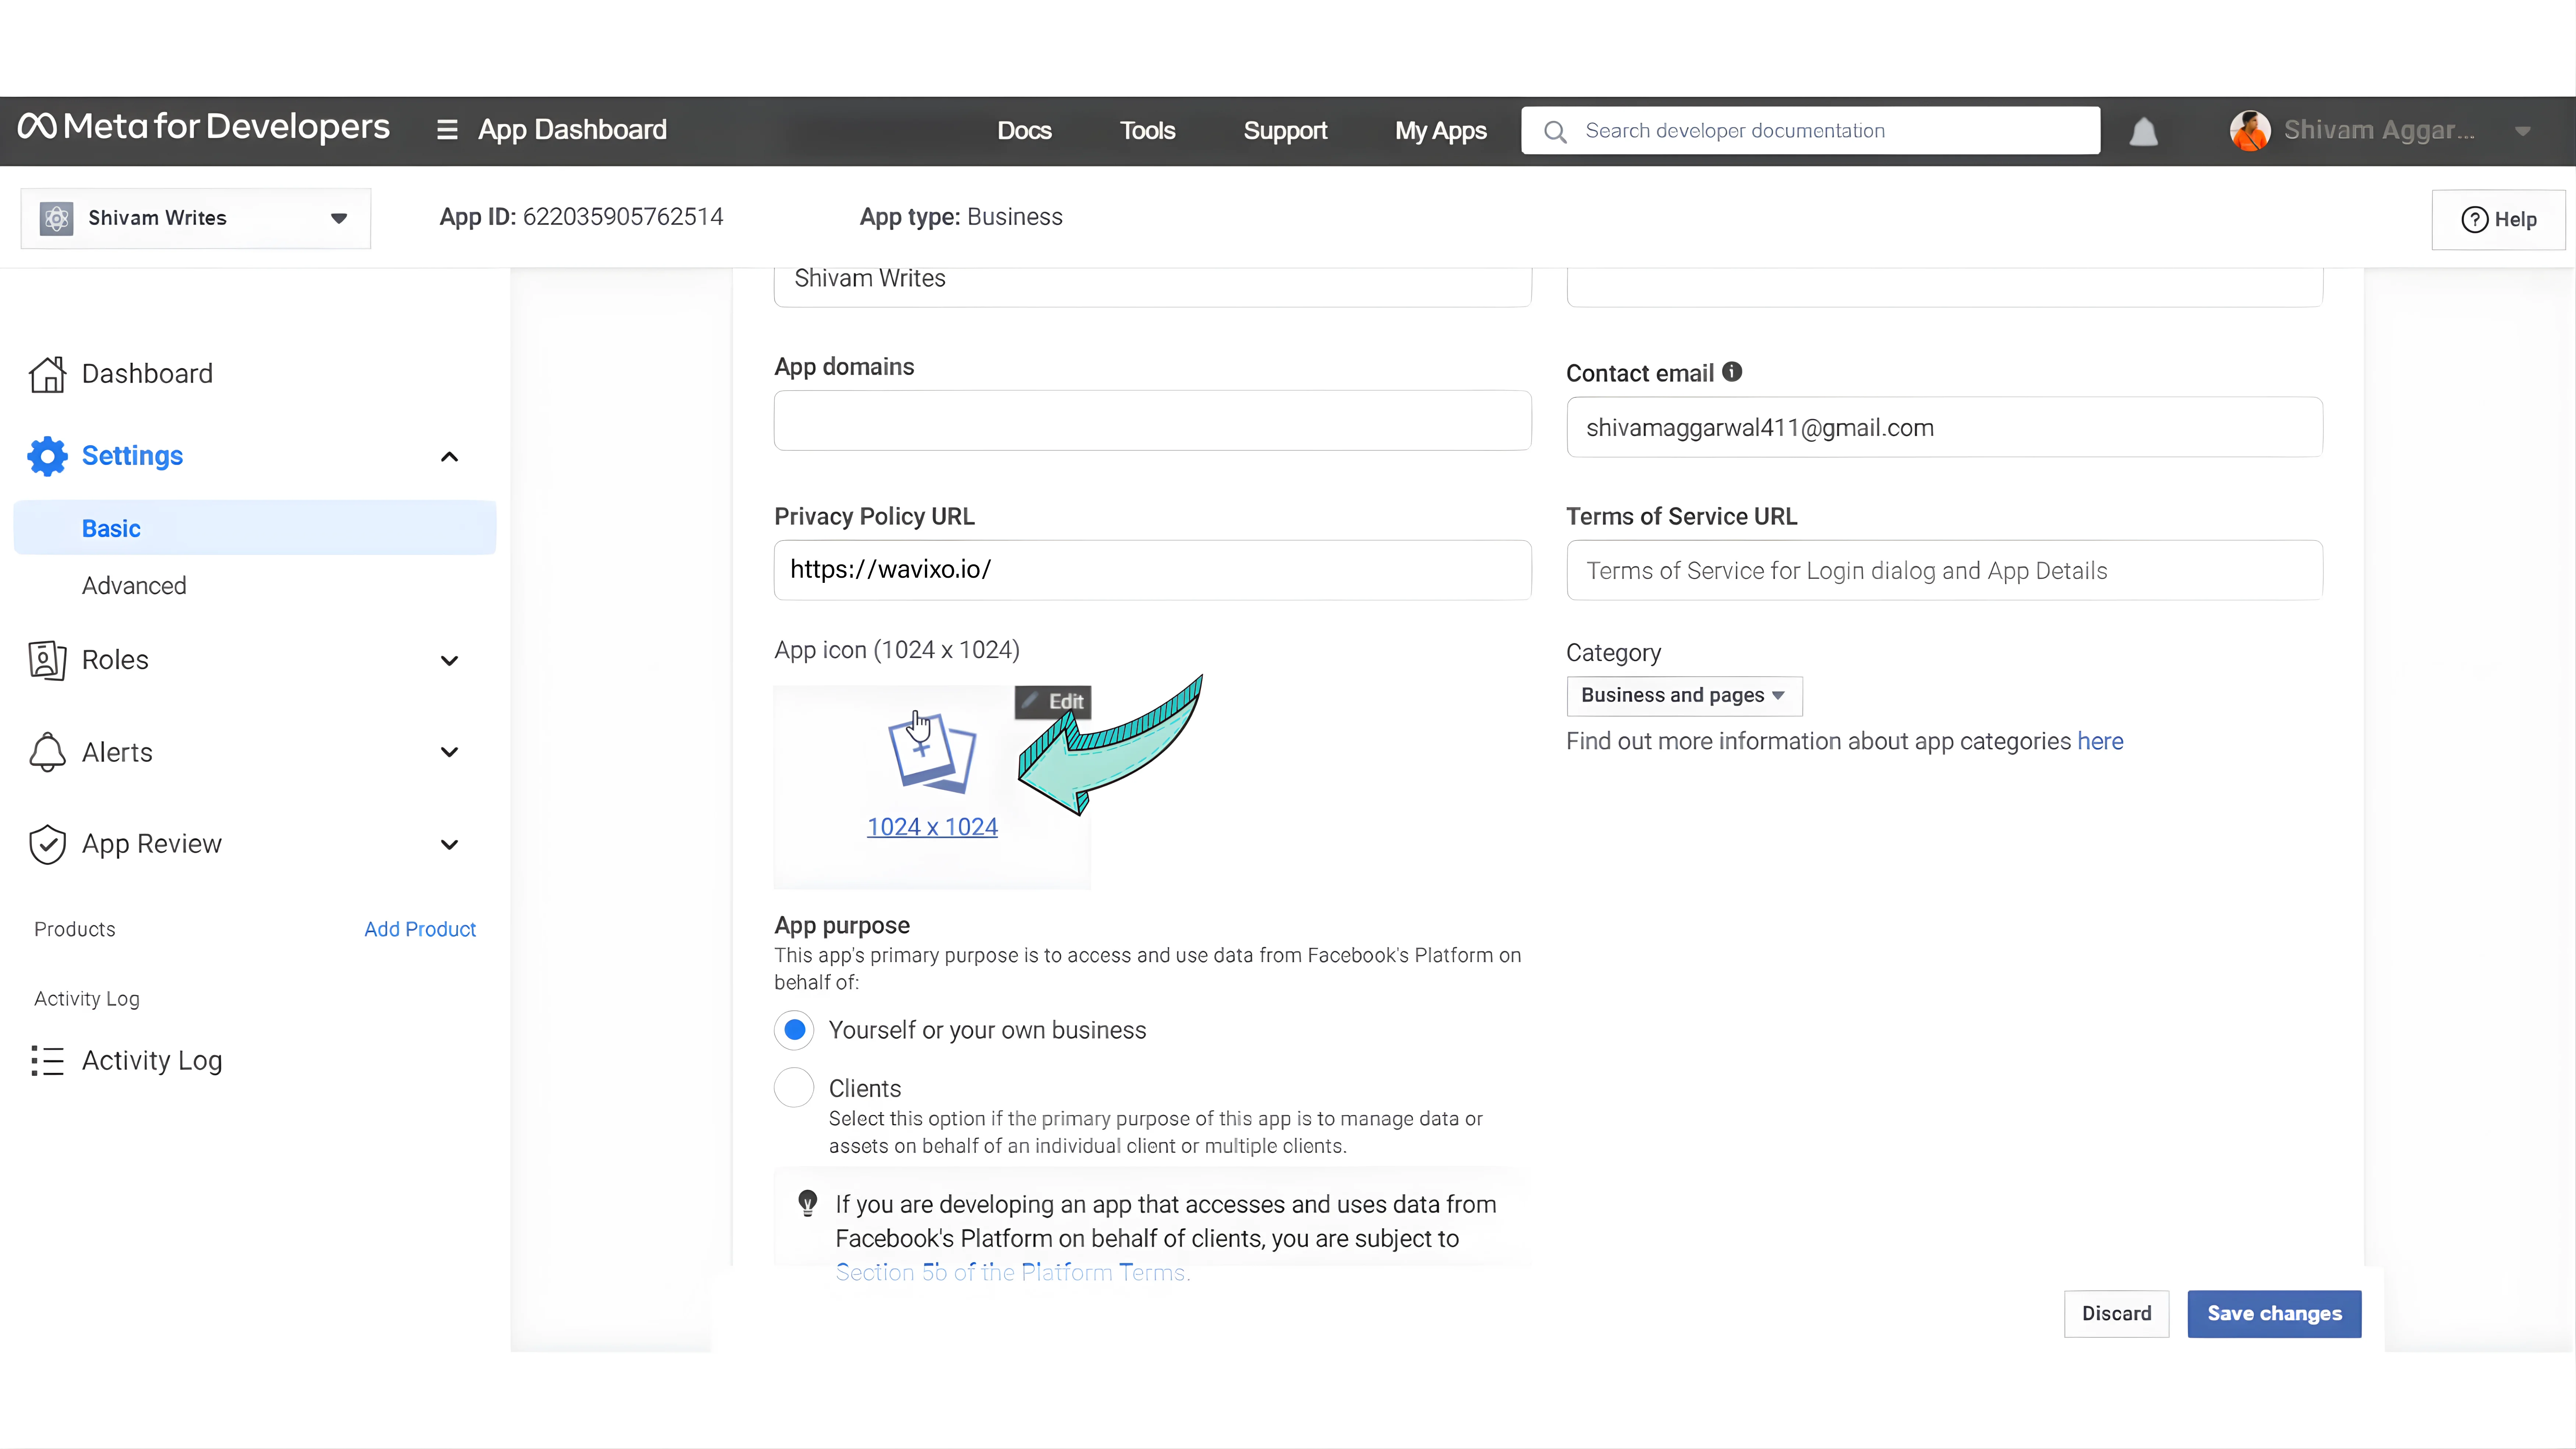
Upload an app icon
Required dimensions: 512×512 to 1024×1024
You can update this later if needed
Step 16: Select Platform
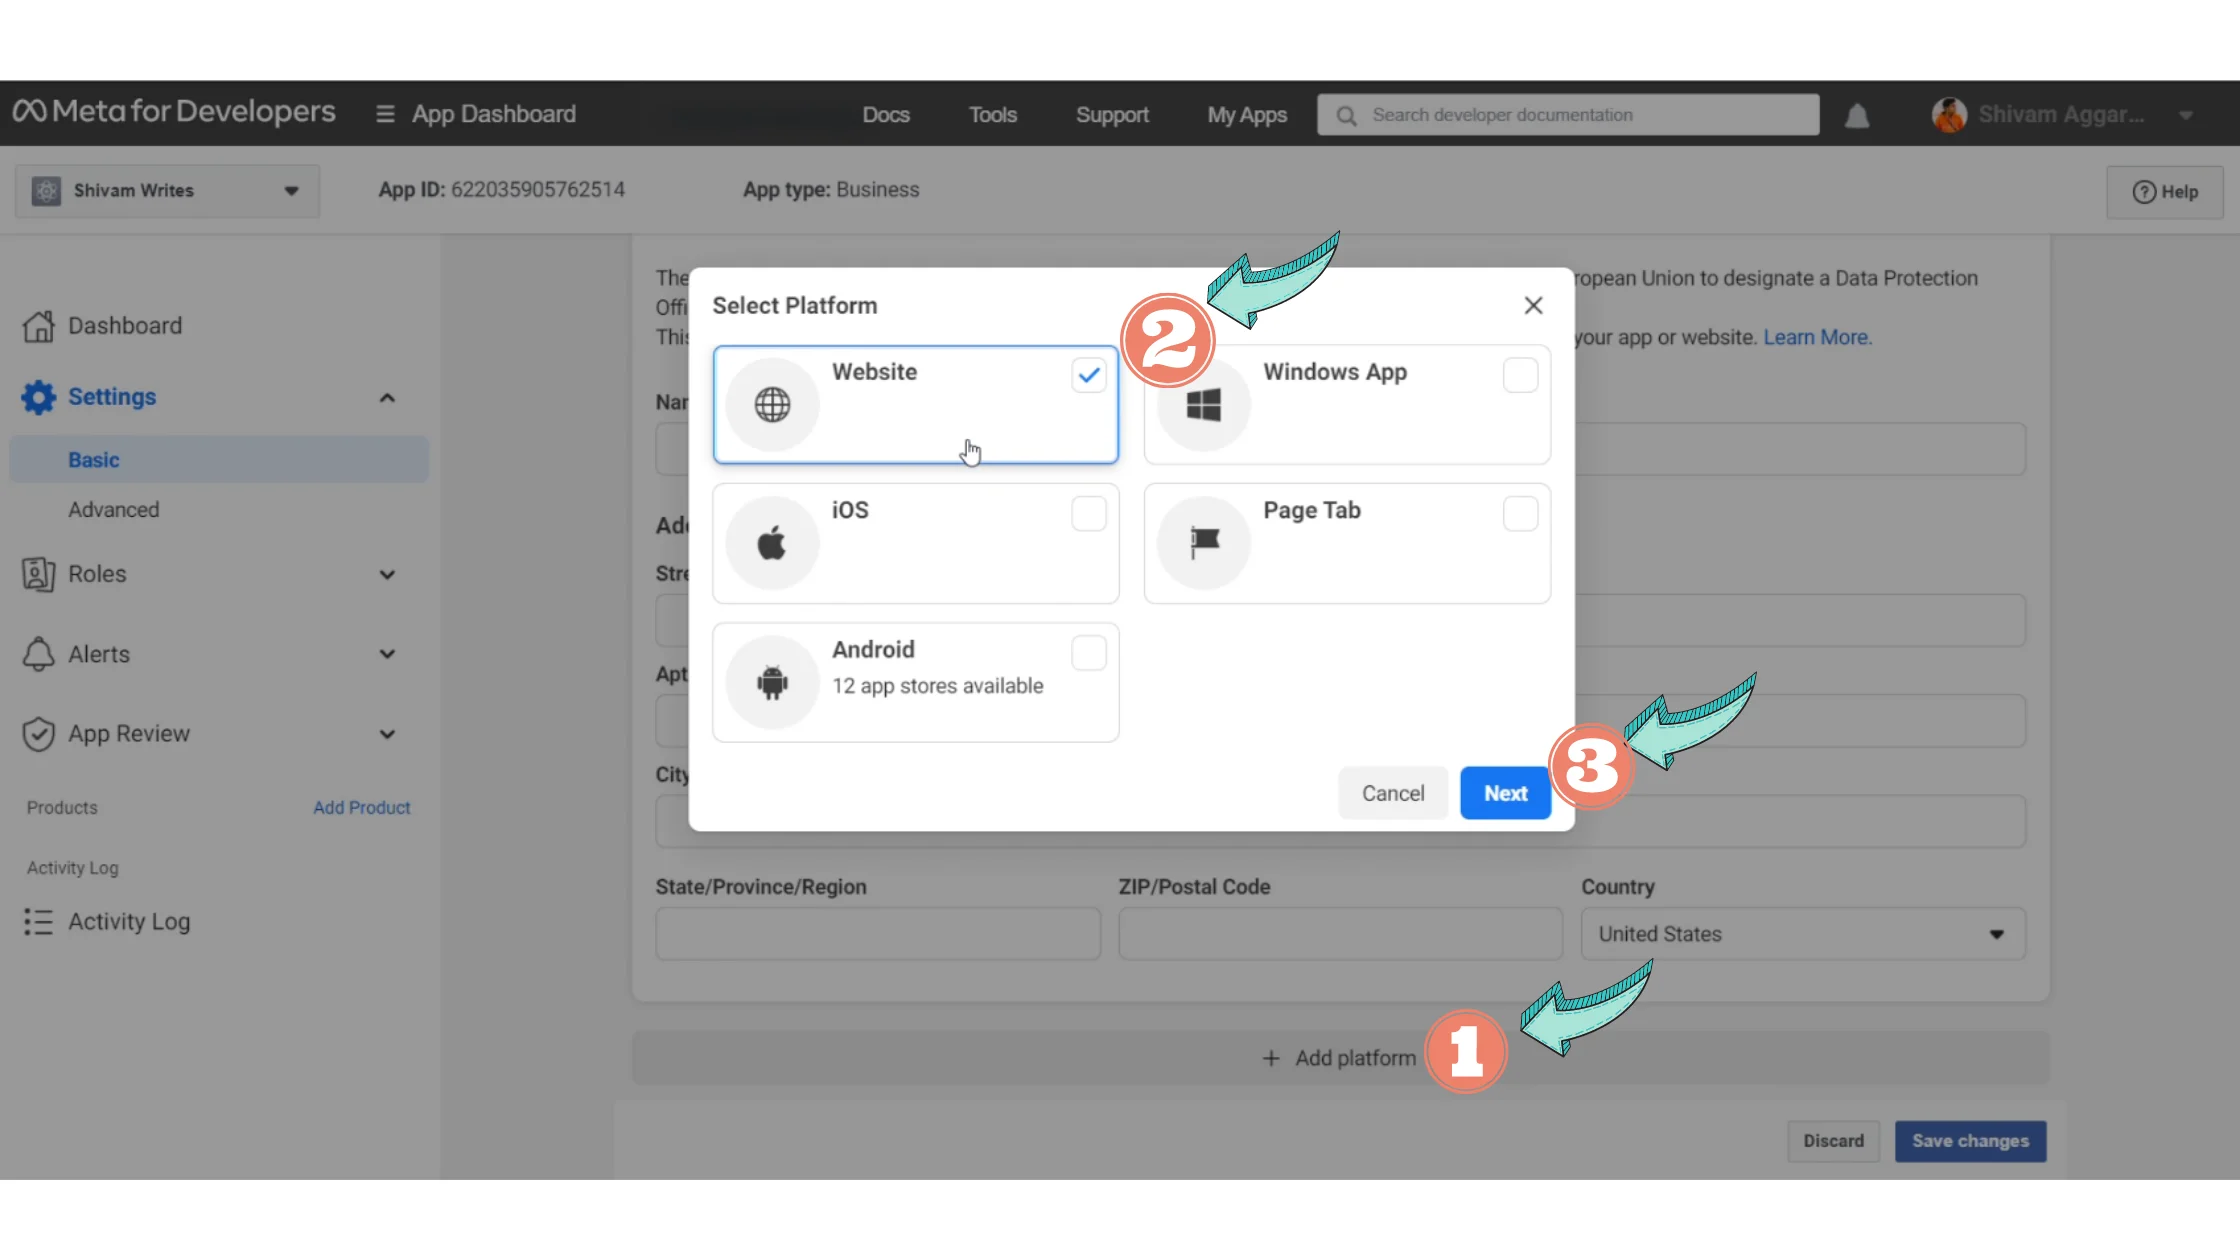
Click Add Platform
Choose Website
Click Next
Step 17: Add Website URL
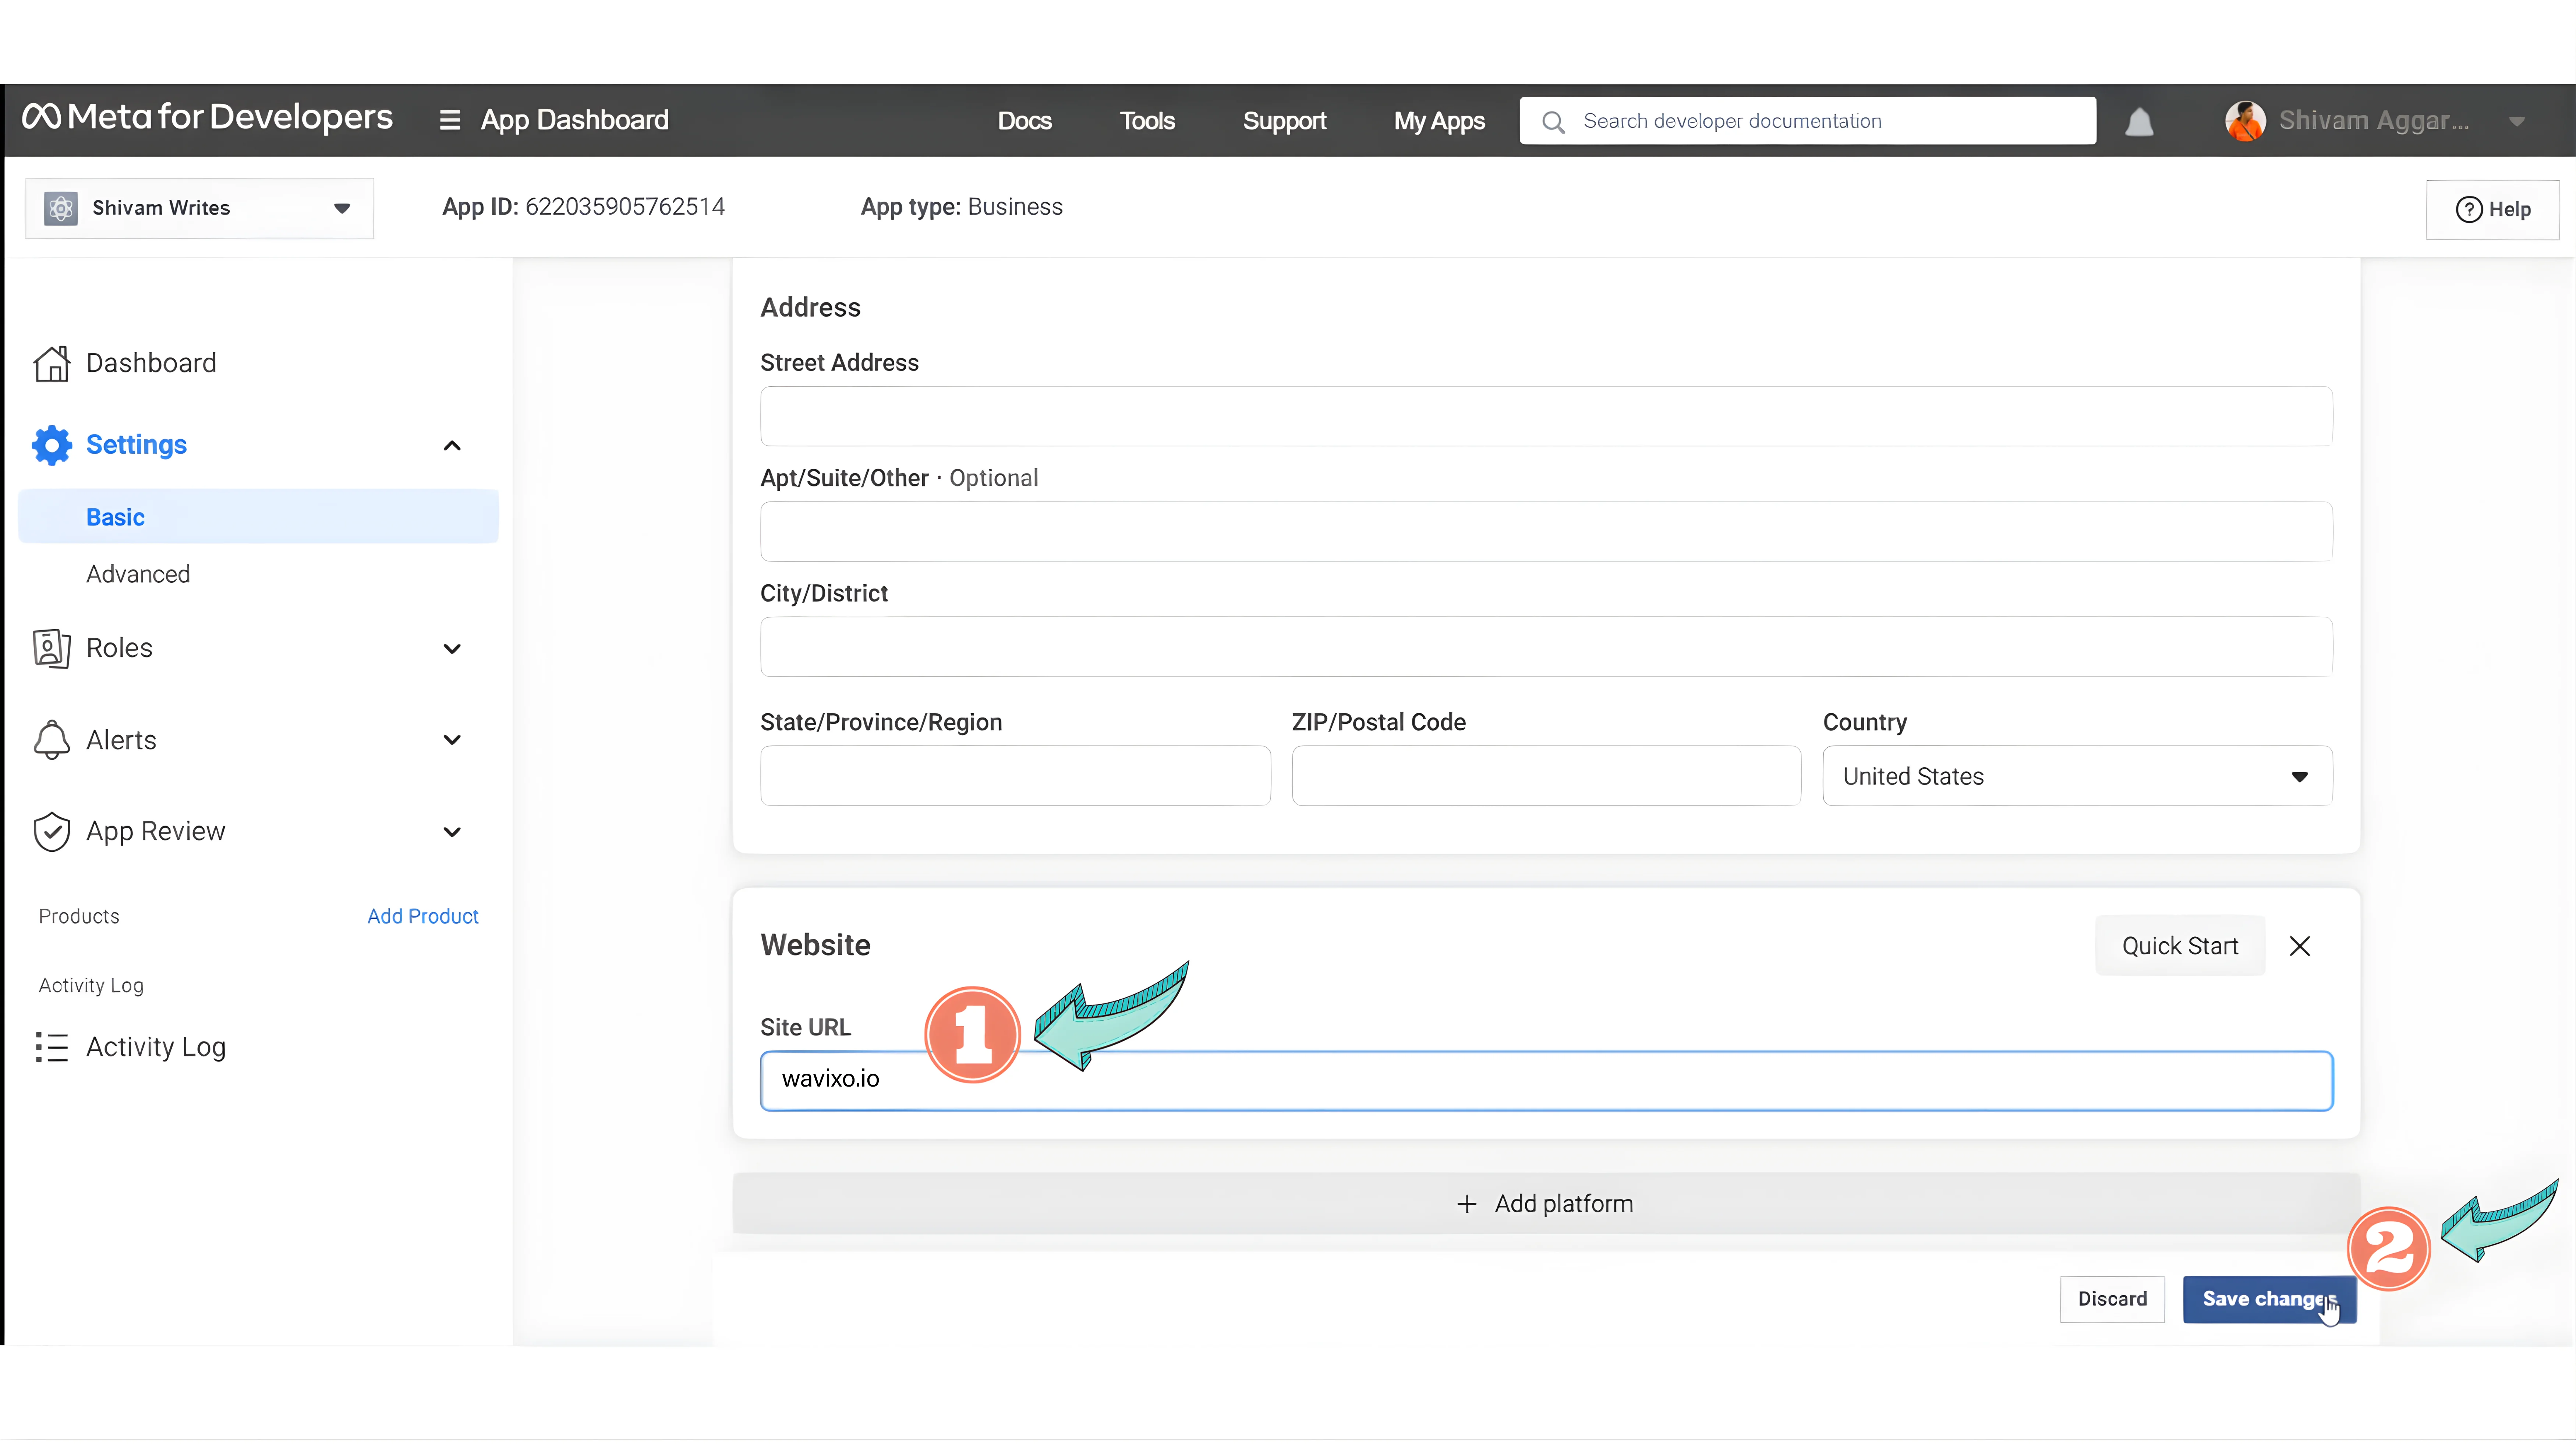
Enter your website URL
Click Save Changes
Step 18: Open App Review Requests
Go to App Review
Click Requests
Step 19: Edit App Review Requests
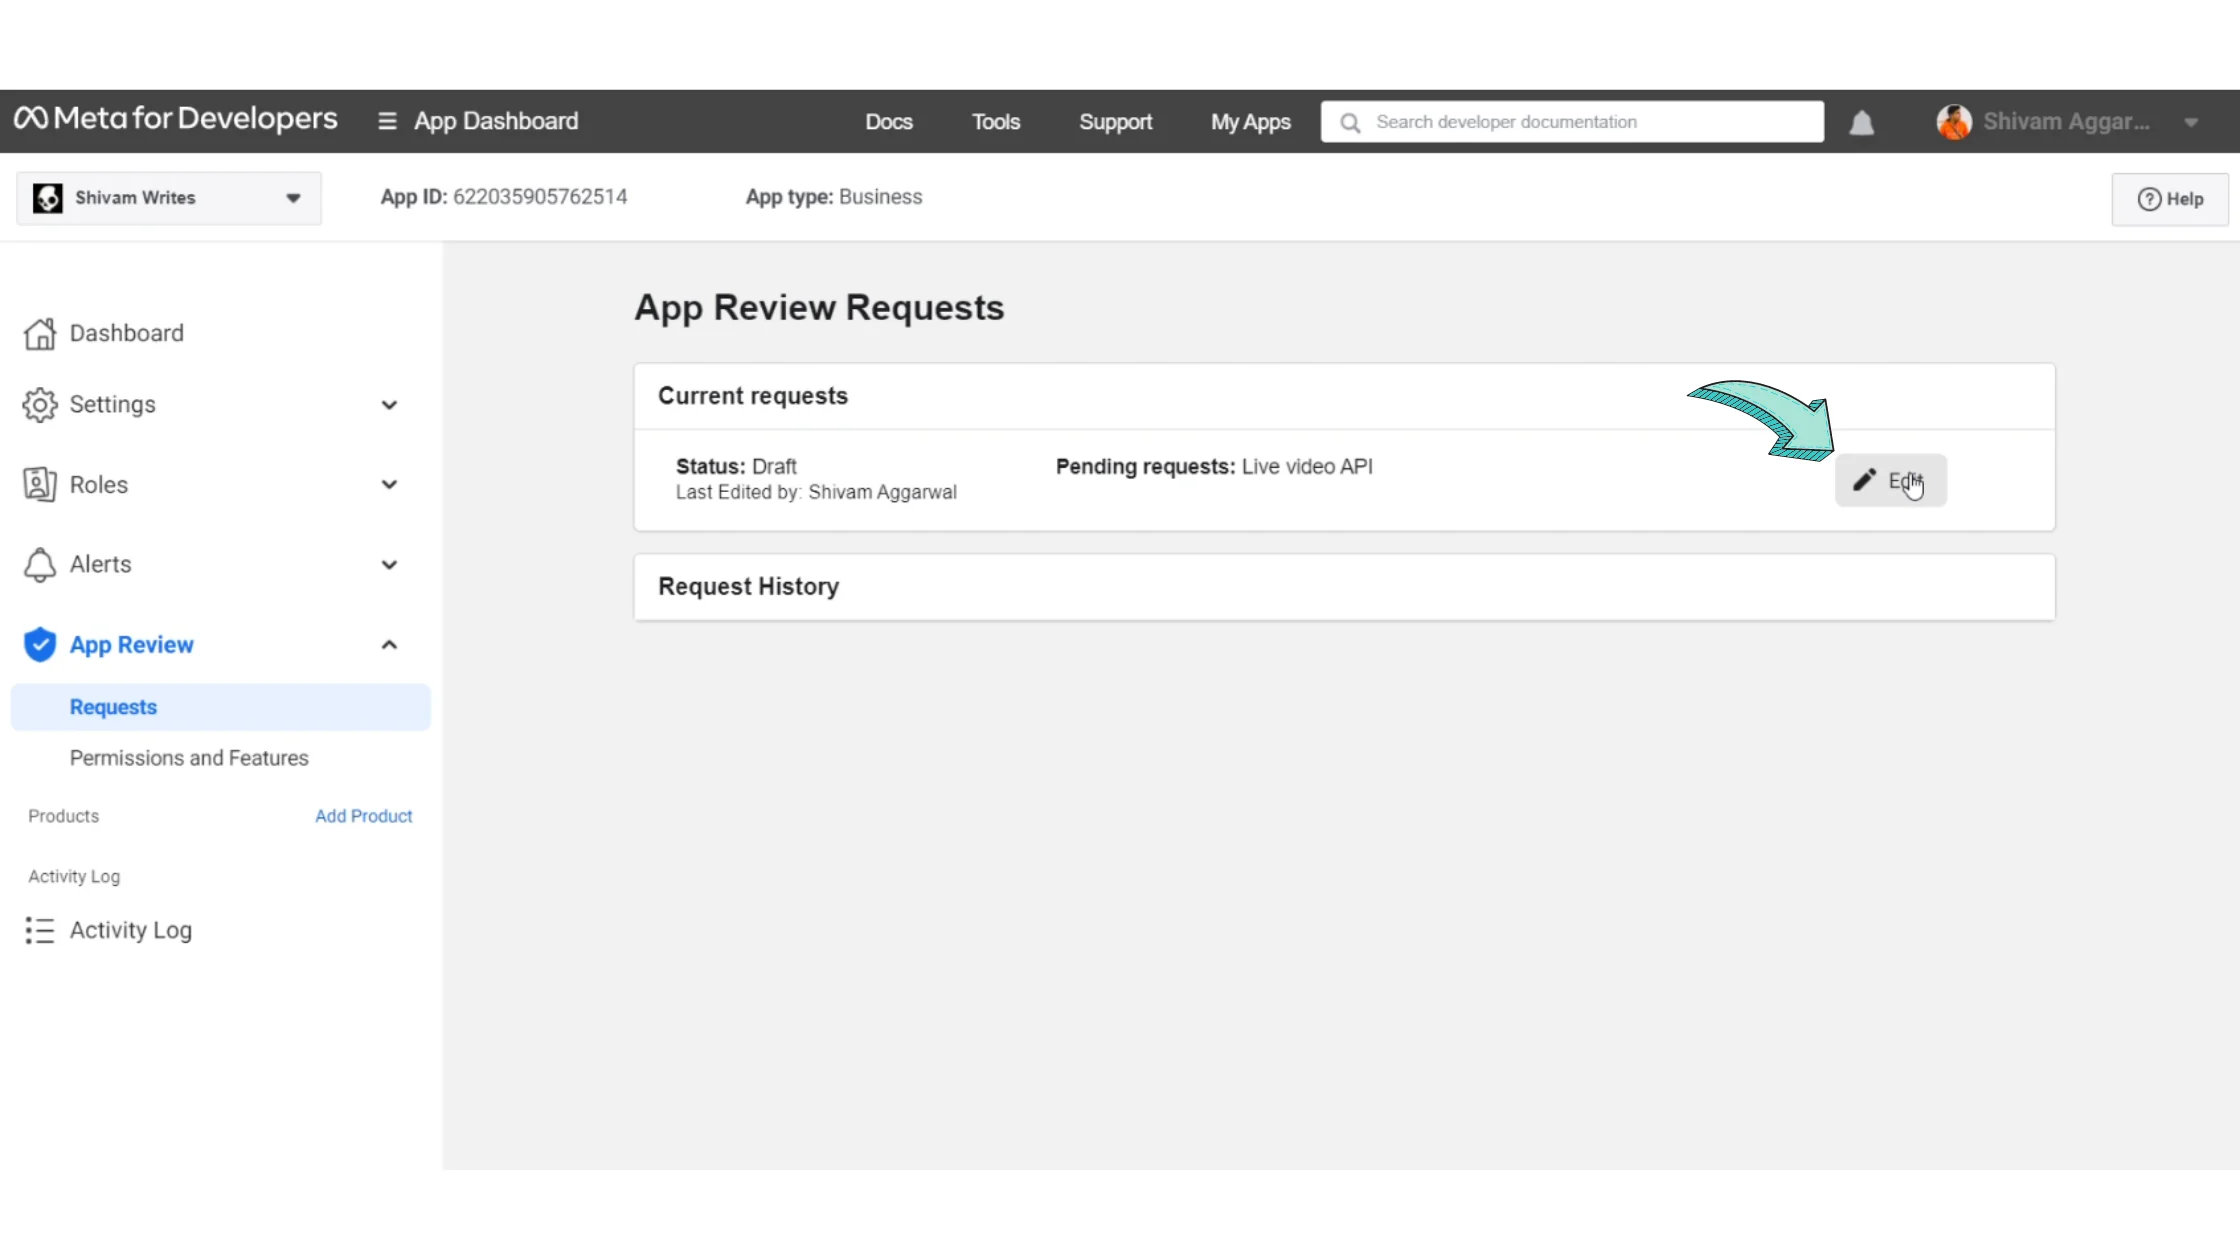
Click Edit on the App Review request
Step 20: Provide Verification Details
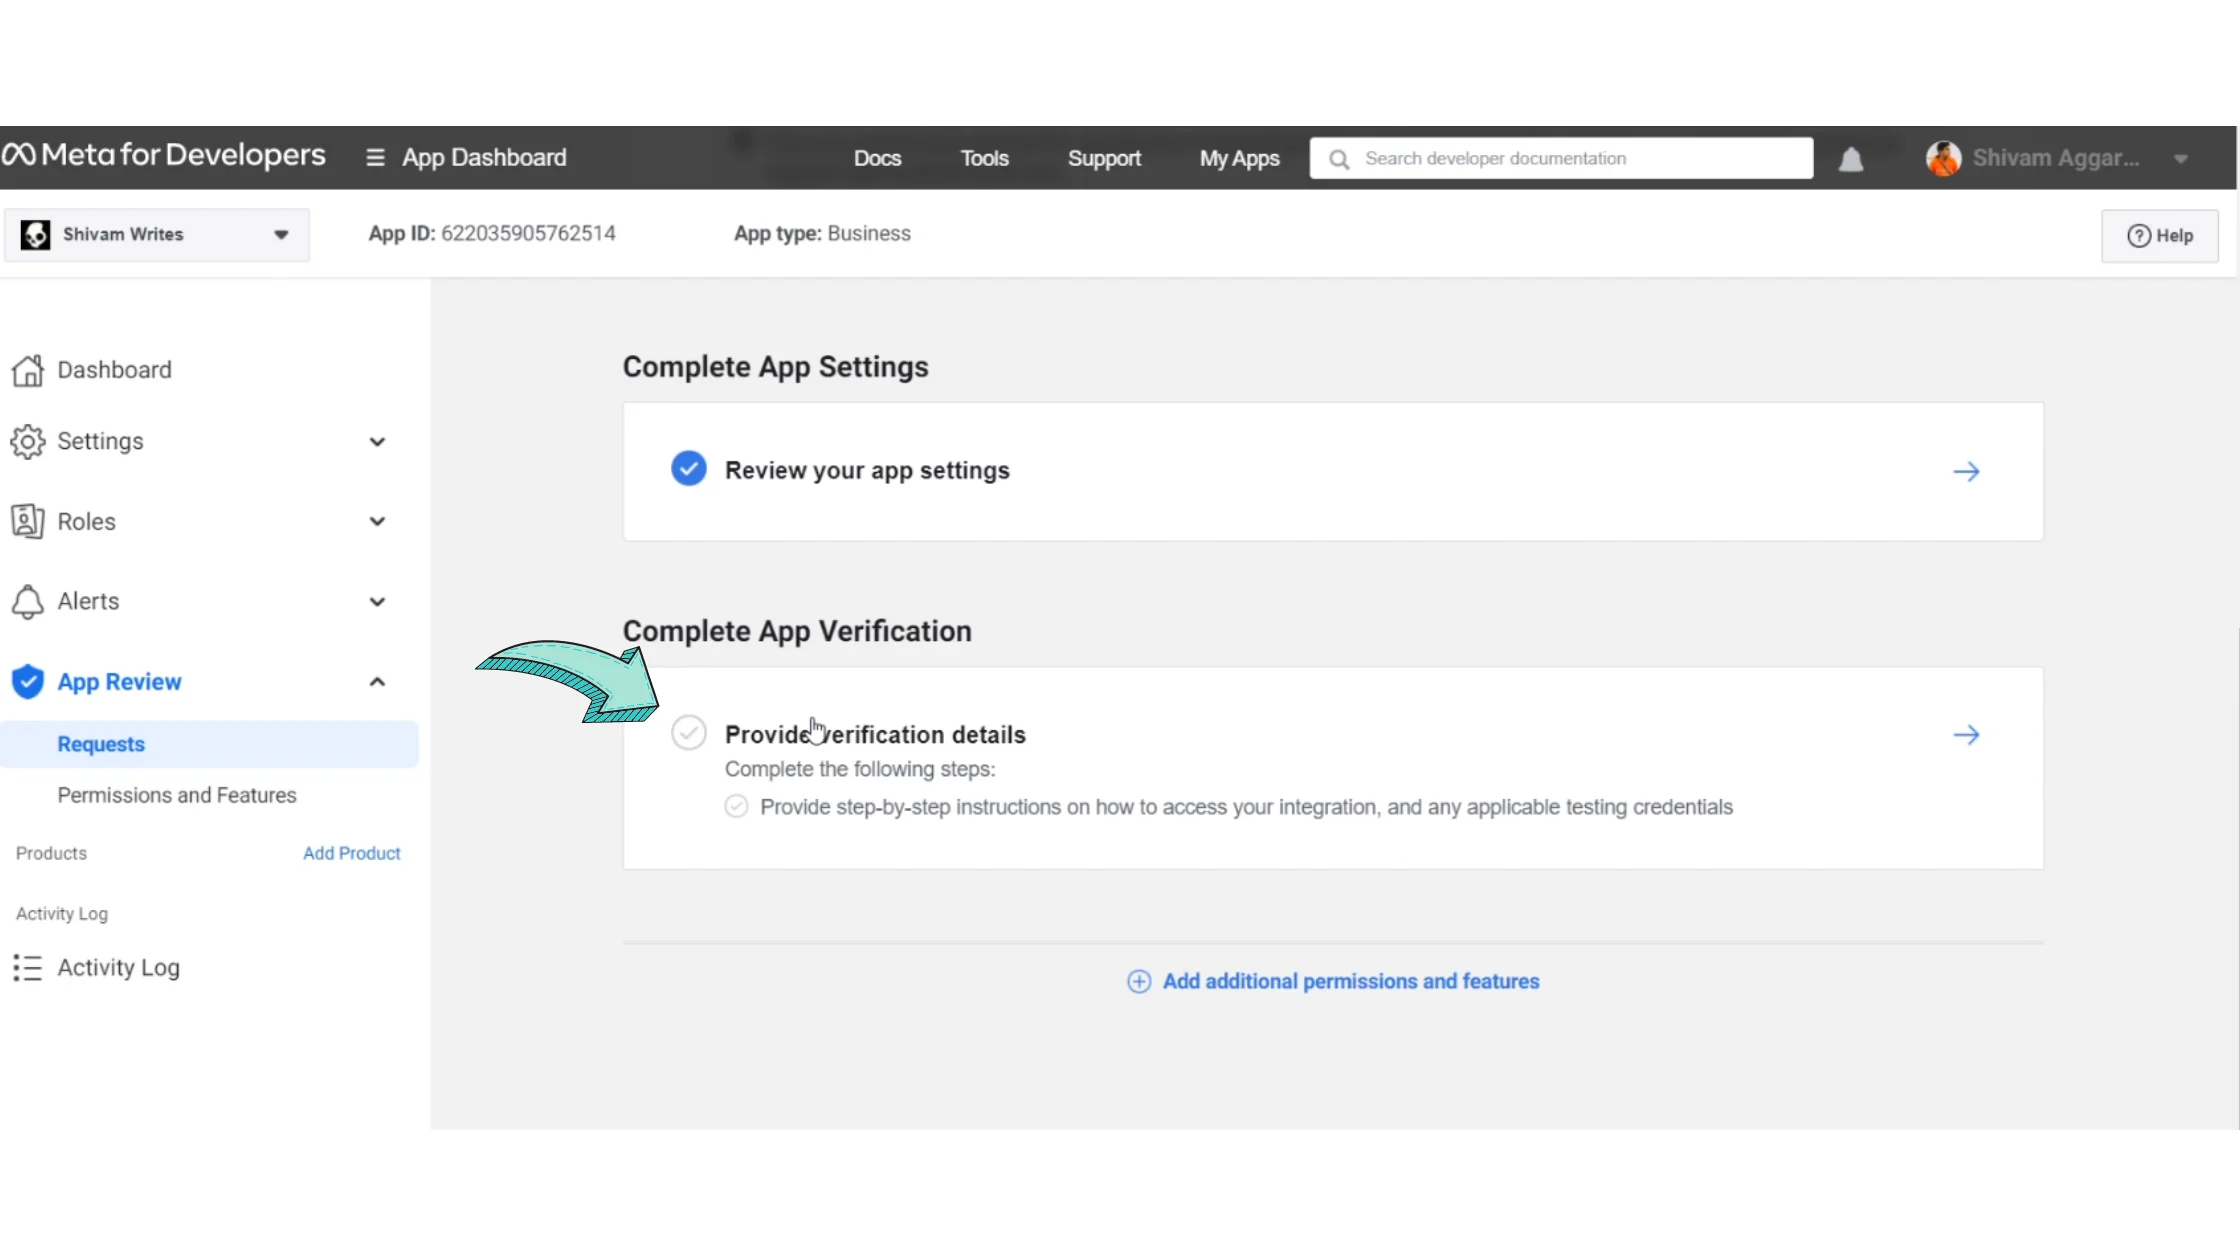
Scroll down
Click Provide Verification Details
Step 21: Add a One-Line Business Description
Add a short description of your business
Make sure it accurately reflects your website and services
Save the text (you’ll need it again later)
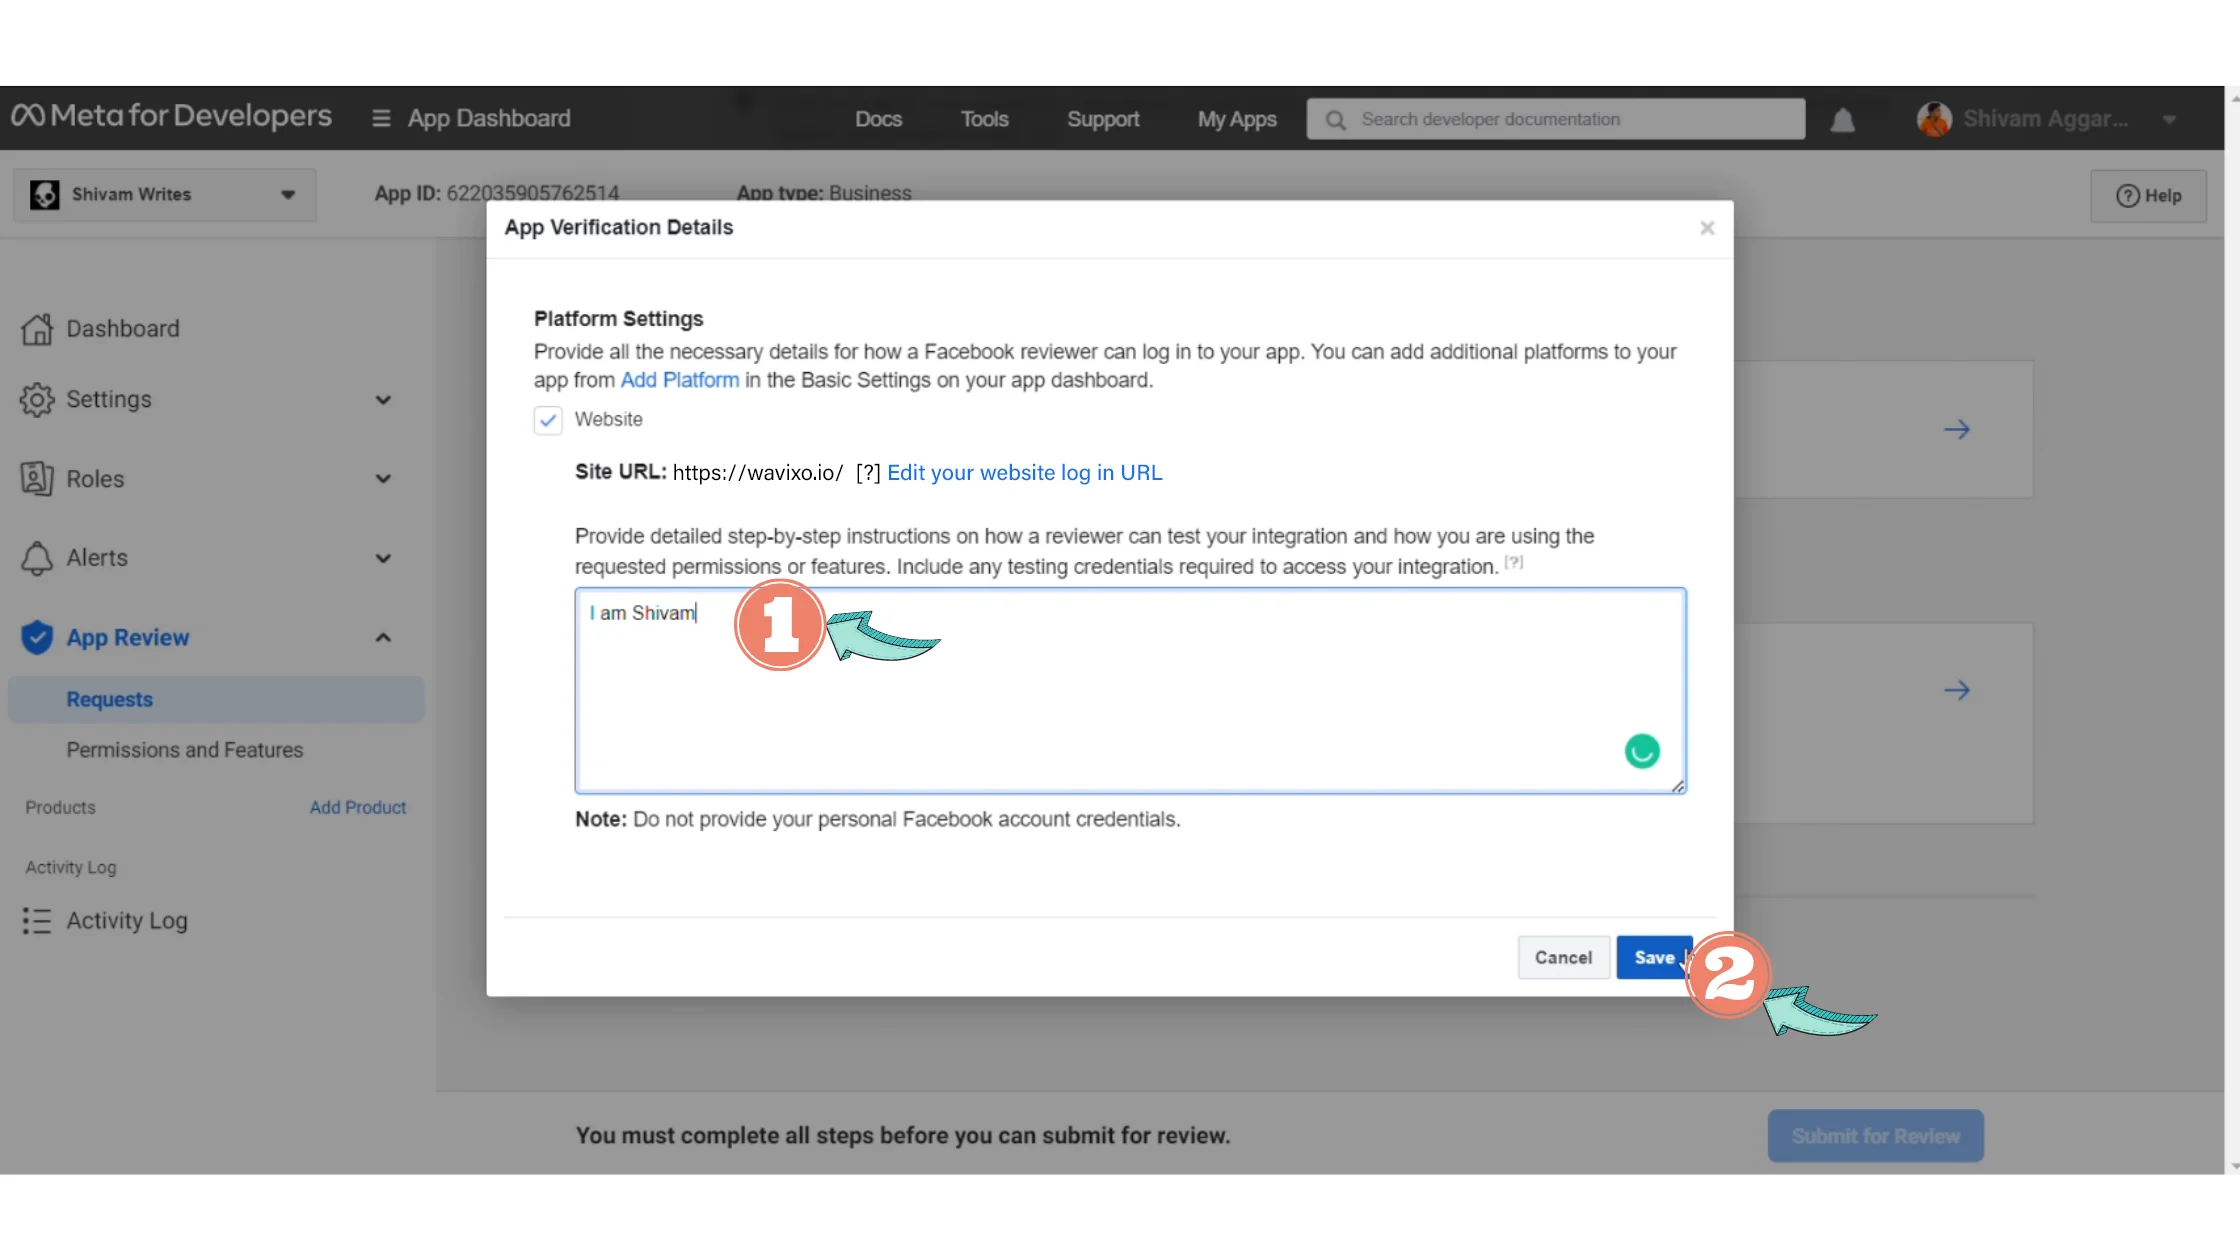
Step 22: Open the Verification Field

Click the field under Provide Verification Details
Step 23: Fill Business Information
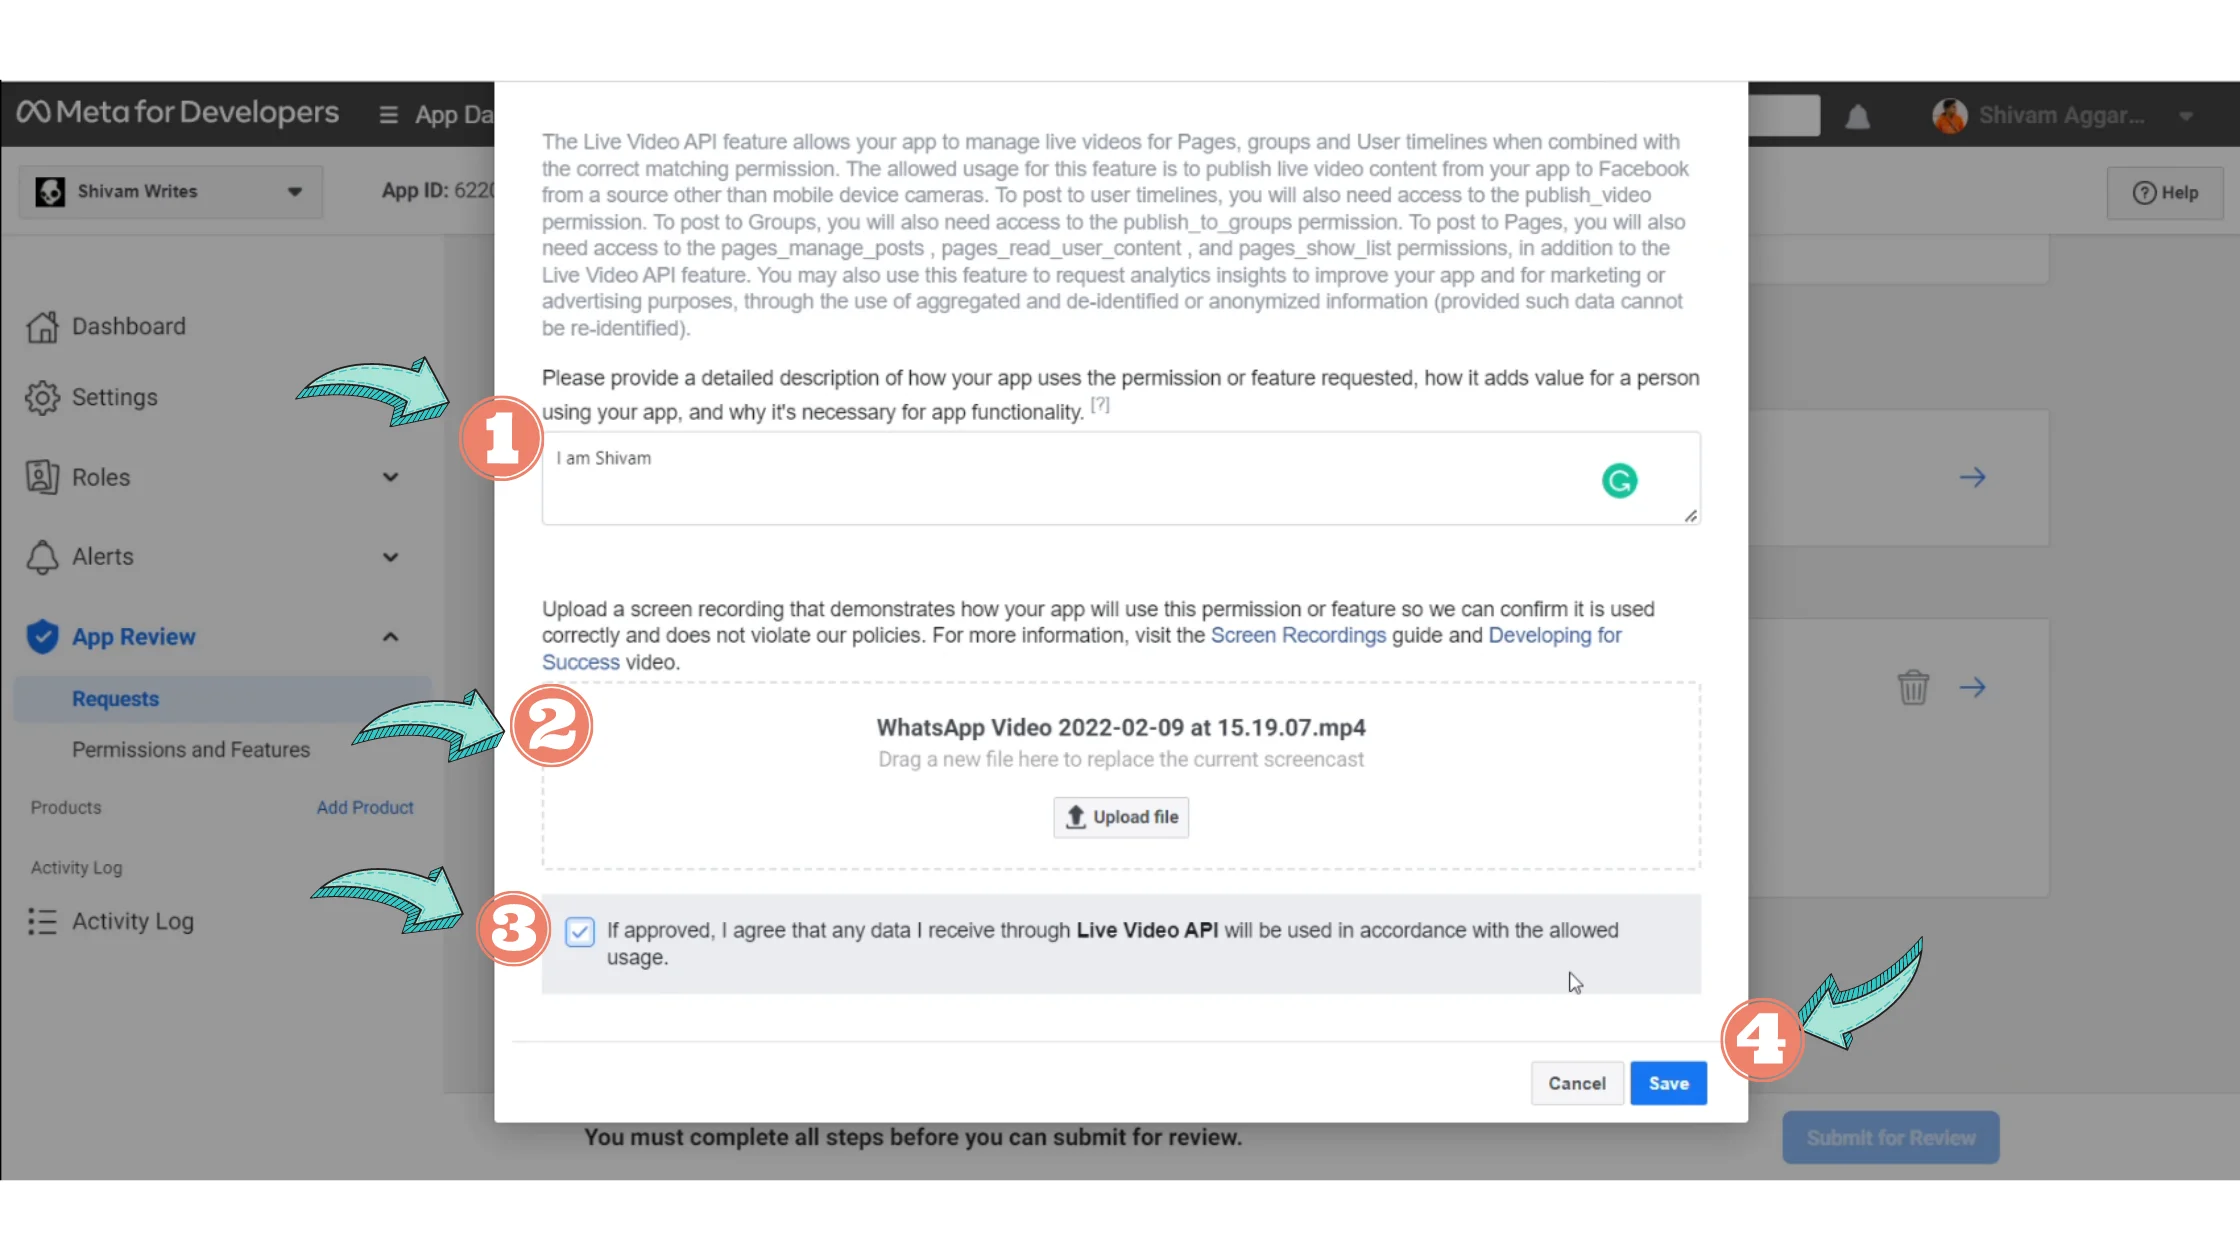
Paste the same one-line business description
Upload a short demo video (around 10 seconds)
The video doesn’t need to be business-related
Keep it short for faster upload
Check the “If Approved” option
Click Save
Step 24: Submit for Review

Click Submit for Review
Enter your Facebook password
Confirm submission
Step 25: Verification Button Enabled 🎉
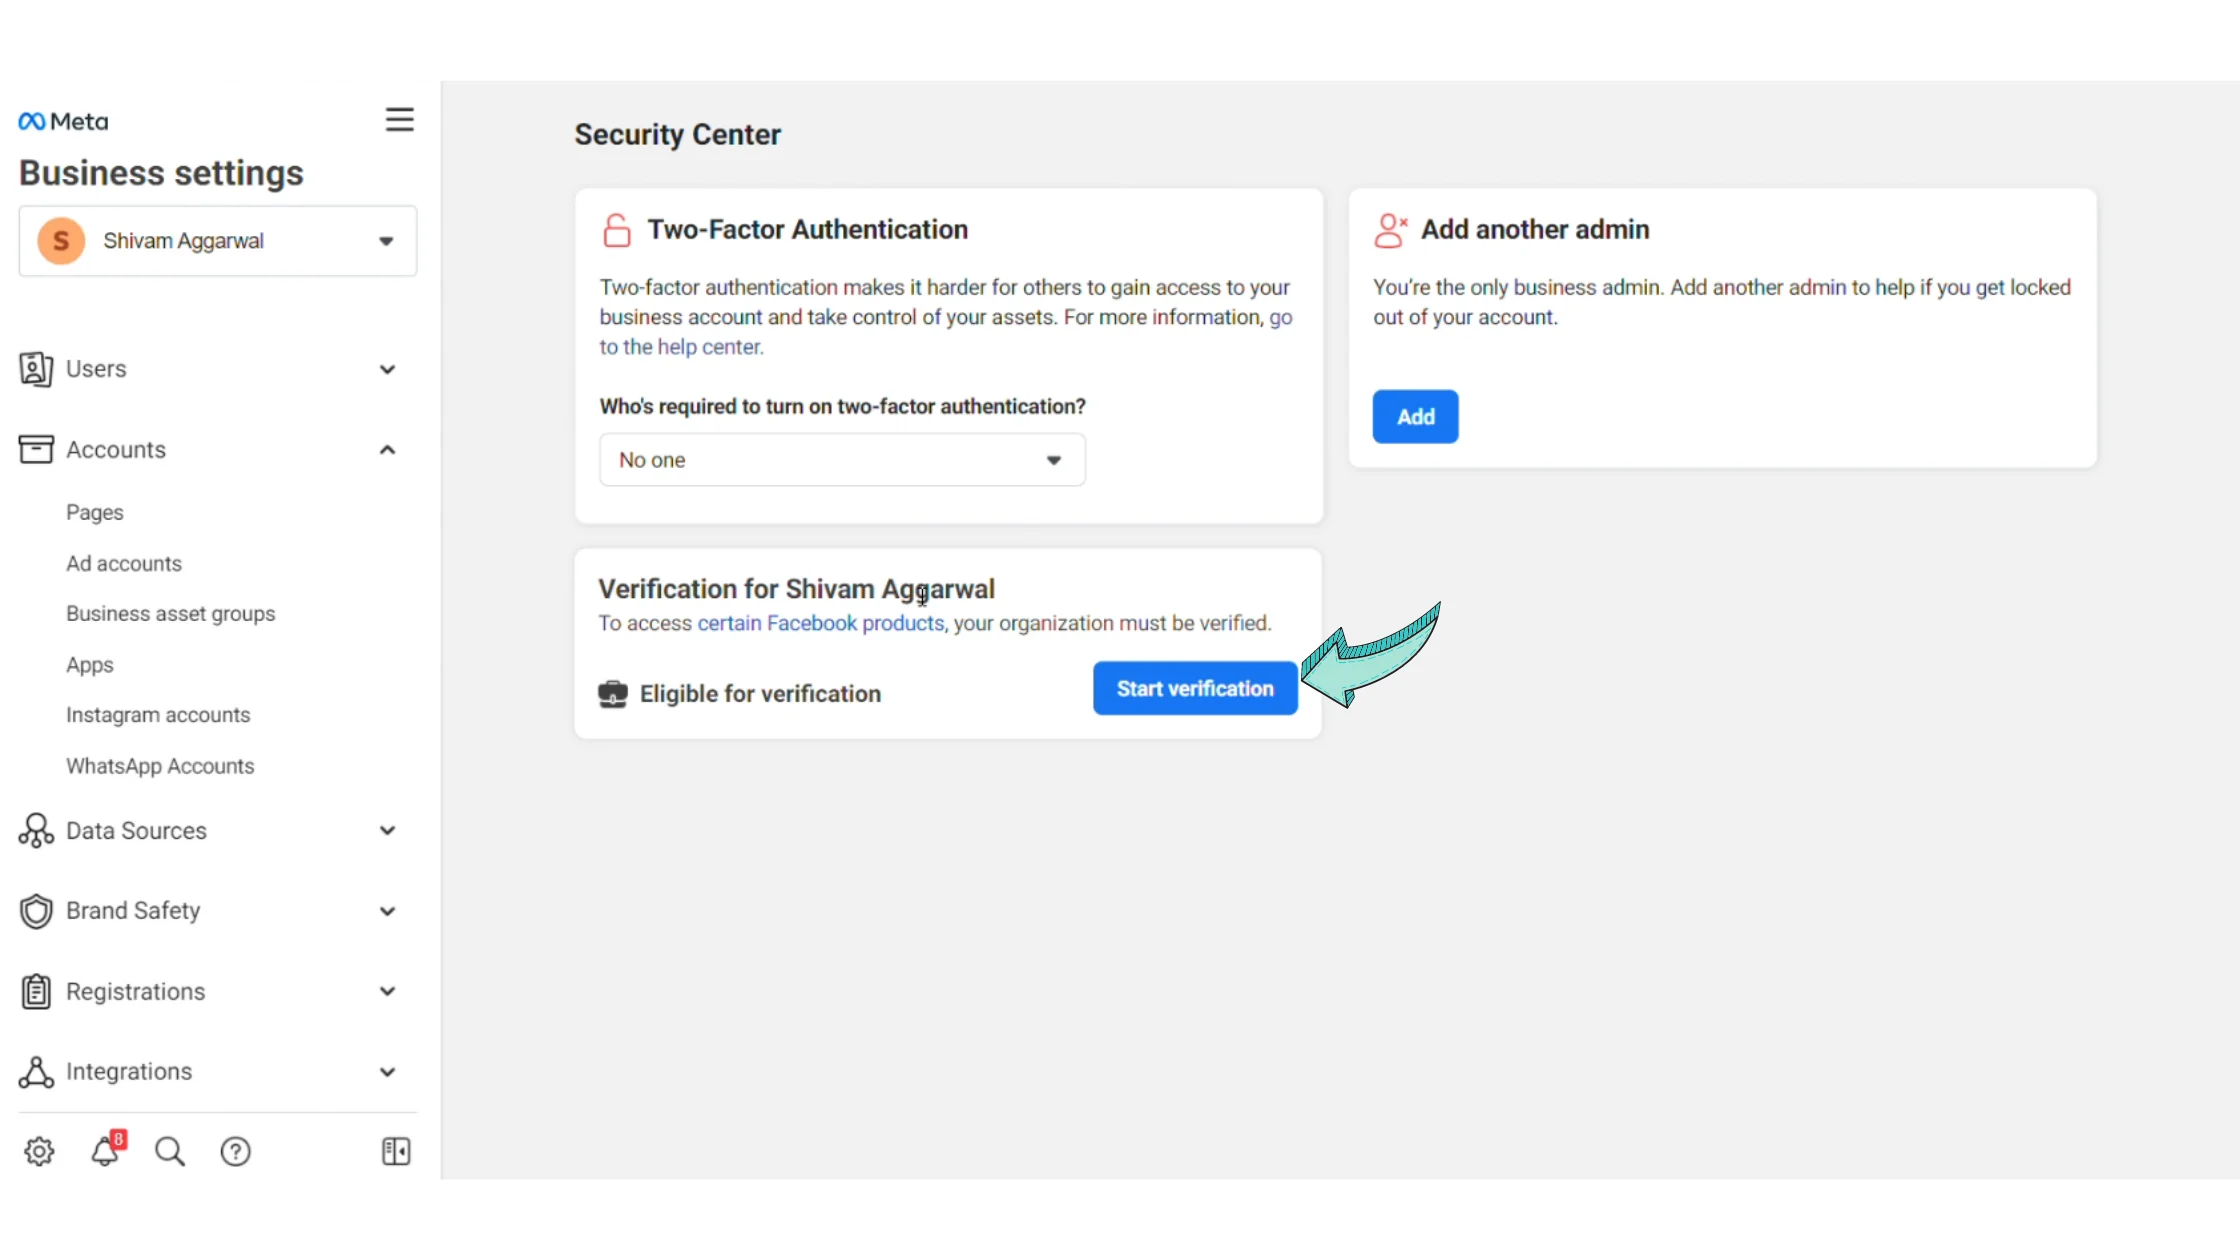
Go back to Facebook Business Security Center.
You’ll now see:
The Start Verification button visible
The button is clickable
Click it to begin your Facebook Business Manager verification process.
FAQs
Is Facebook Business Manager Verification Necessary?
You can technically get WhatsApp Business API without verification, but:
Messaging limits will be very low
Access to features will be restricted
To fully use WhatsApp Business API with Wavixo, verification is strongly recommended.
Verification usually takes 2–7 days.
What Is Facebook Business Manager?
Facebook Business Manager is a tool that lets you manage:
Facebook Pages
Ad accounts
Instagram accounts
Business assets and catalogues
All from a single dashboard.
Related Articles
WhatsApp Broadcast Rules
WhatsApp Business App vs WhatsApp Business API
WhatsApp Co-existence Guide
How to Apply for WhatsApp Business API


Make your Productivity
more efficient. From this time.
Get the Demo and unplash your productivity. Feel Free to get the
latest Technology. Have a good time