Meta Tech Provider
Help Center - Articles Detail
How to Migrate to Wavixo from Your
Existing WhatsApp API Provider
A complete step-by-step guide to switching your WhatsApp Business API provider to Wavixo.
If you're planning to move from your current WhatsApp Business API provider to Wavixo,
you're in the right place!
Before starting the migration,
let’s understand what gets transferred and what does not during the process.
What Will Be Retained When You Migrate to Wavixo?
When you migrate from another provider to Wavixo, the following items remain intact:
Your registered WhatsApp phone number
Your display name
Current Quality Rating
WhatsApp Green Tick (if approved)
Messaging limits
All previously approved high-quality WhatsApp templates
Approved templates can be used instantly after migration — no re-approval is needed.
📌 Note: The quality rating of templates does not migrate. Meta duplicates templates, which makes them appear as new templates with no rating.
What Does Not Transfer During Migration?
These items aren’t included in the migration and will not move to Wavixo:
Rejected, low-quality, or pending templates
Chat history
Message analytics/insights
Authentication tokens
If your chat history is crucial, be sure to export or save your data before switching providers.
How Long Does Migration Take?
The migration process typically completes within minutes.
Your old provider continues sending & receiving messages until migration finishes.
Once completed, your Wavixo Business API starts sending messages immediately.
There is zero downtime, ensuring seamless communication.
Migration Requirements
Before migrating to Wavixo, ensure:
Your WhatsApp Business API and Display Name are already verified
Two-Factor Authentication (2FA) is disabled
Your WhatsApp API number can receive OTP via SMS or Call
The Migration Has Two Parts
1. Disable 2-Factor Authentication on your current WhatsApp API provider
2. Migrate your WhatsApp API account to Wavixo
Both are explained below in detail.
PART 1: How to Disable 2-Factor Authentication (2FA)
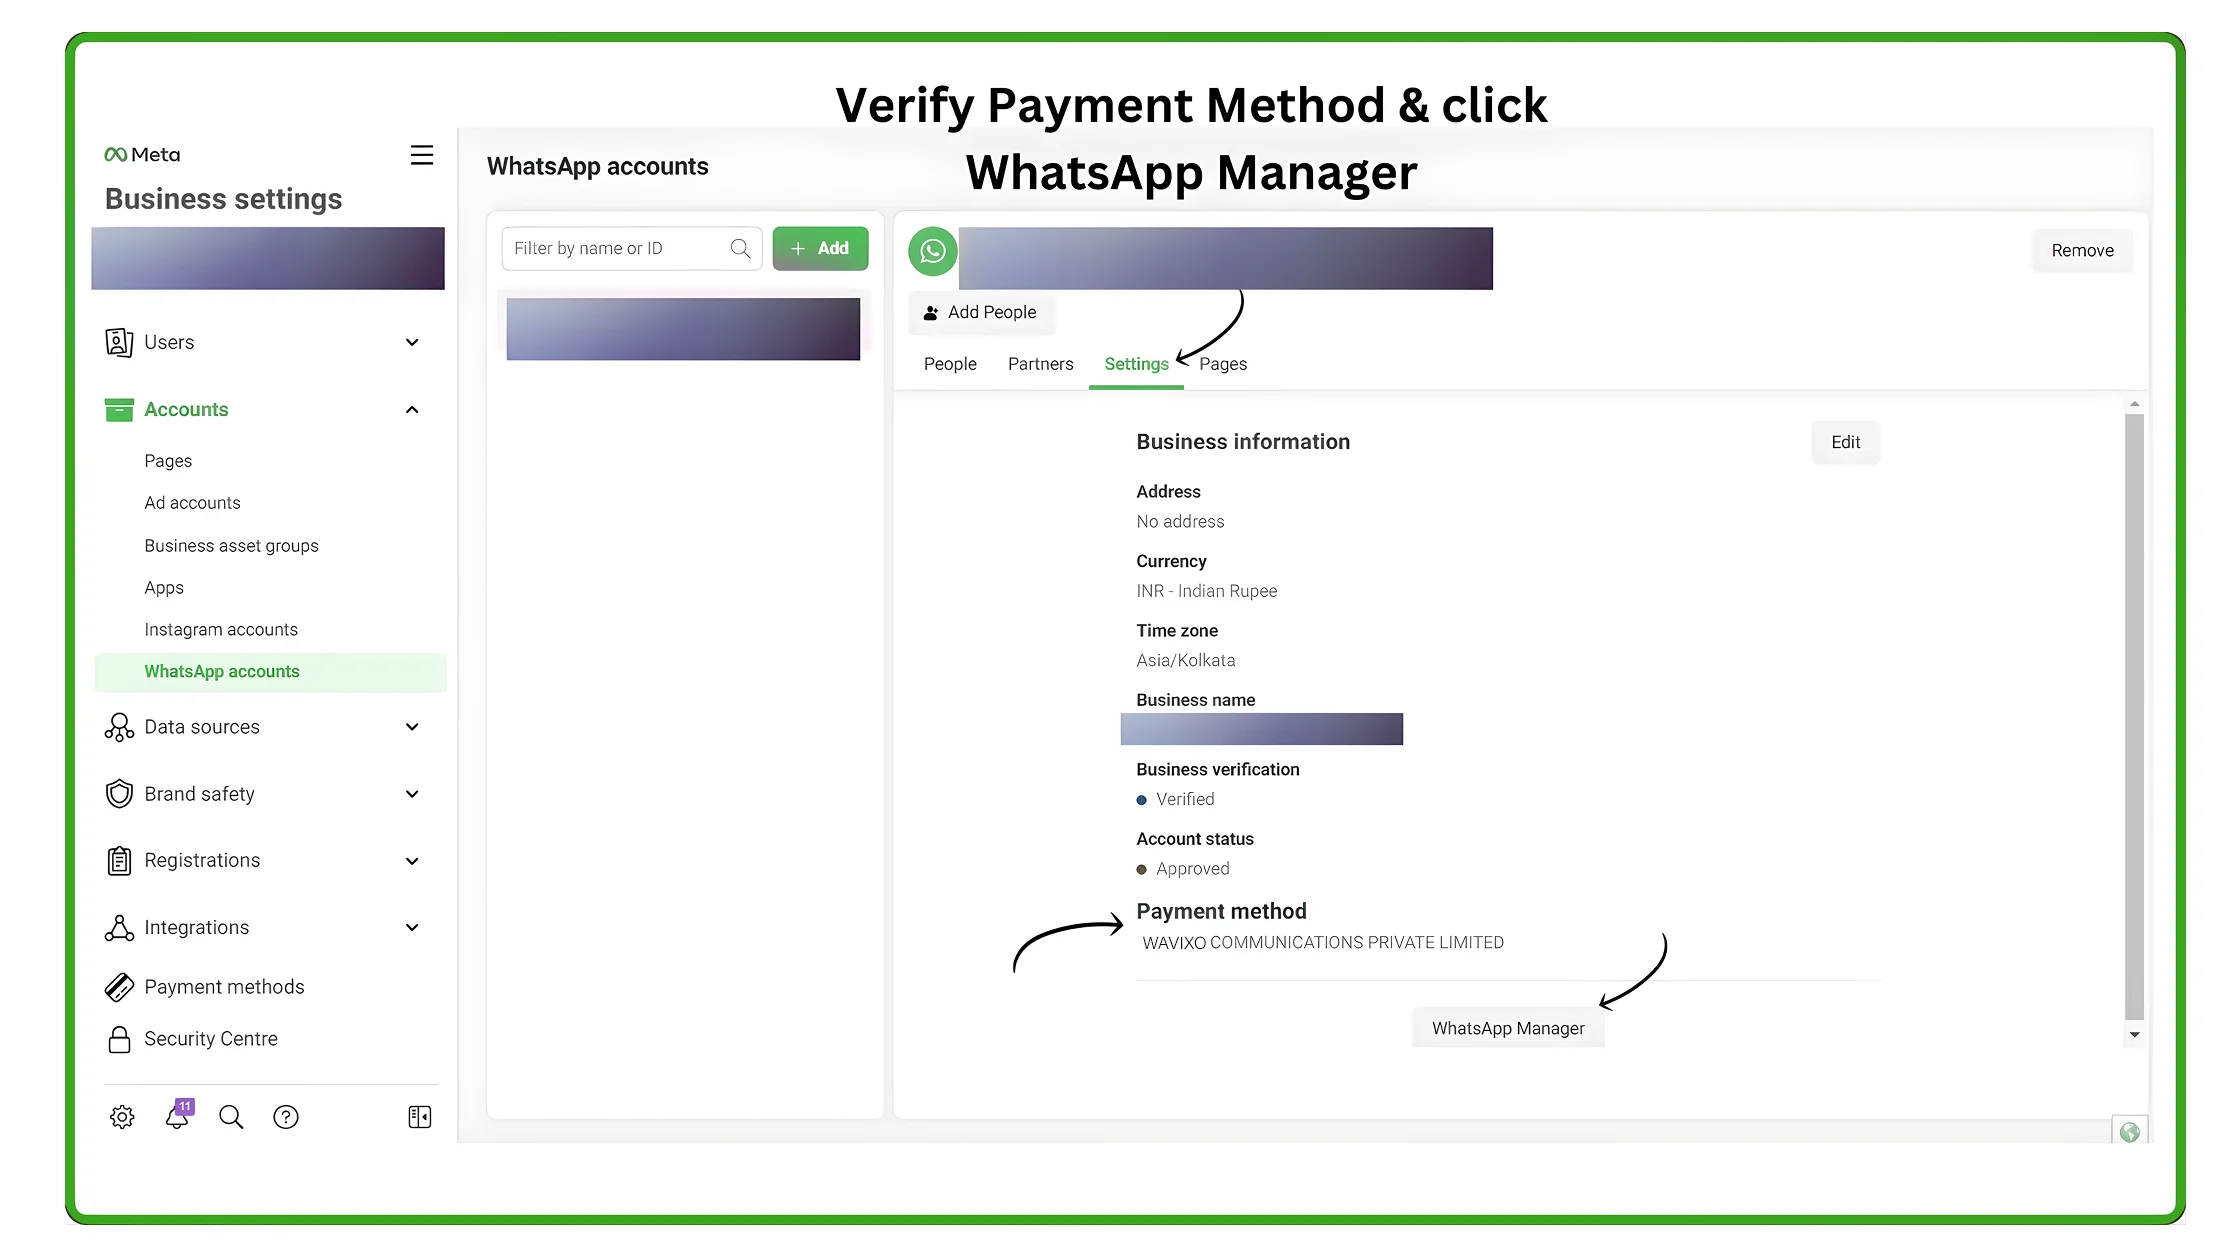
1. Open Facebook Business Settings → Select “WhatsApp Accounts”
Go to:
https://business.facebook.com/settings/
Choose the WhatsApp Business API account you want to migrate to Wavixo.
 2. Go to Settings → Open WhatsApp Manager
Inside WhatsApp Accounts, select Settings.
Confirm that your current API provider appears under Payment Method (not mandatory).
Then click WhatsApp Manager.
(Shown clearly in the image on page 3.)
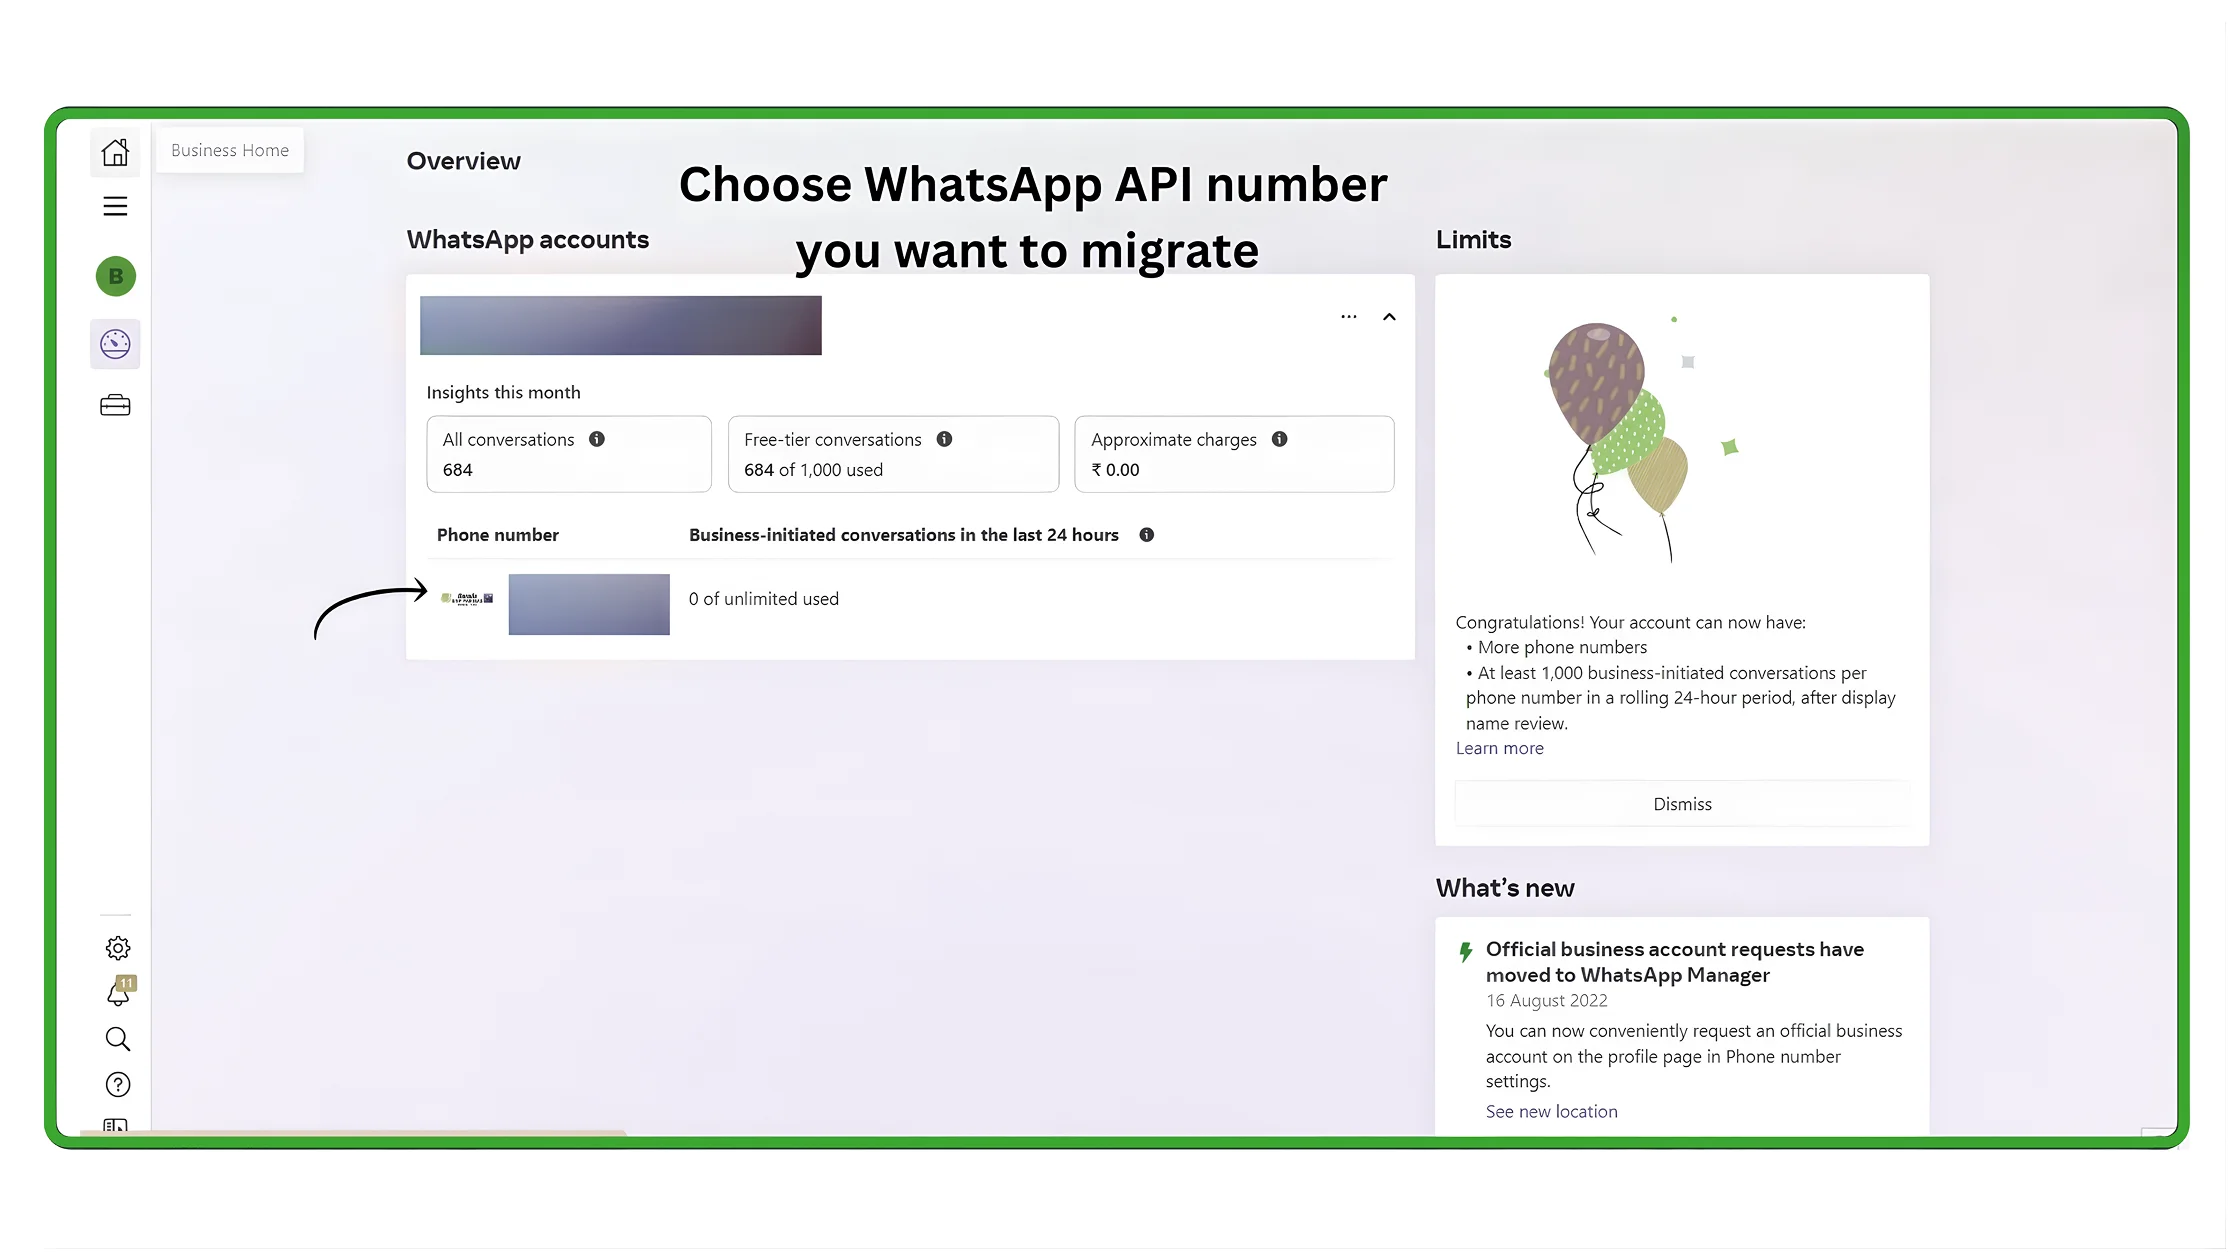
 3. Click the Phone Number You Want to Migrate
If you have multiple API numbers, choose the one you wish to migrate.
⚠️ If your number is not visible, ask your current API provider to disable 2FA from their end.
 4. Verify Your Profile
Open your profile details and select Two-Step Verification.
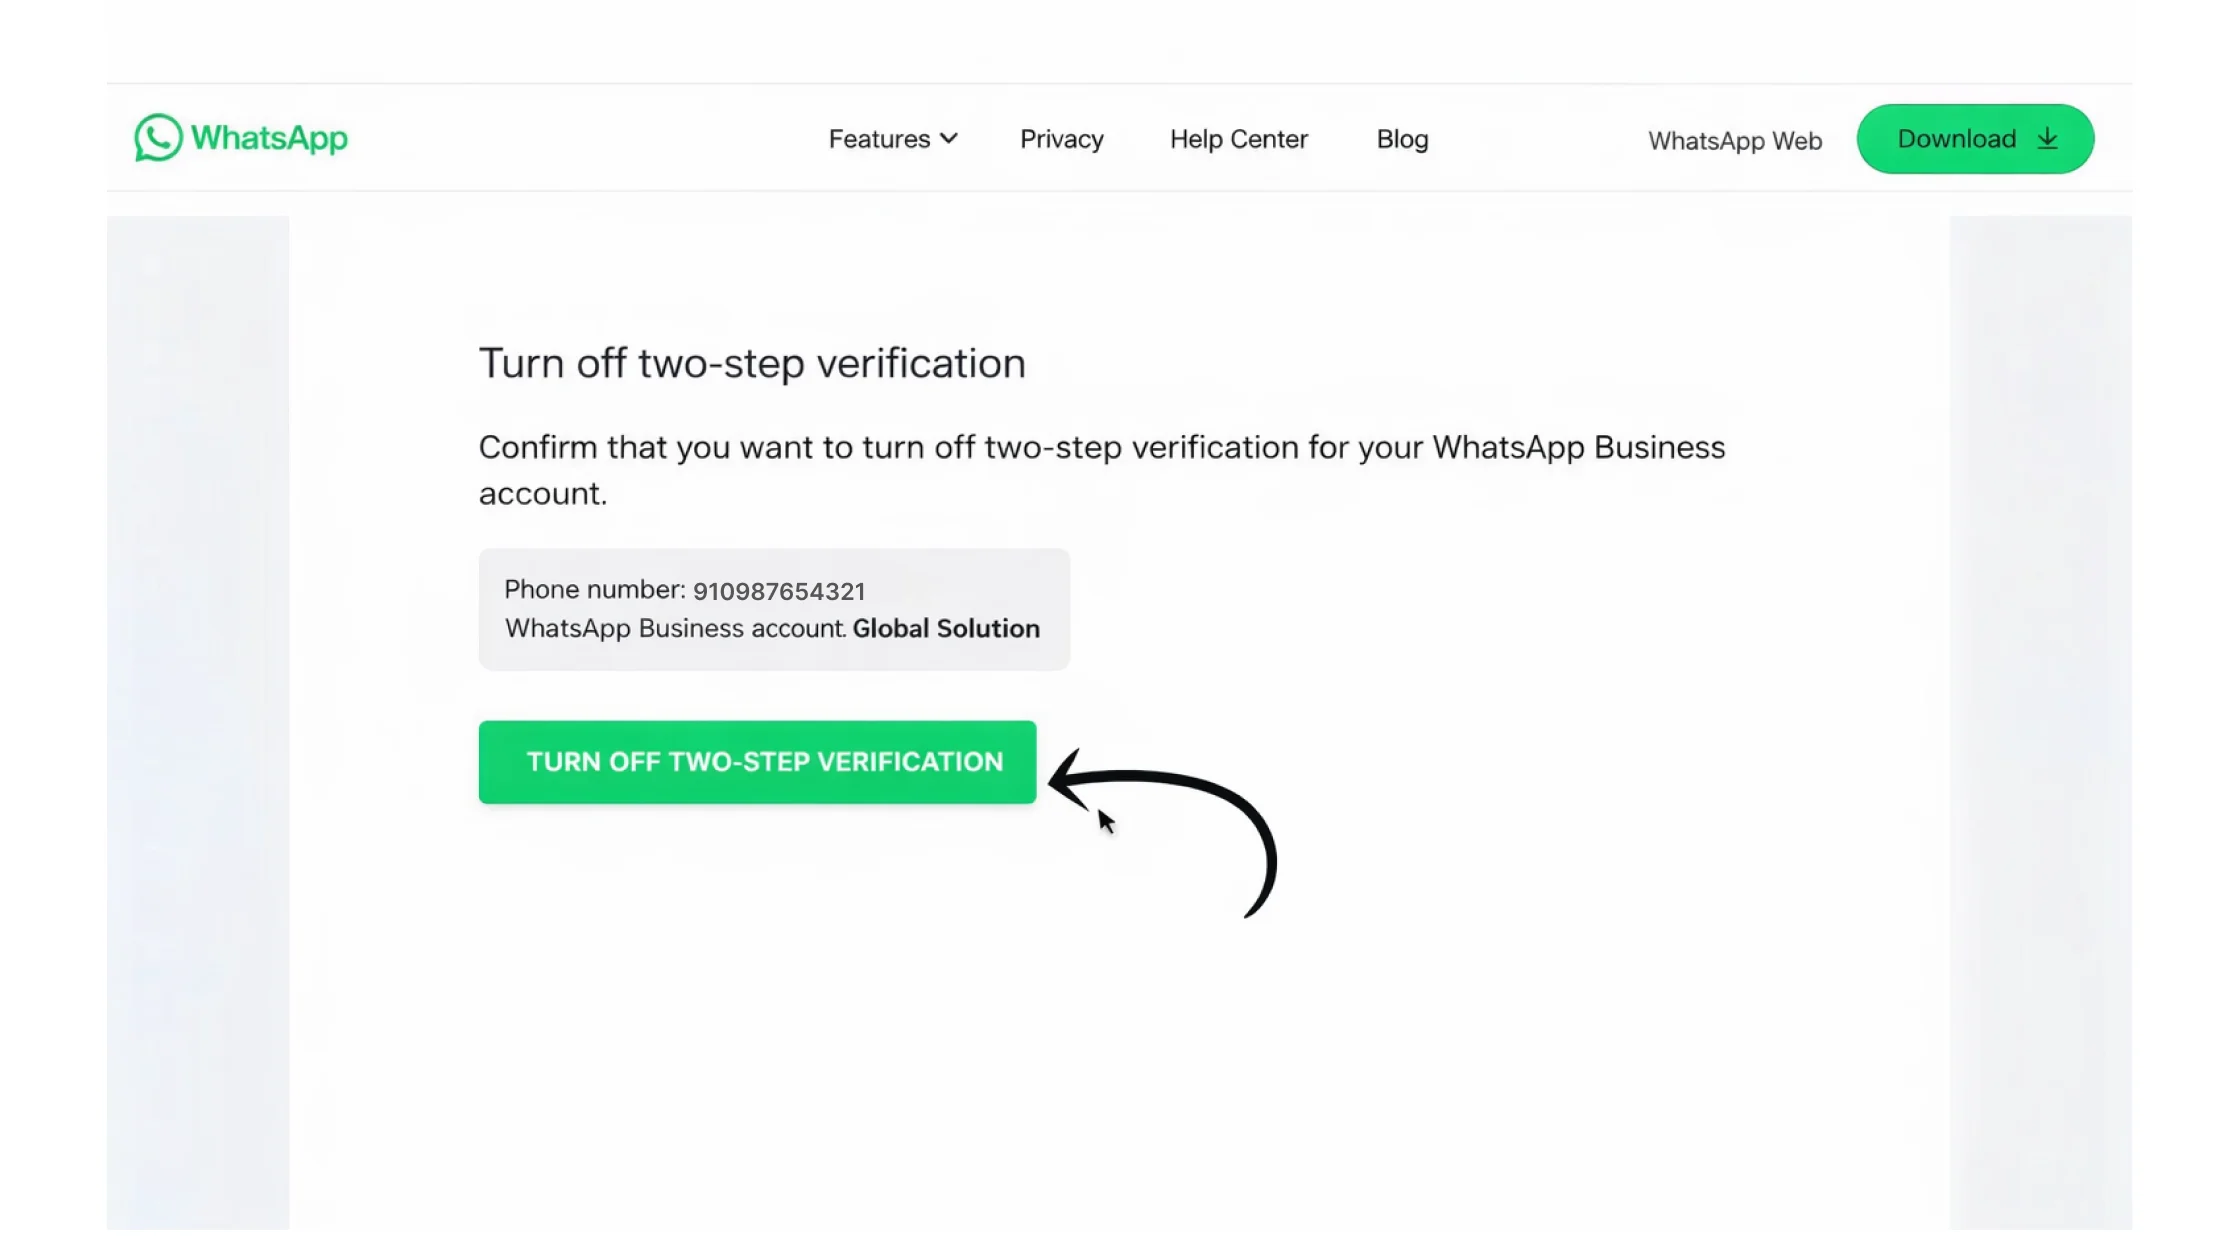
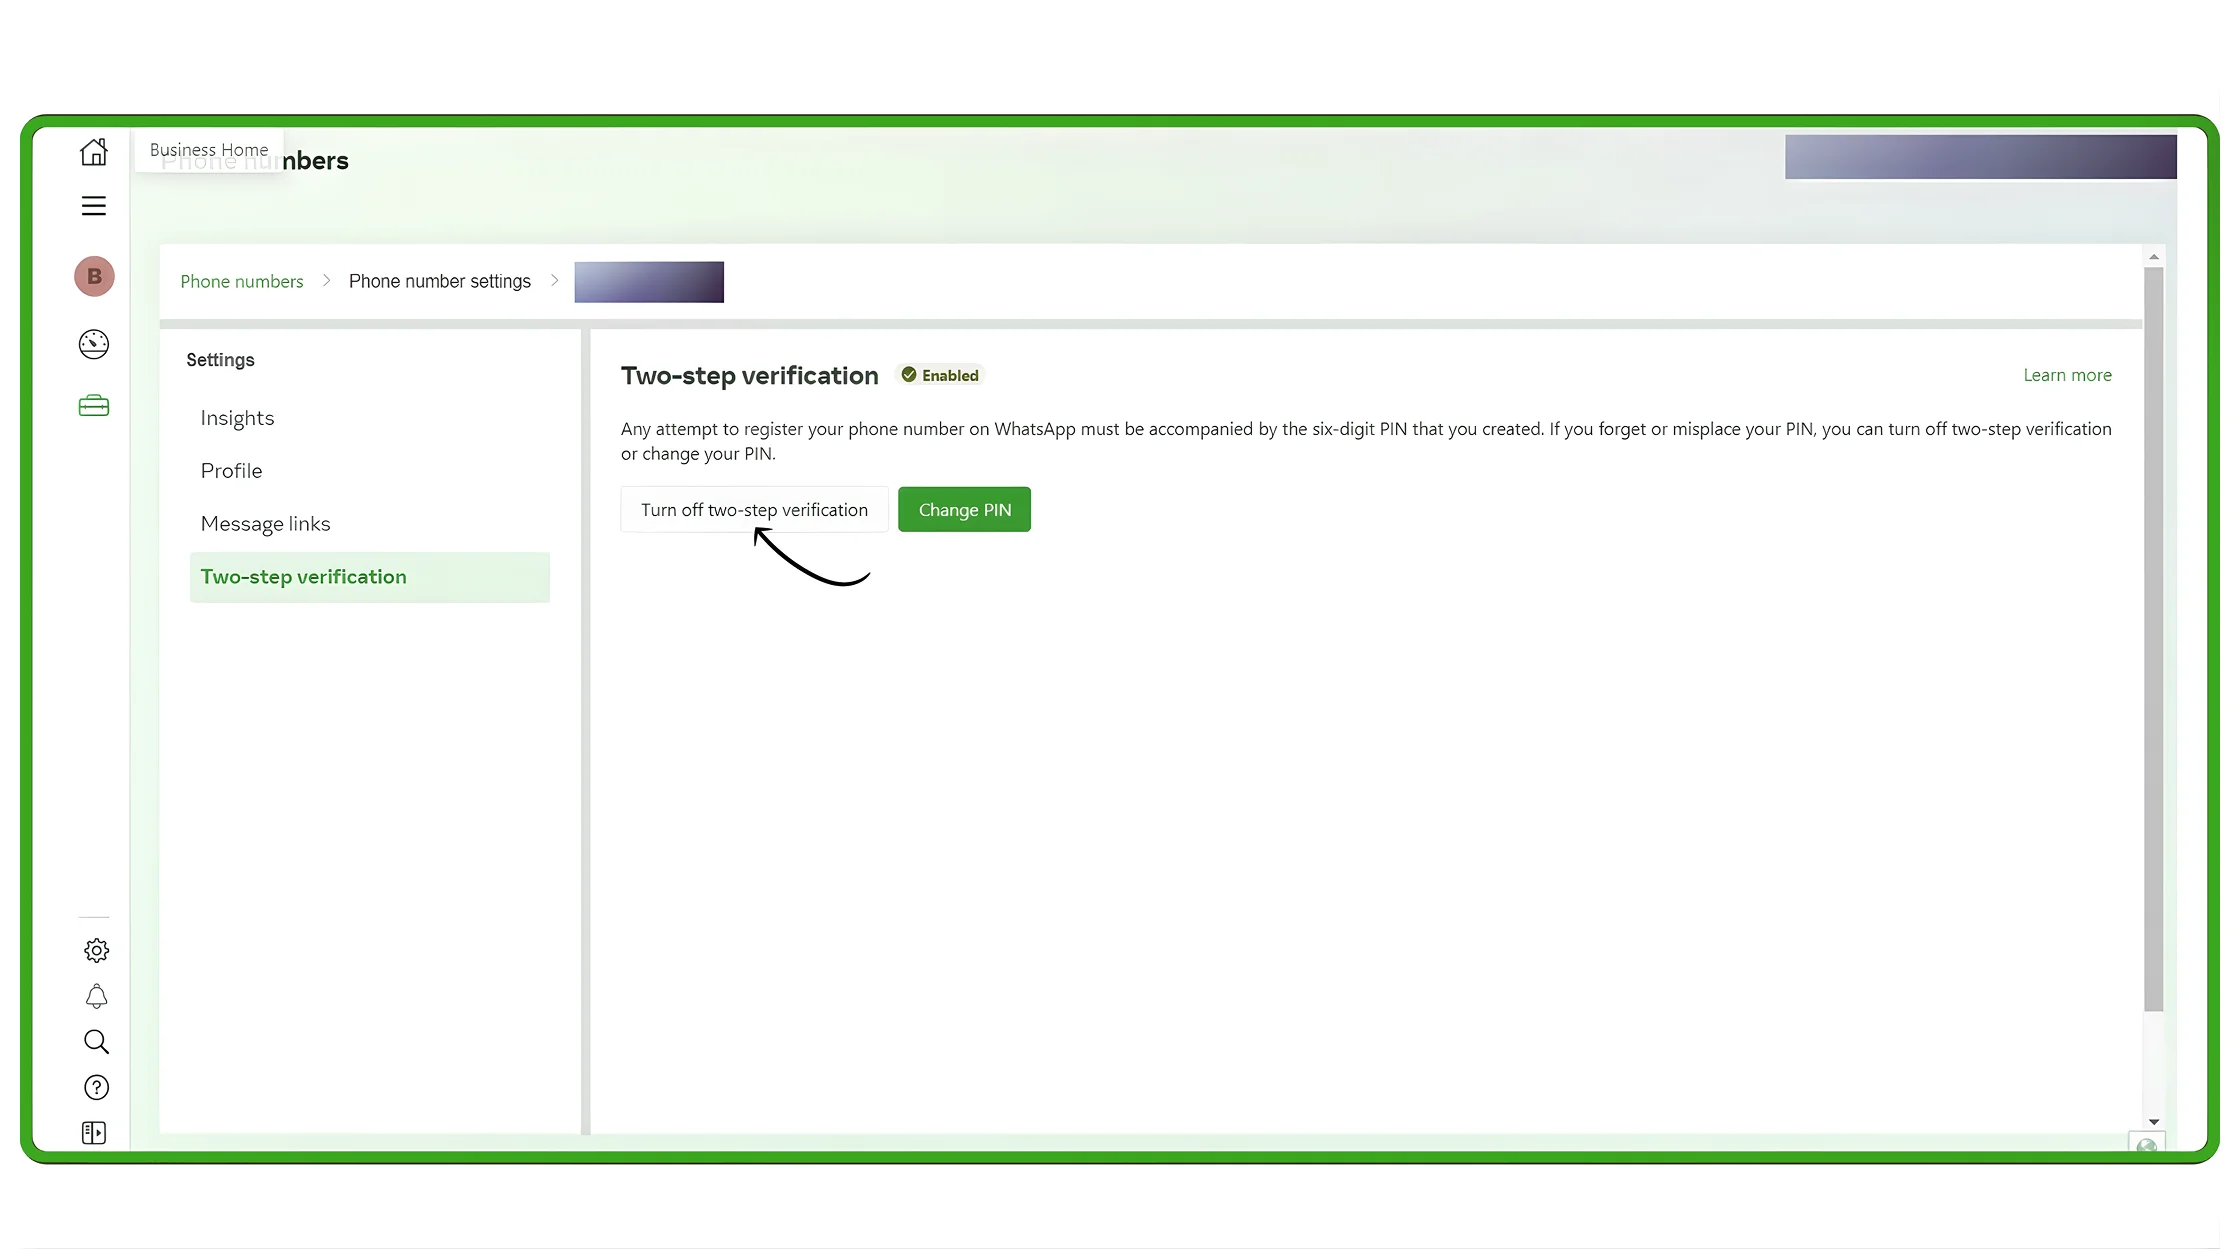 5. Turn Off Two-Step Verification
Click Turn Off Two-Step Verification.
If the button is greyed out, follow the instructions in the next section.
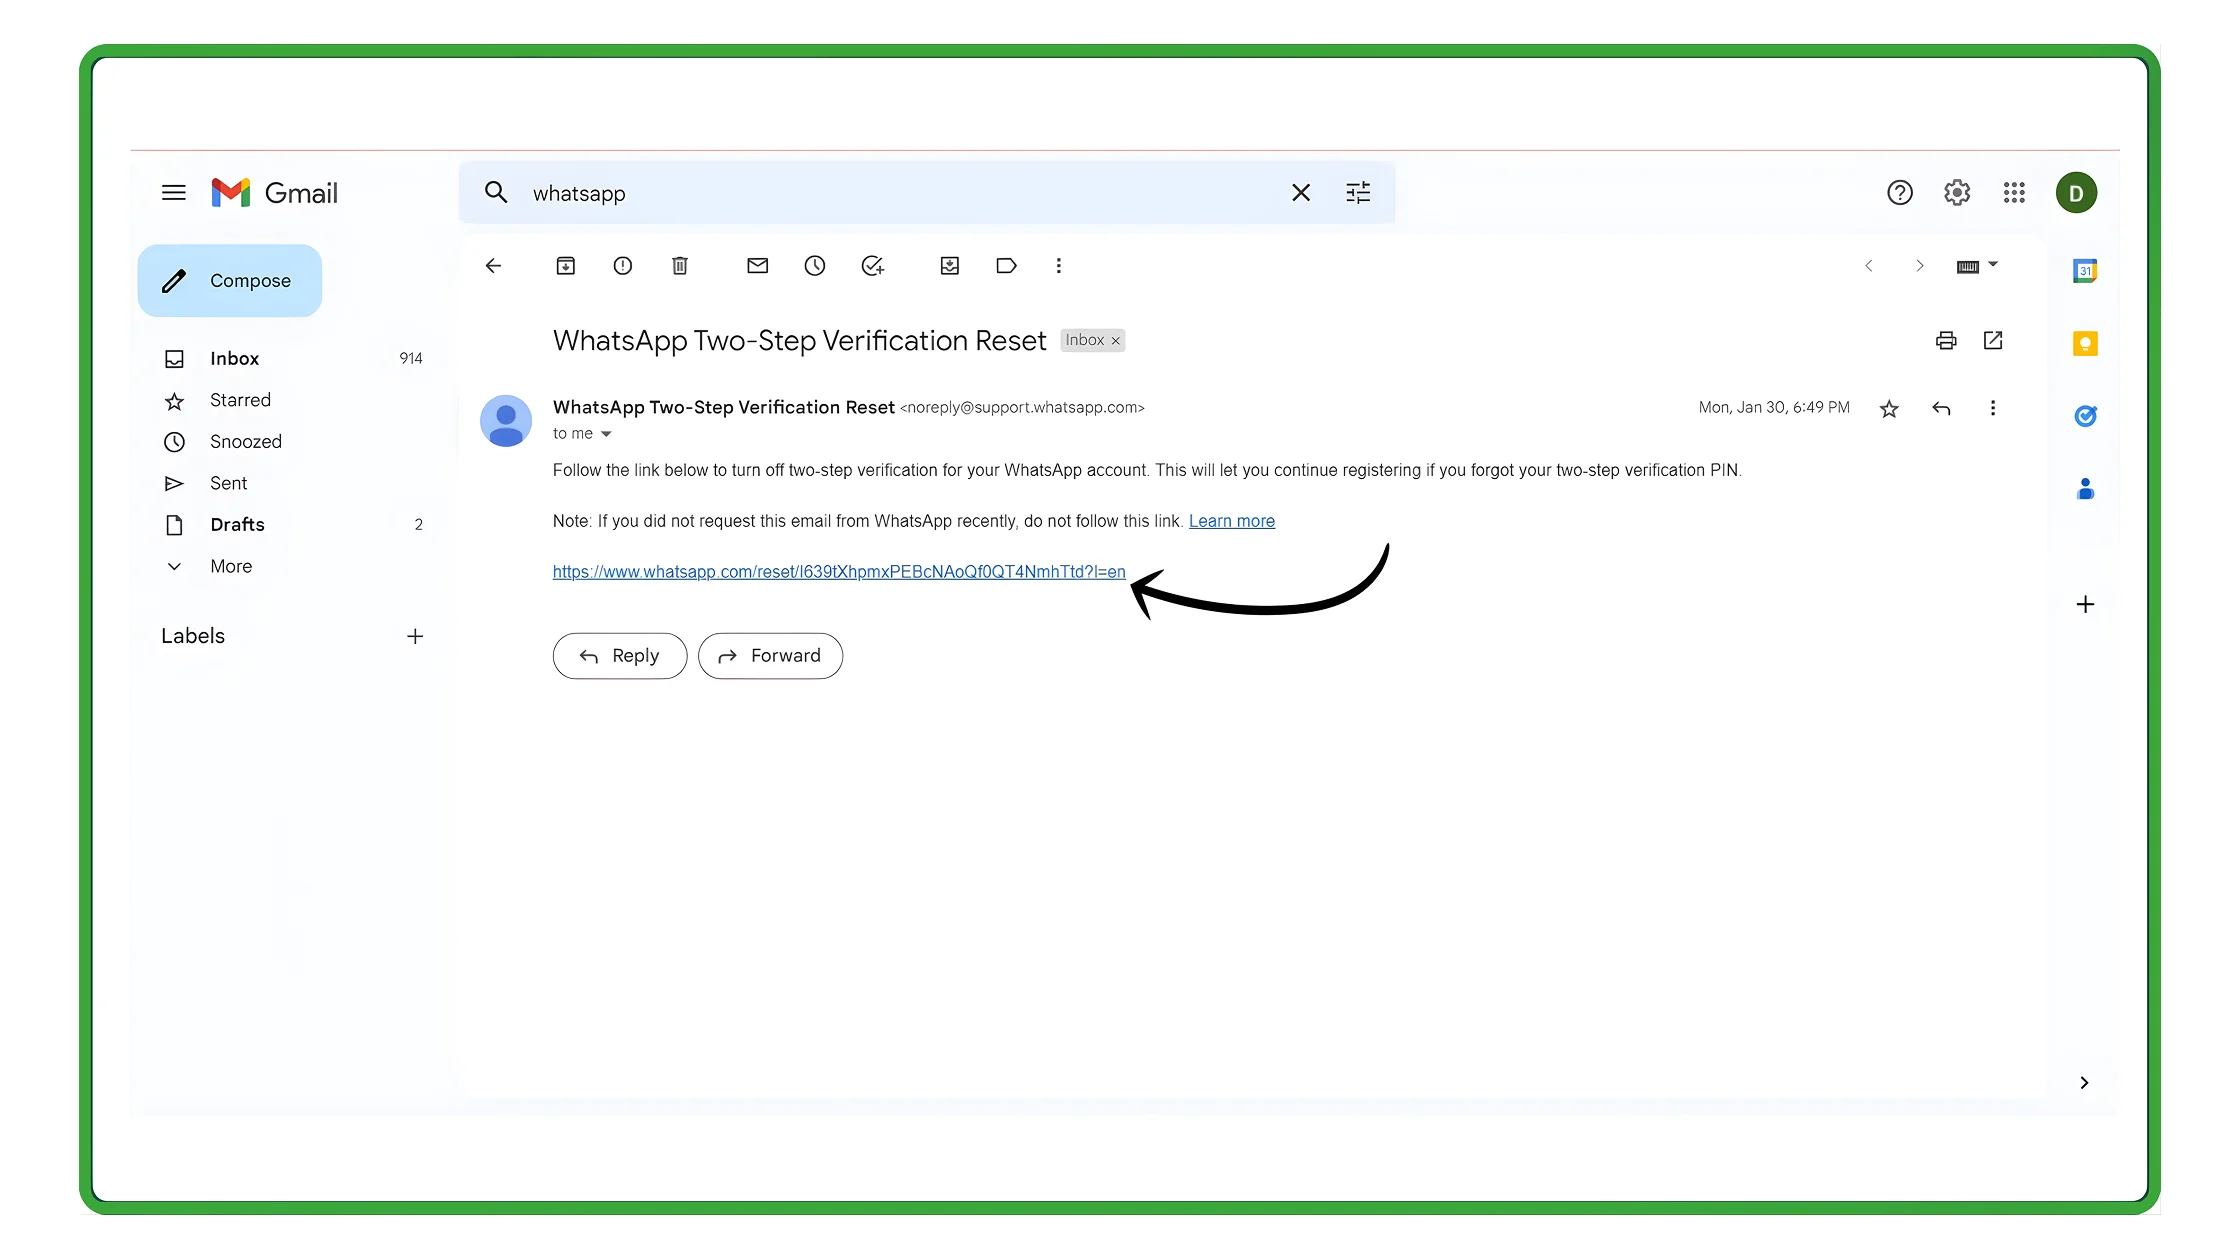 6. Open the Email Sent to Your Business Mail
You’ll receive an email with a link to confirm turning off 2FA.
Click the link.
 7. Click “Disable 2FA”
This confirms your 2FA is turned off successfully.
 8. Contact Wavixo Support Once Done
After disabling 2FA, reach out to Wavixo support via call, WhatsApp, or email so they can proceed with migration.
If the “Turn Off 2FA” Button is Greyed Out
This usually happens when your business email is not verified.
To fix:
Click the verification link shown in Business Settings
Verify your email
Refresh — the 2FA toggle will now be available
Once disabled, continue with the steps below.
PART 2: How to Migrate to Wavixo from Your Current API Provider
1. Sign Up on the Wavixo App
(If already registered, skip to Step 4.)
You can sign up via Google or manually fill out the registration form.
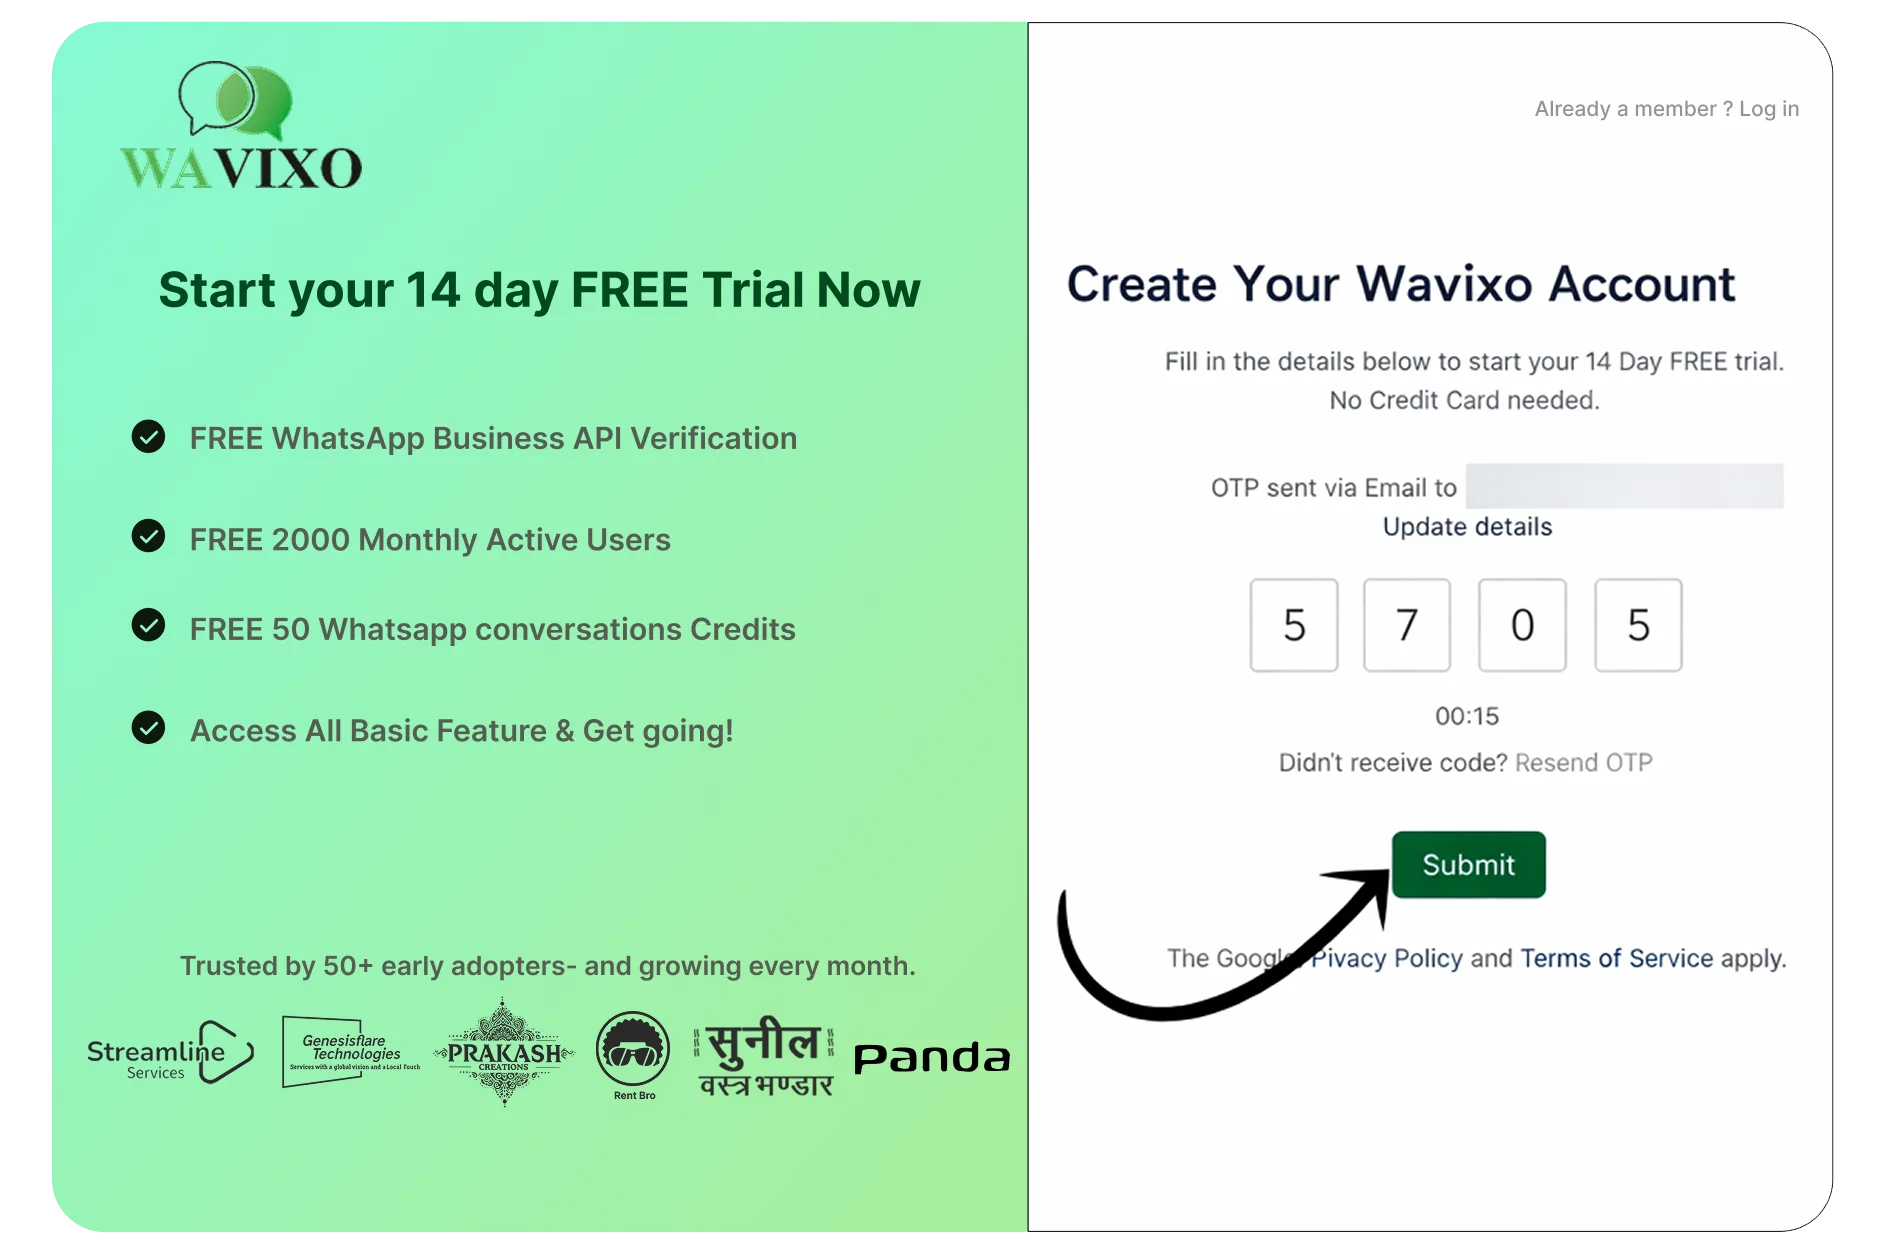
 2. Enter OTP (For Form Signup Only)
An OTP will be sent to your registered email.
Enter it and click Submit.
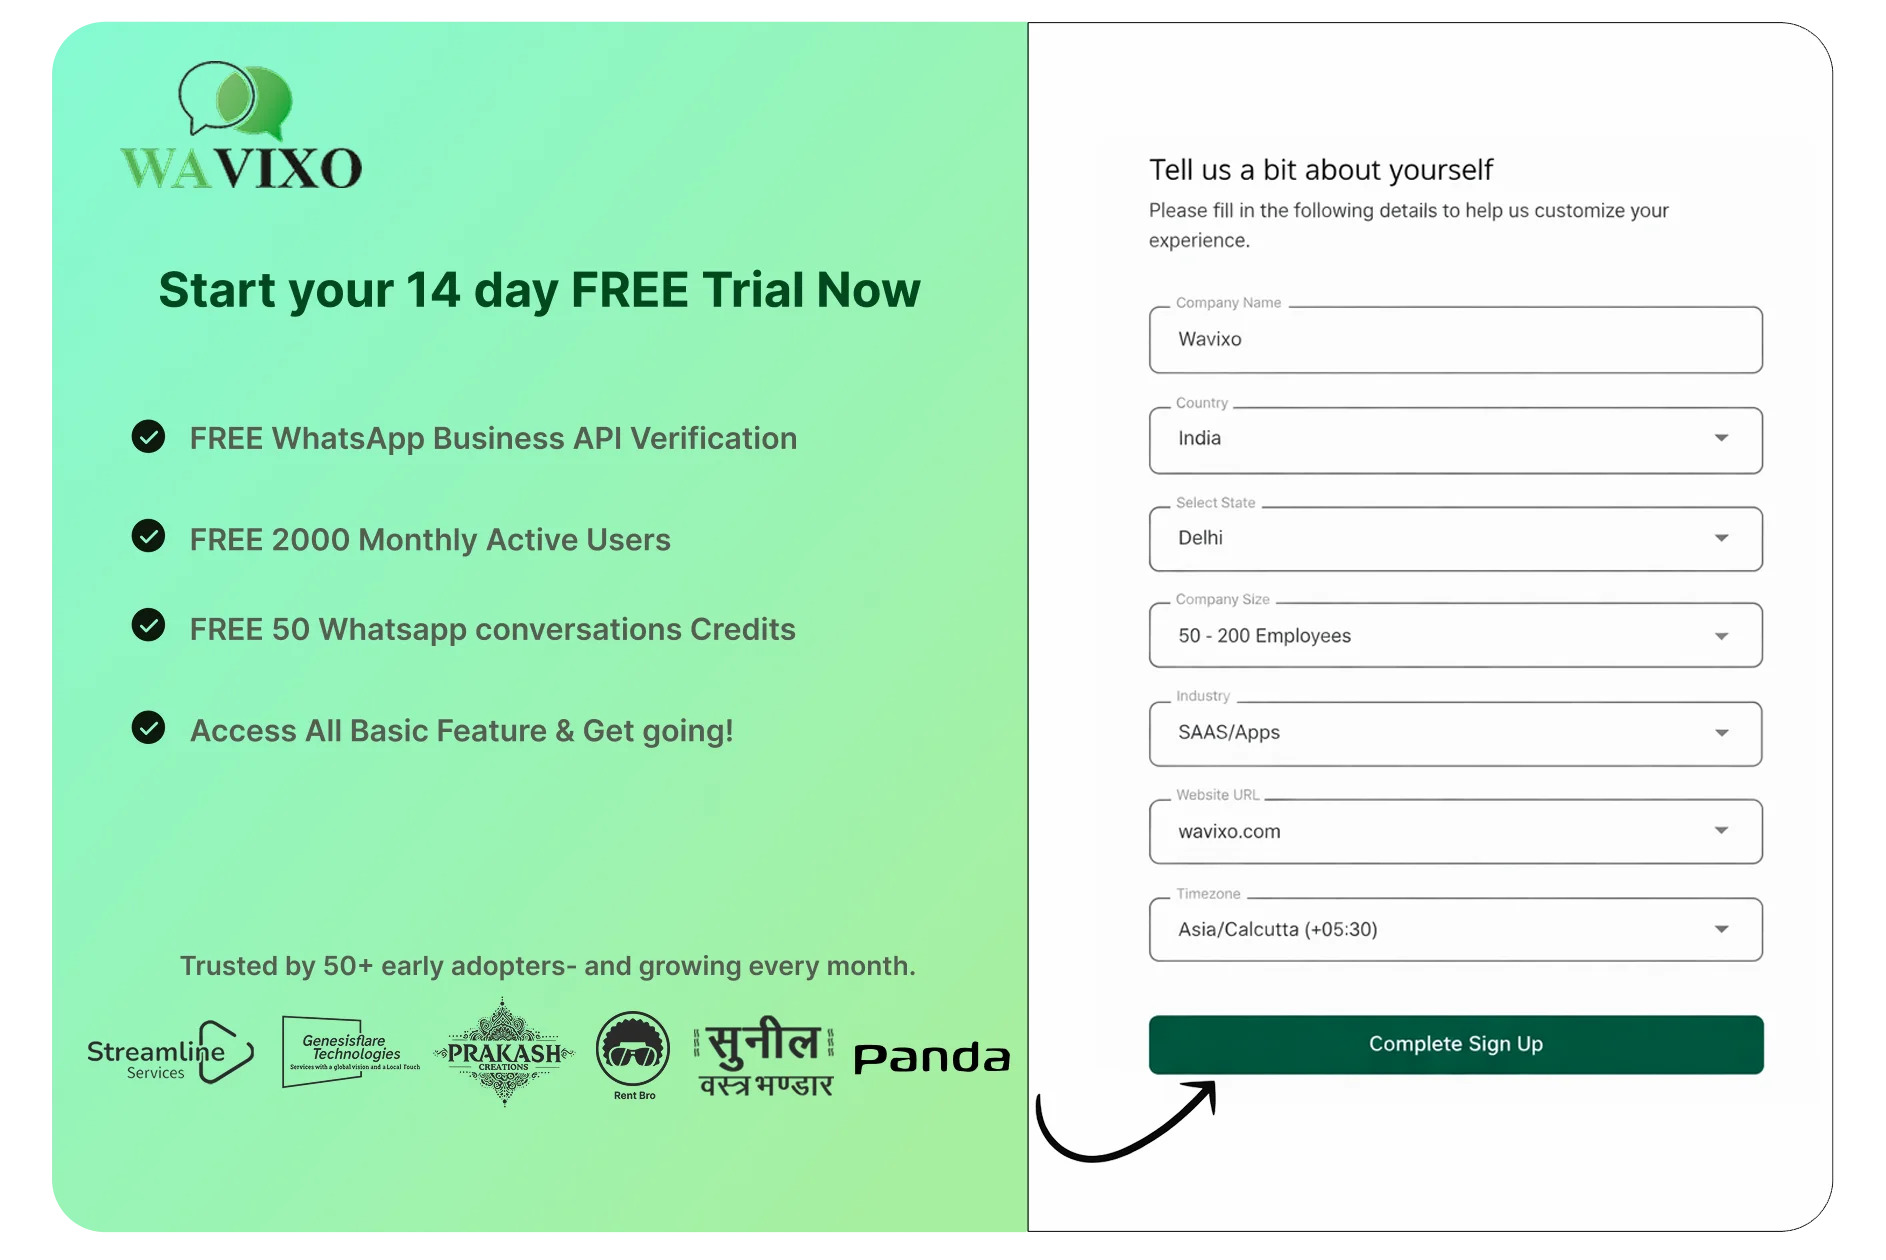
 3. Add Personal & Company Information
Fill in:
Company name
Employee size
Industry
Billing currency
Timezone
Click Complete Sign Up.
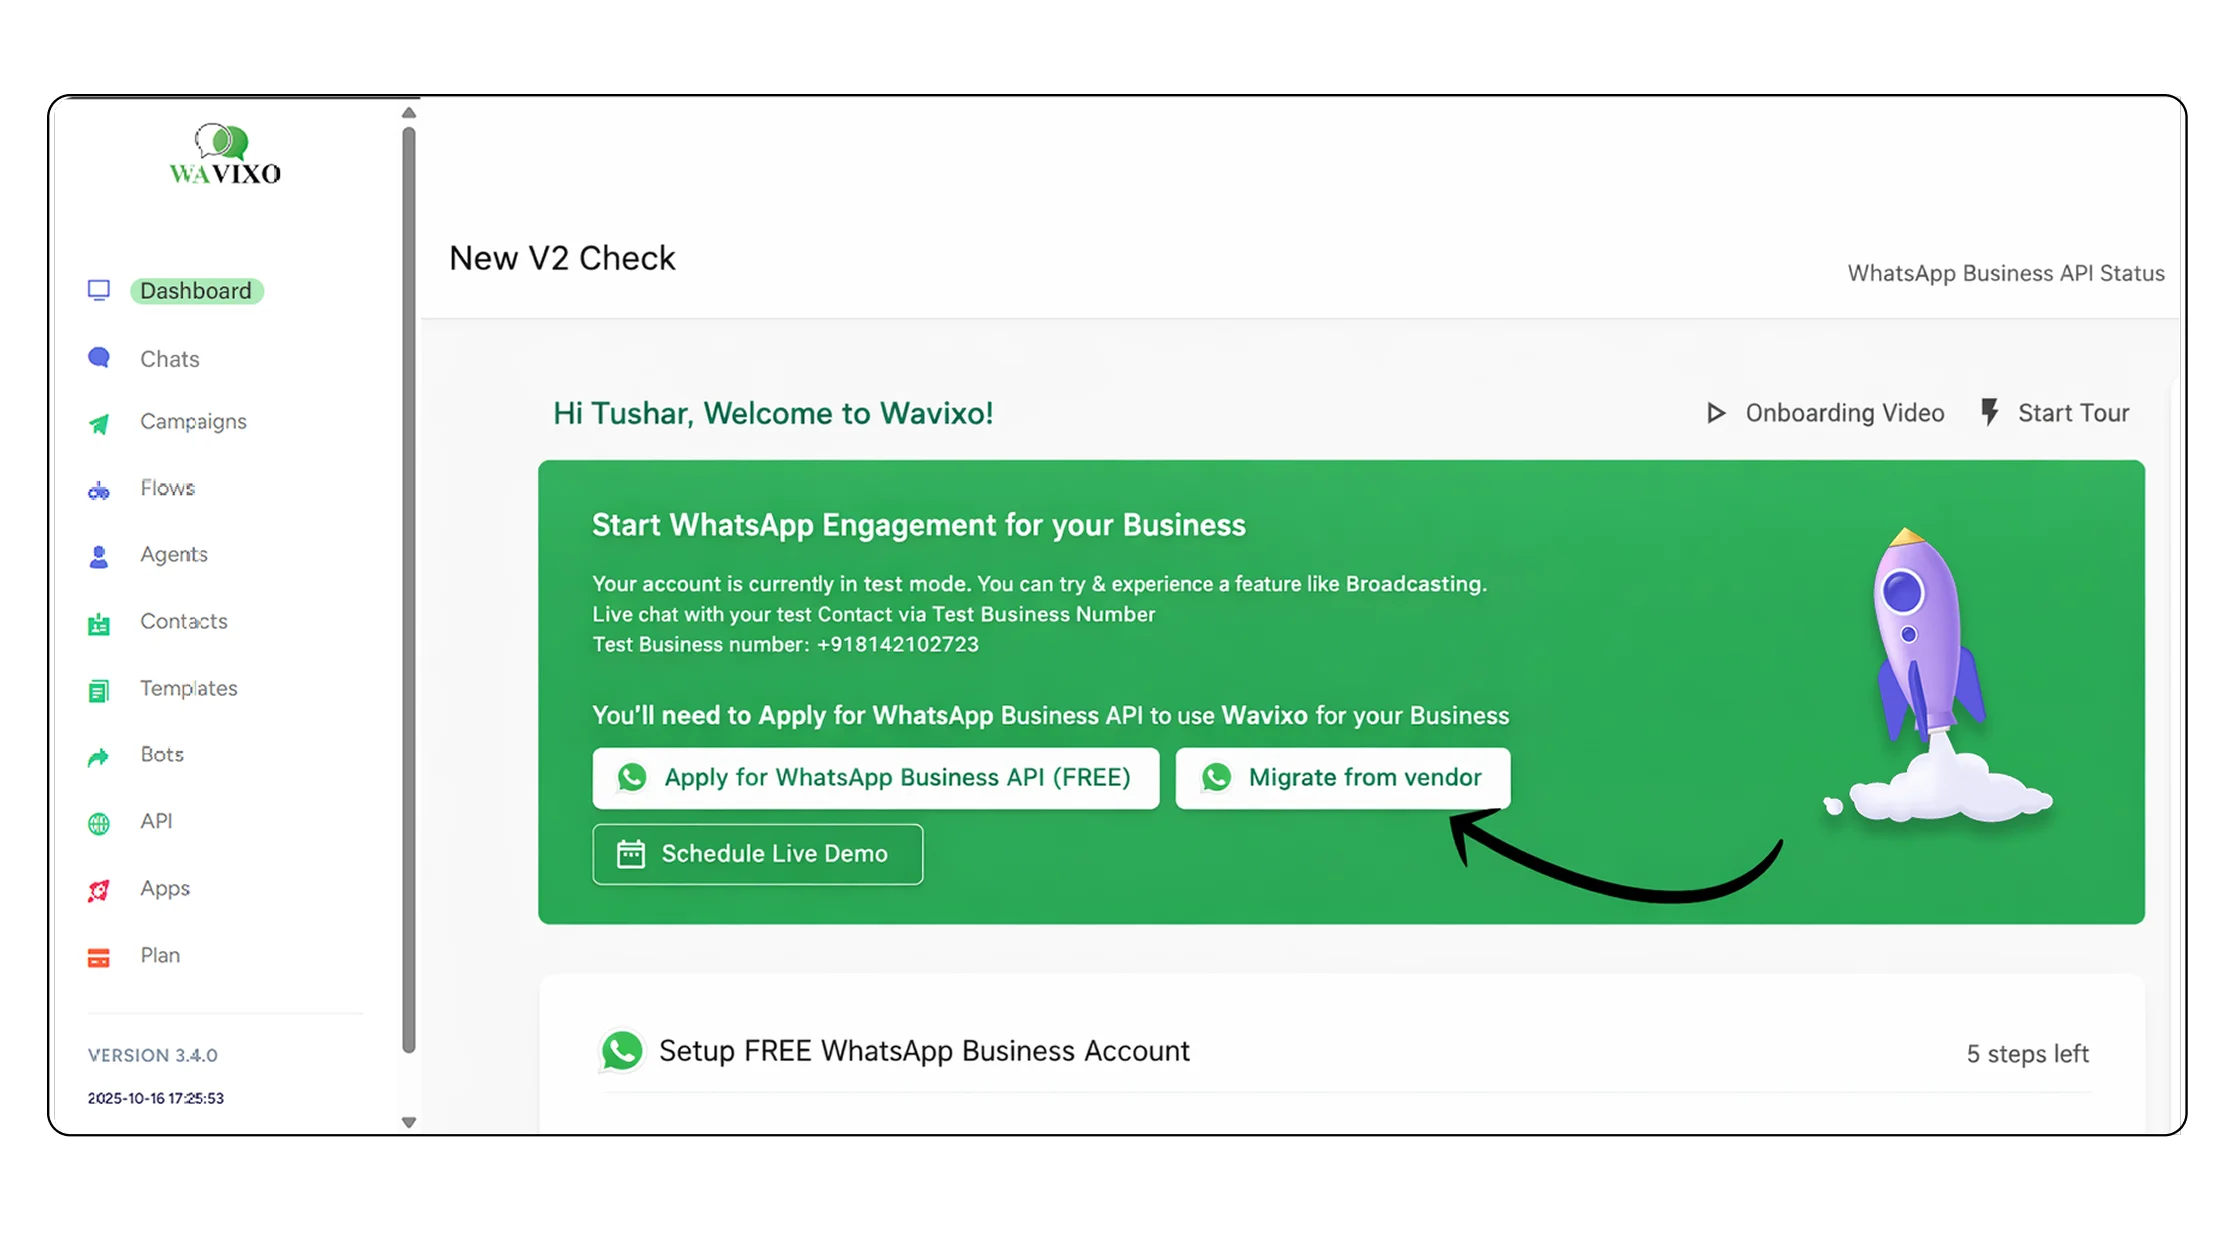
 4. Click “Migrate from Vendor”
This option appears on your Wavixo dashboard.
 5. Click “Apply Now”
 6. Select “Continue with Facebook”
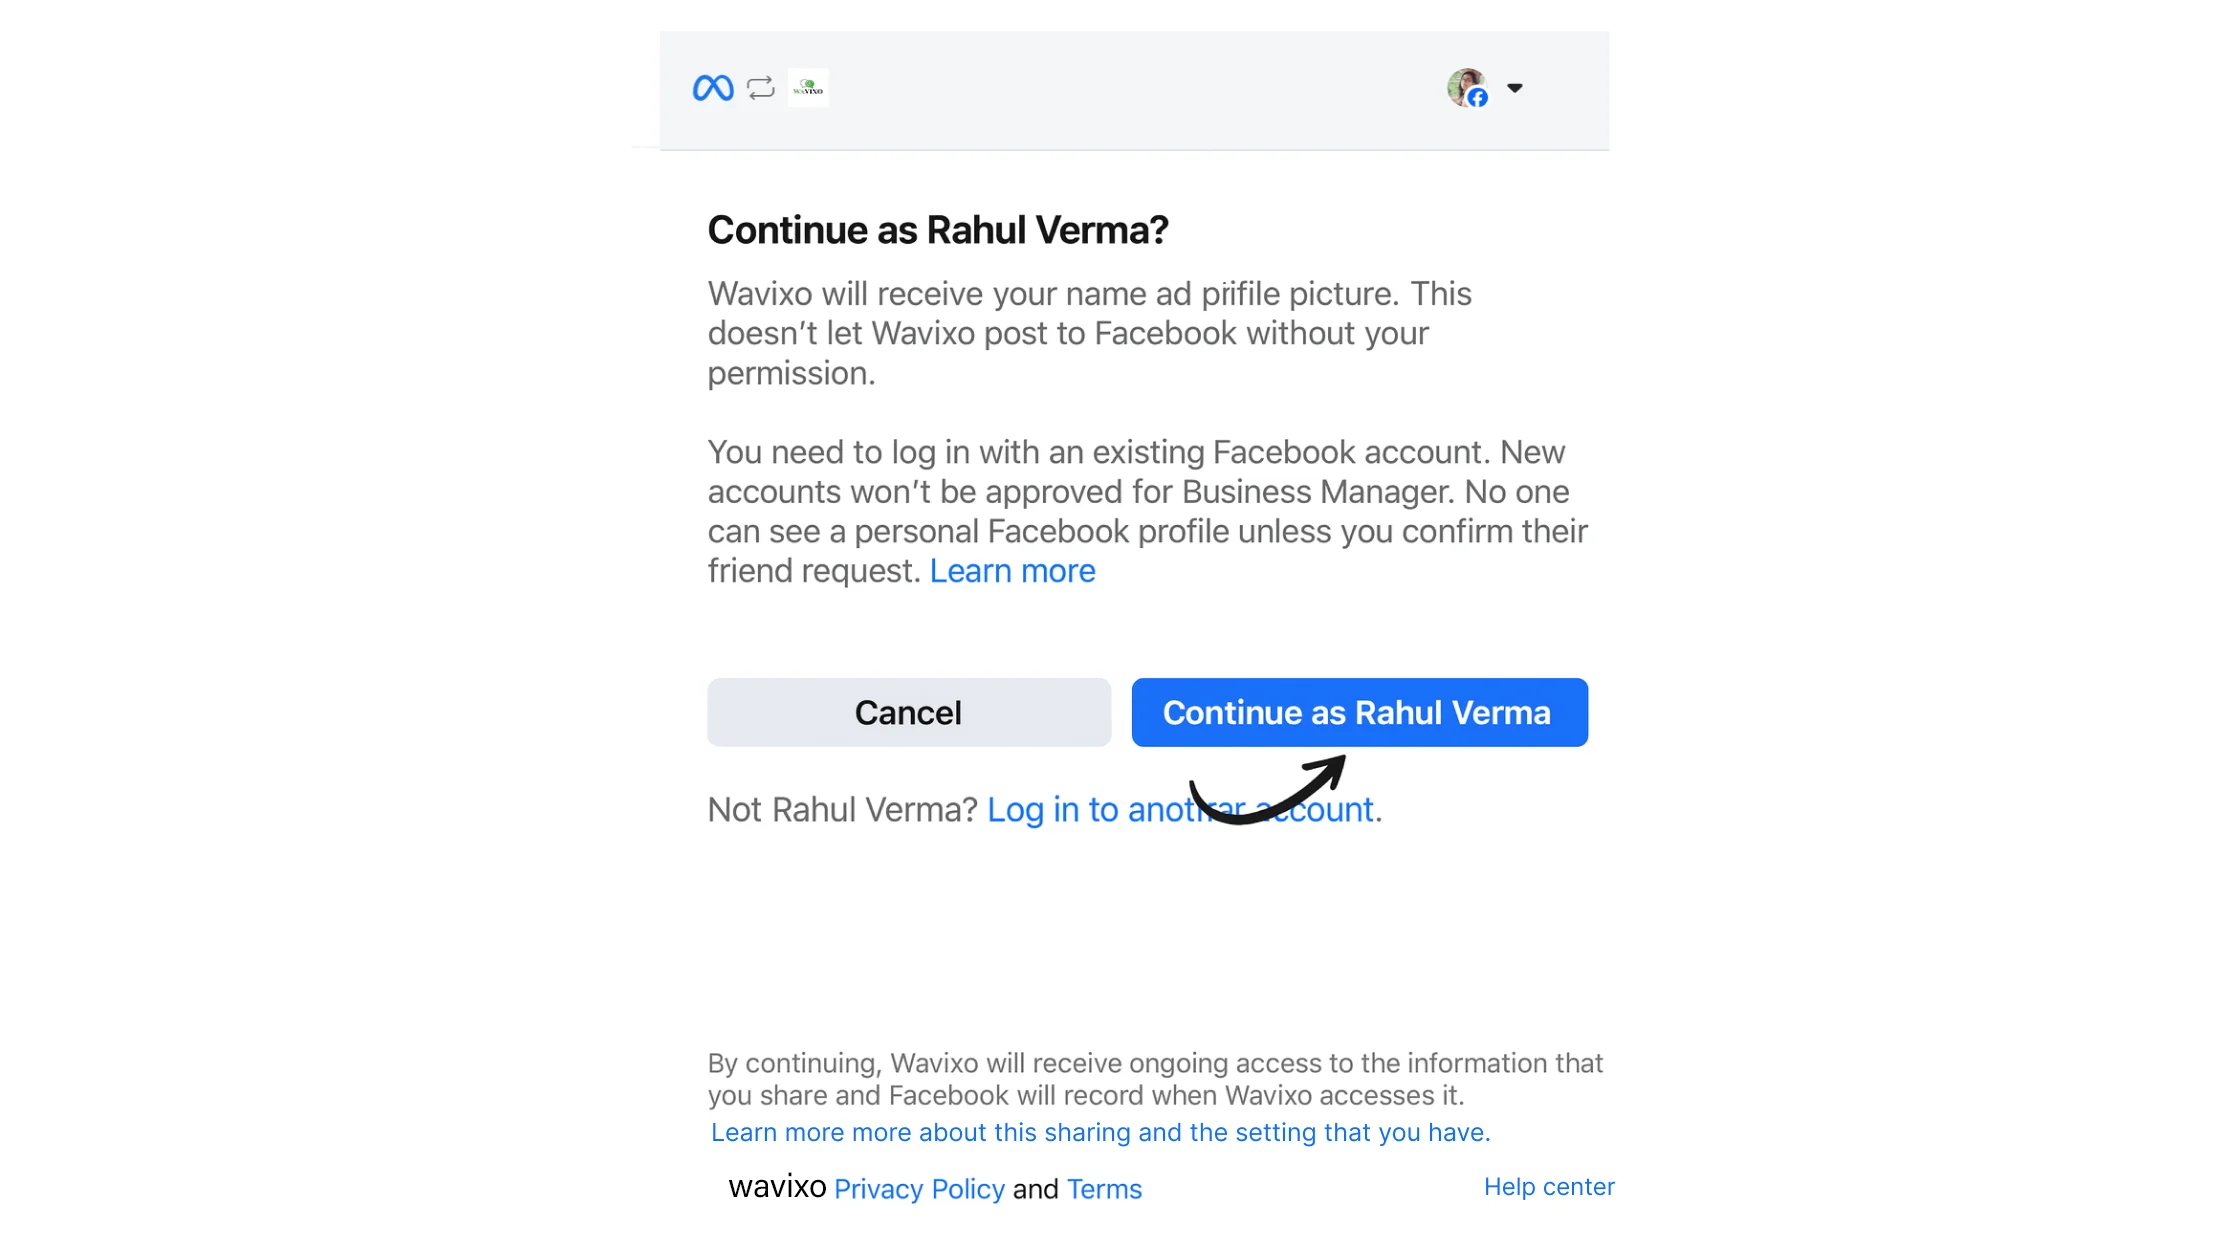
 7. Click “Get Started”
This screen allows you to connect your Facebook account with Wavixo.
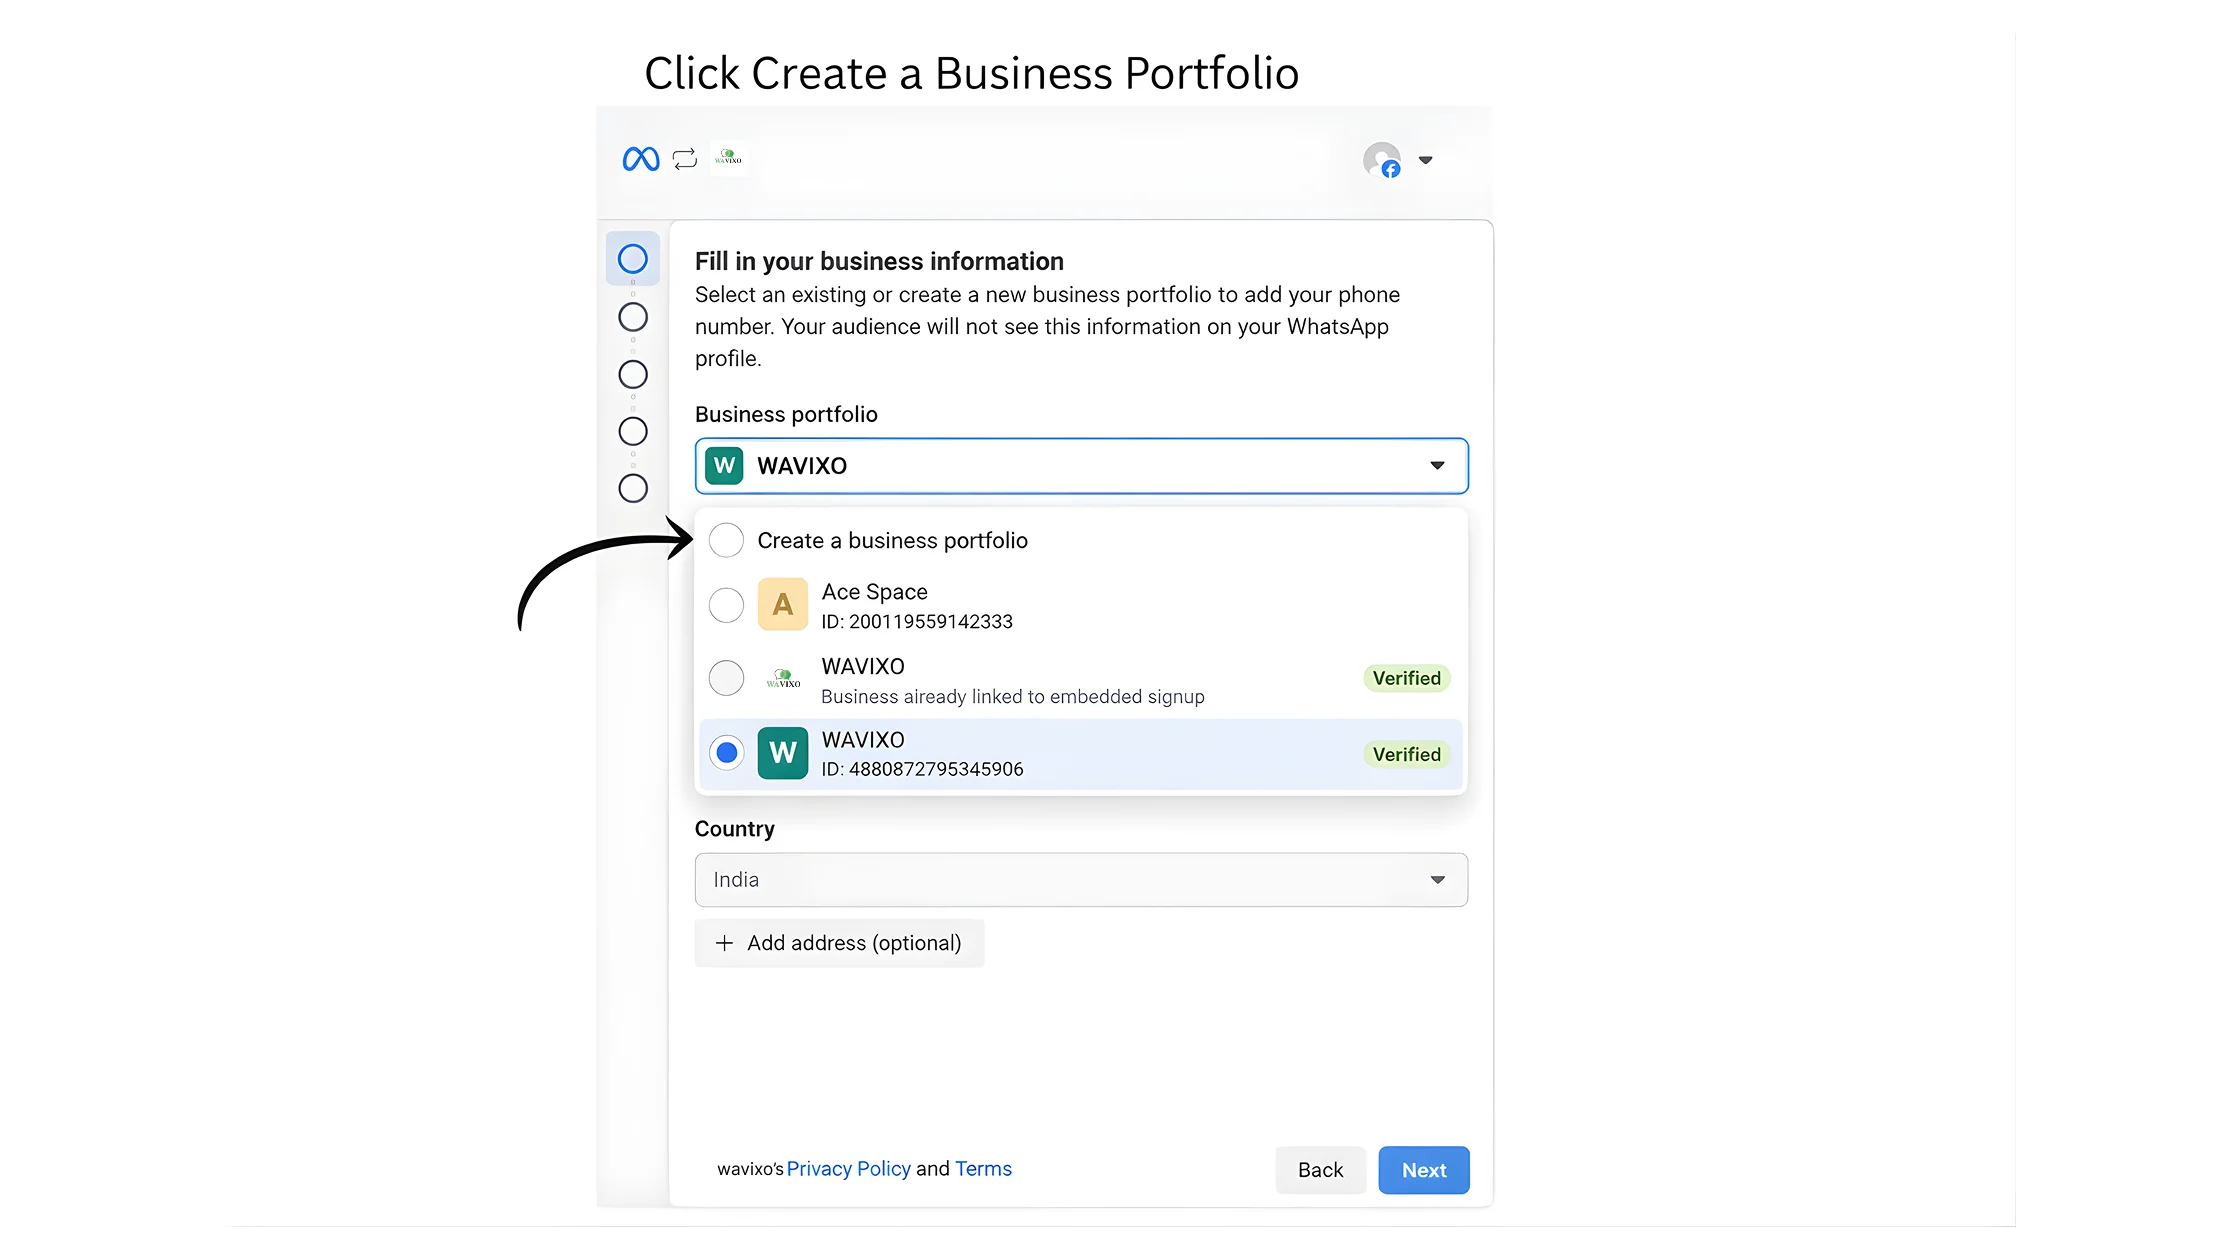
 8. Select “Create a Business Portfolio”
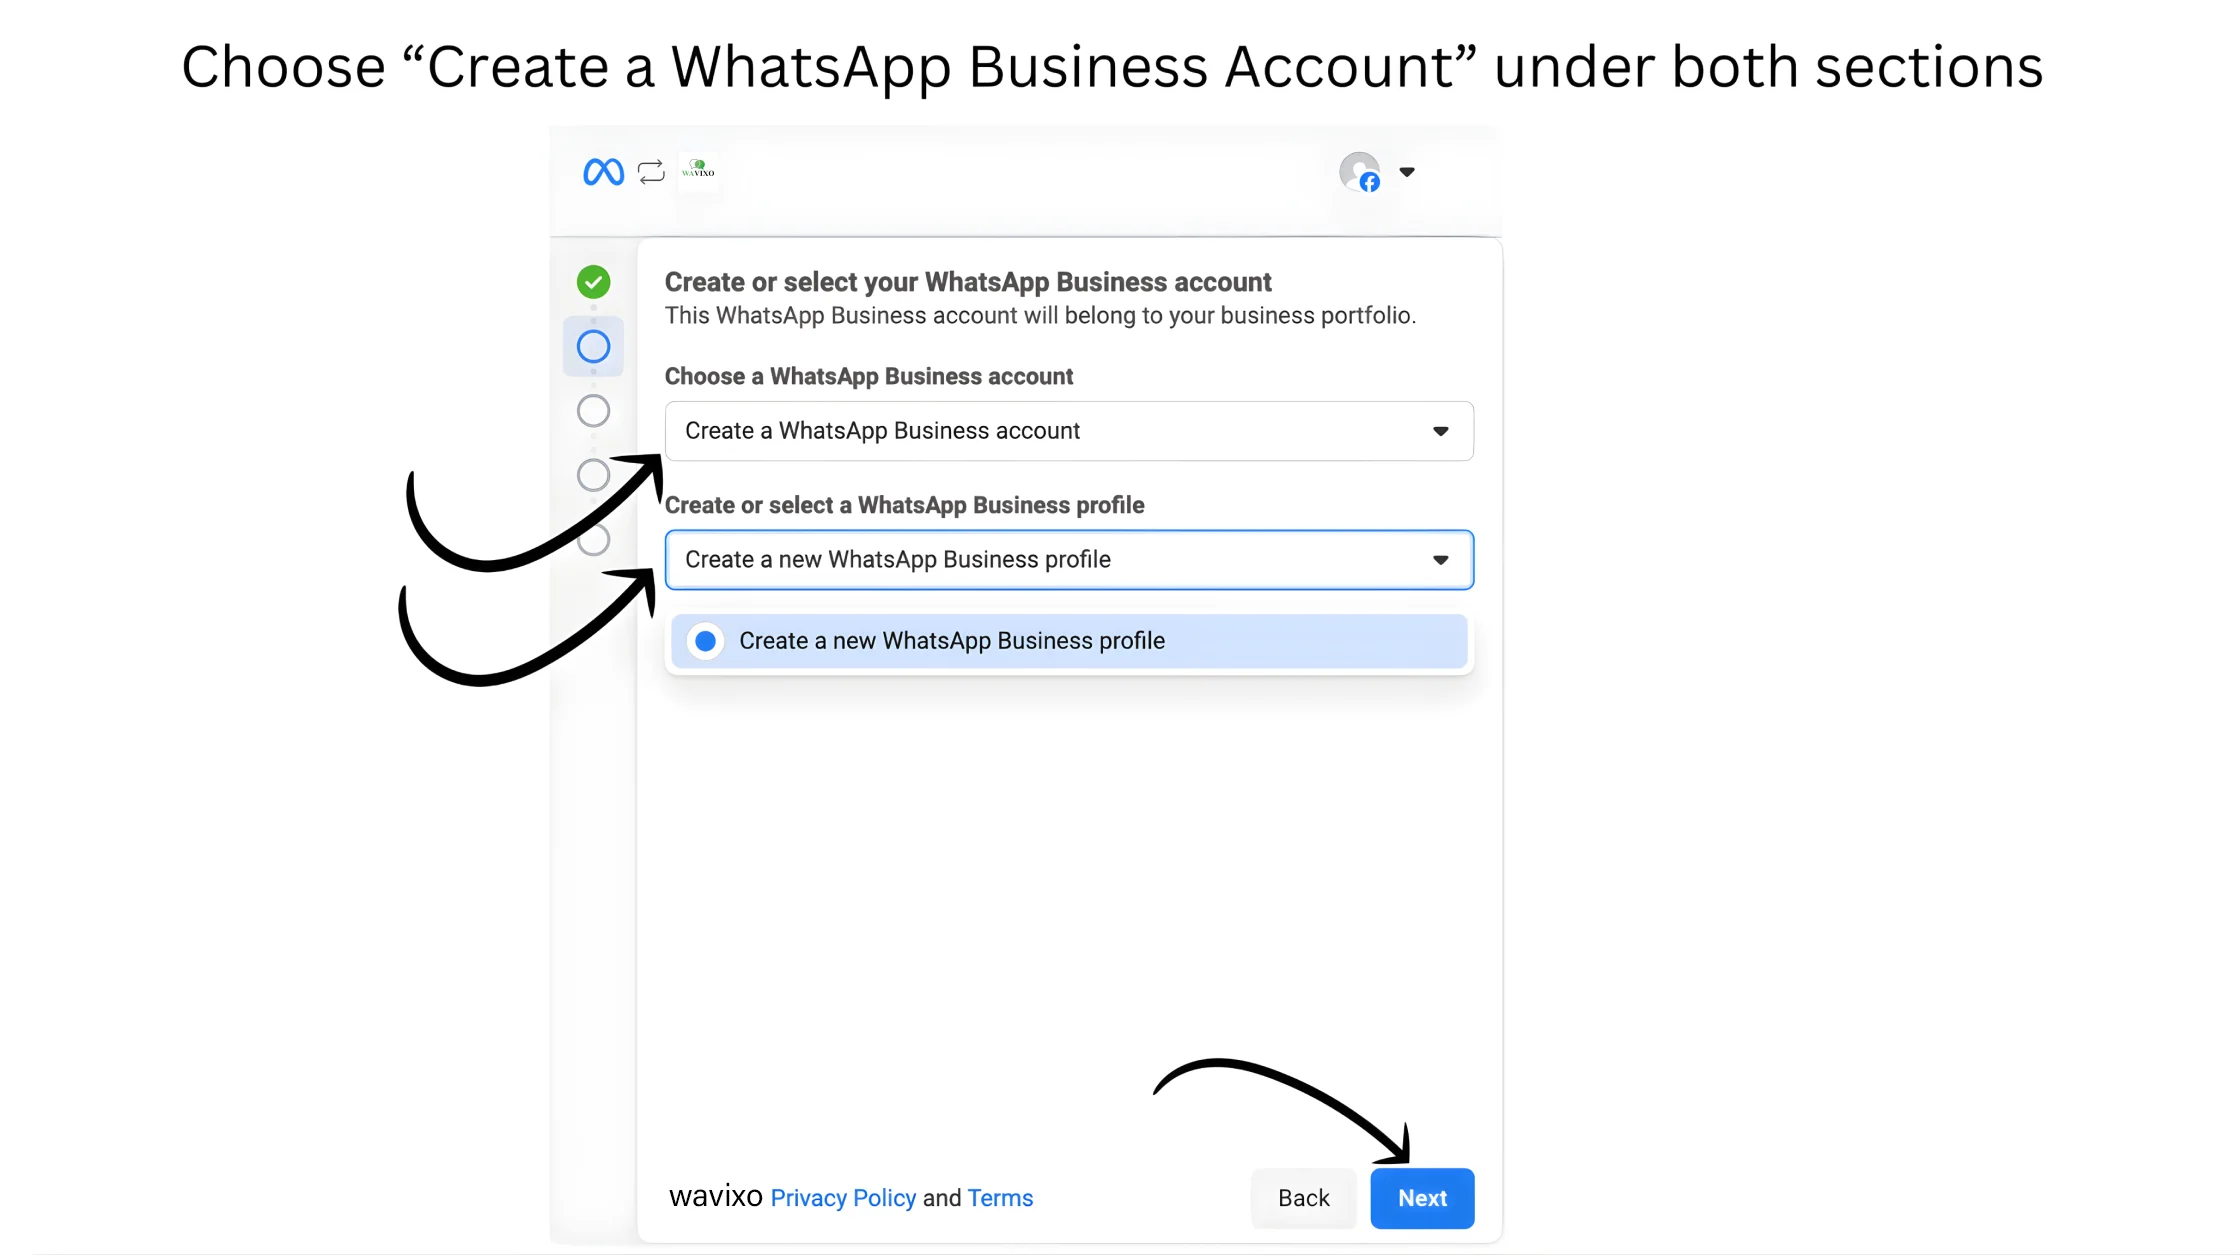
 9. Create a New WhatsApp Business Account
Under both dropdowns:
Choose Create a WhatsApp Business Account
Choose Create a New WhatsApp Business Profile
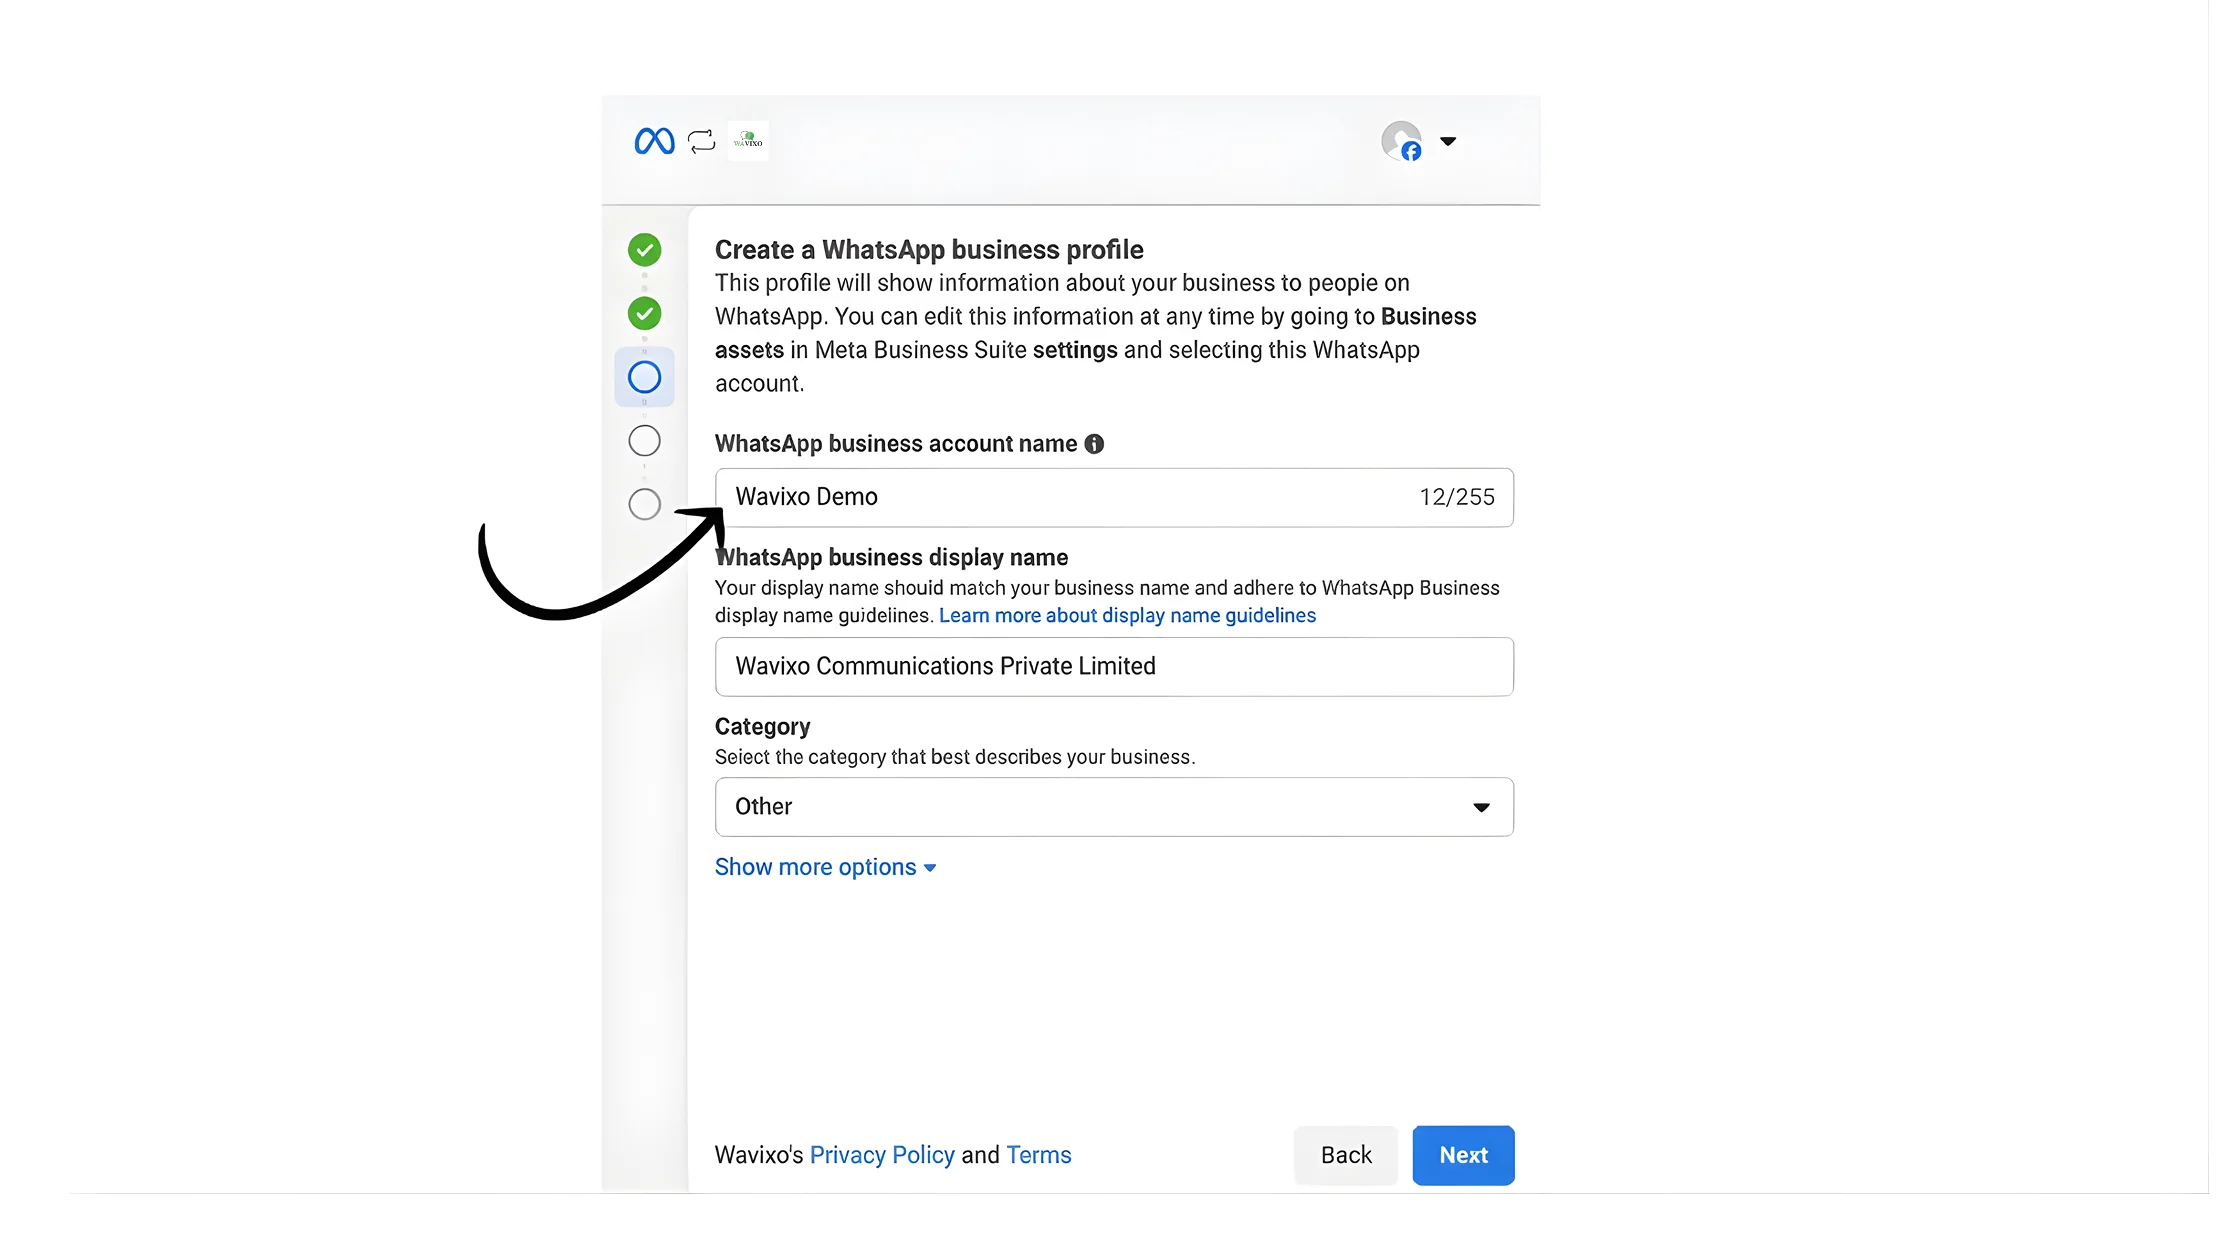
 10. Set Your WhatsApp Business Account Name
This internal name is not visible to your customers.
Next:
Enter your Display Name (customer-visible)
Select your Business Category
Click Next.
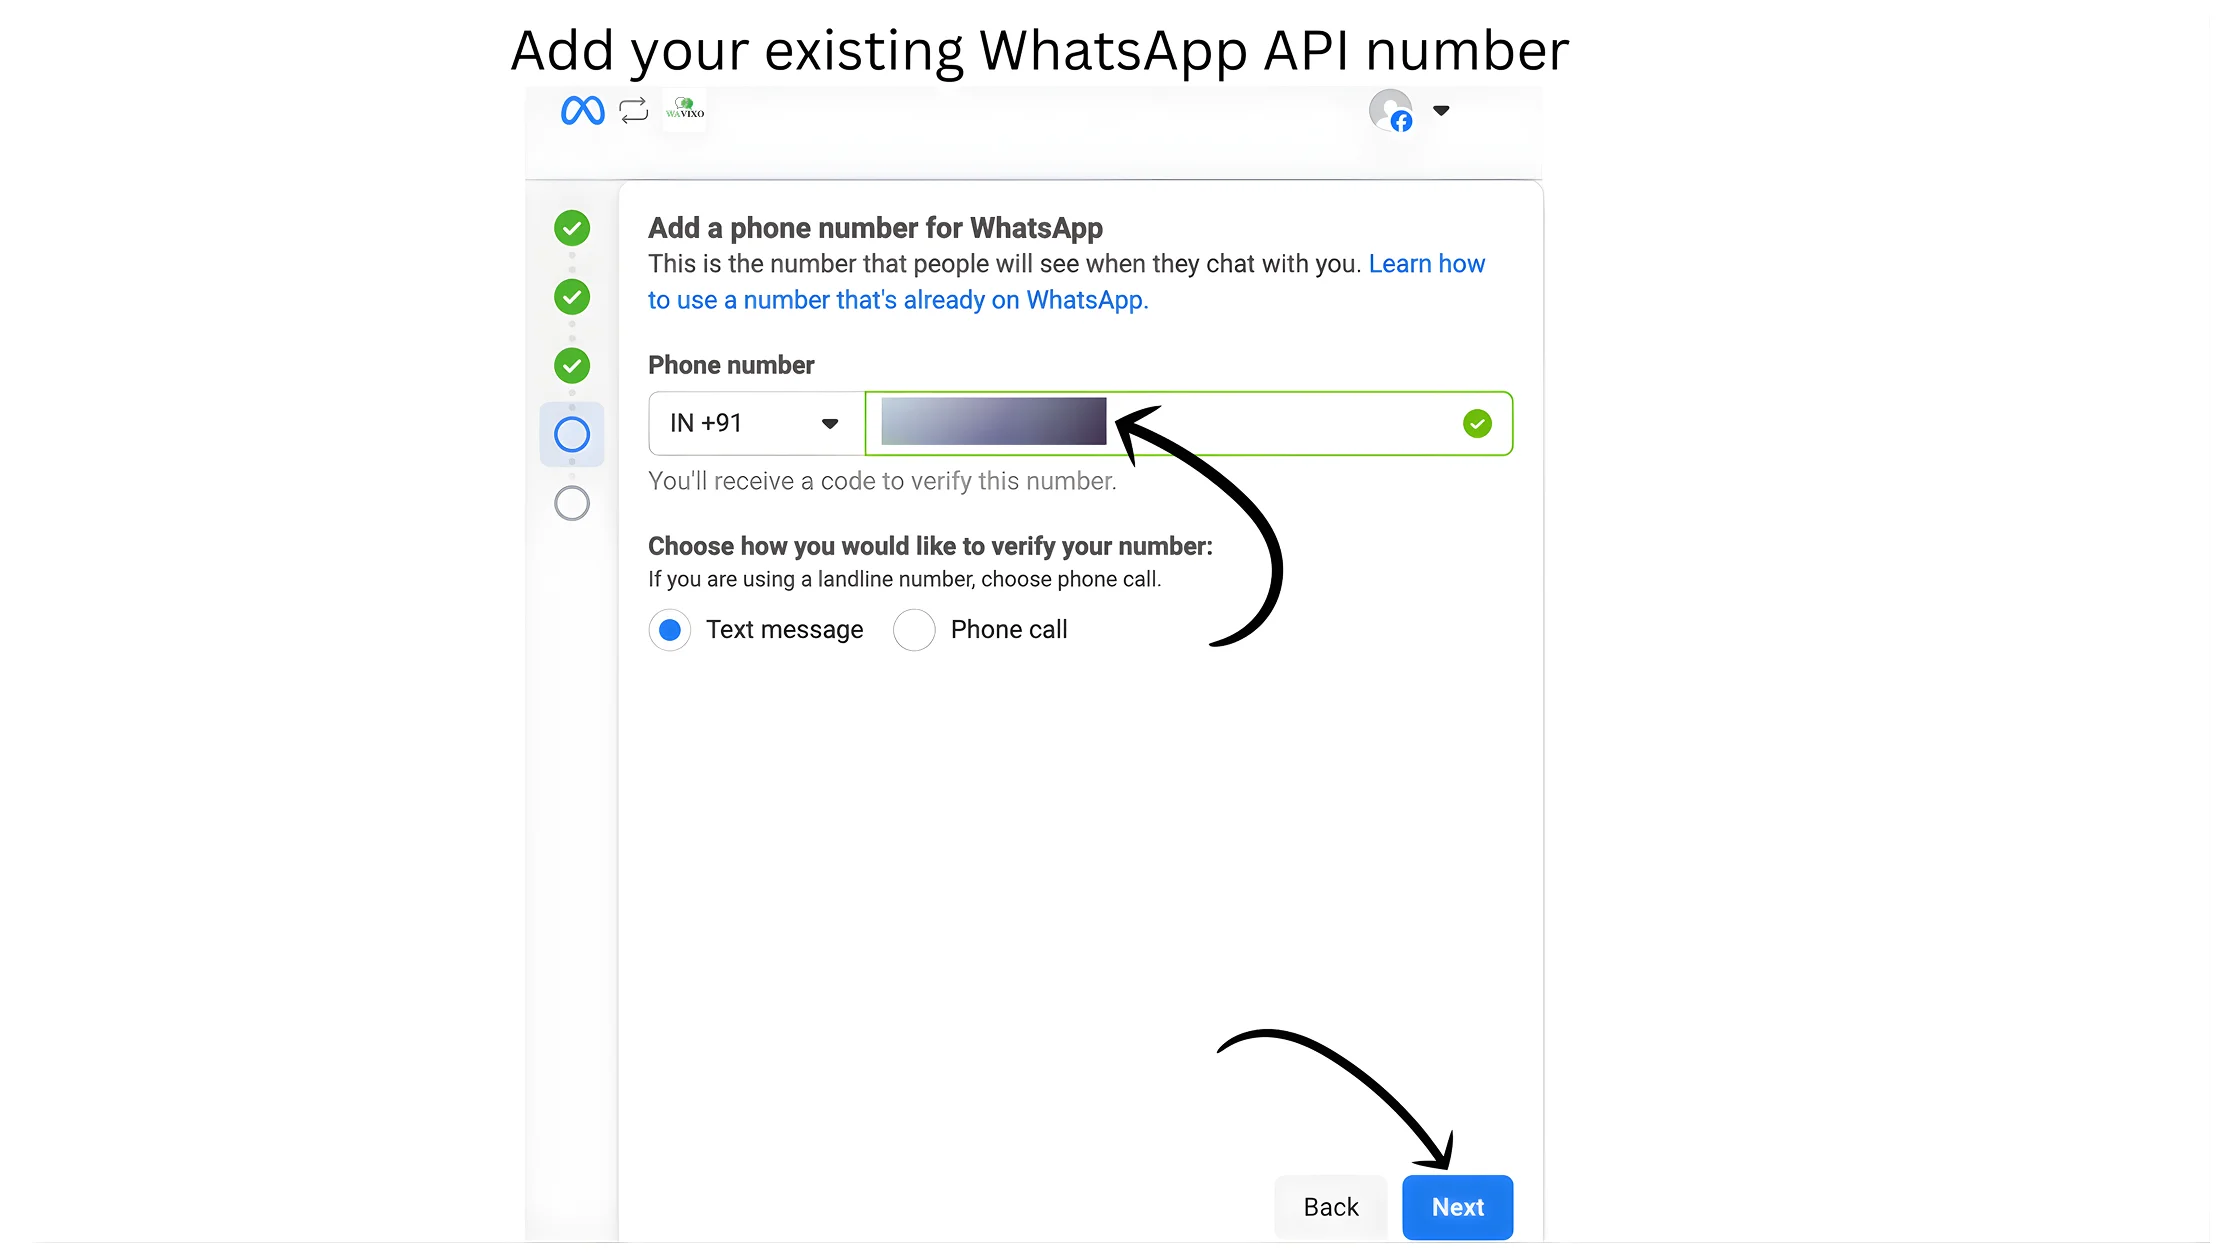
 11. Add Your Existing WhatsApp API Number
Select your preferred verification method → Click Next.
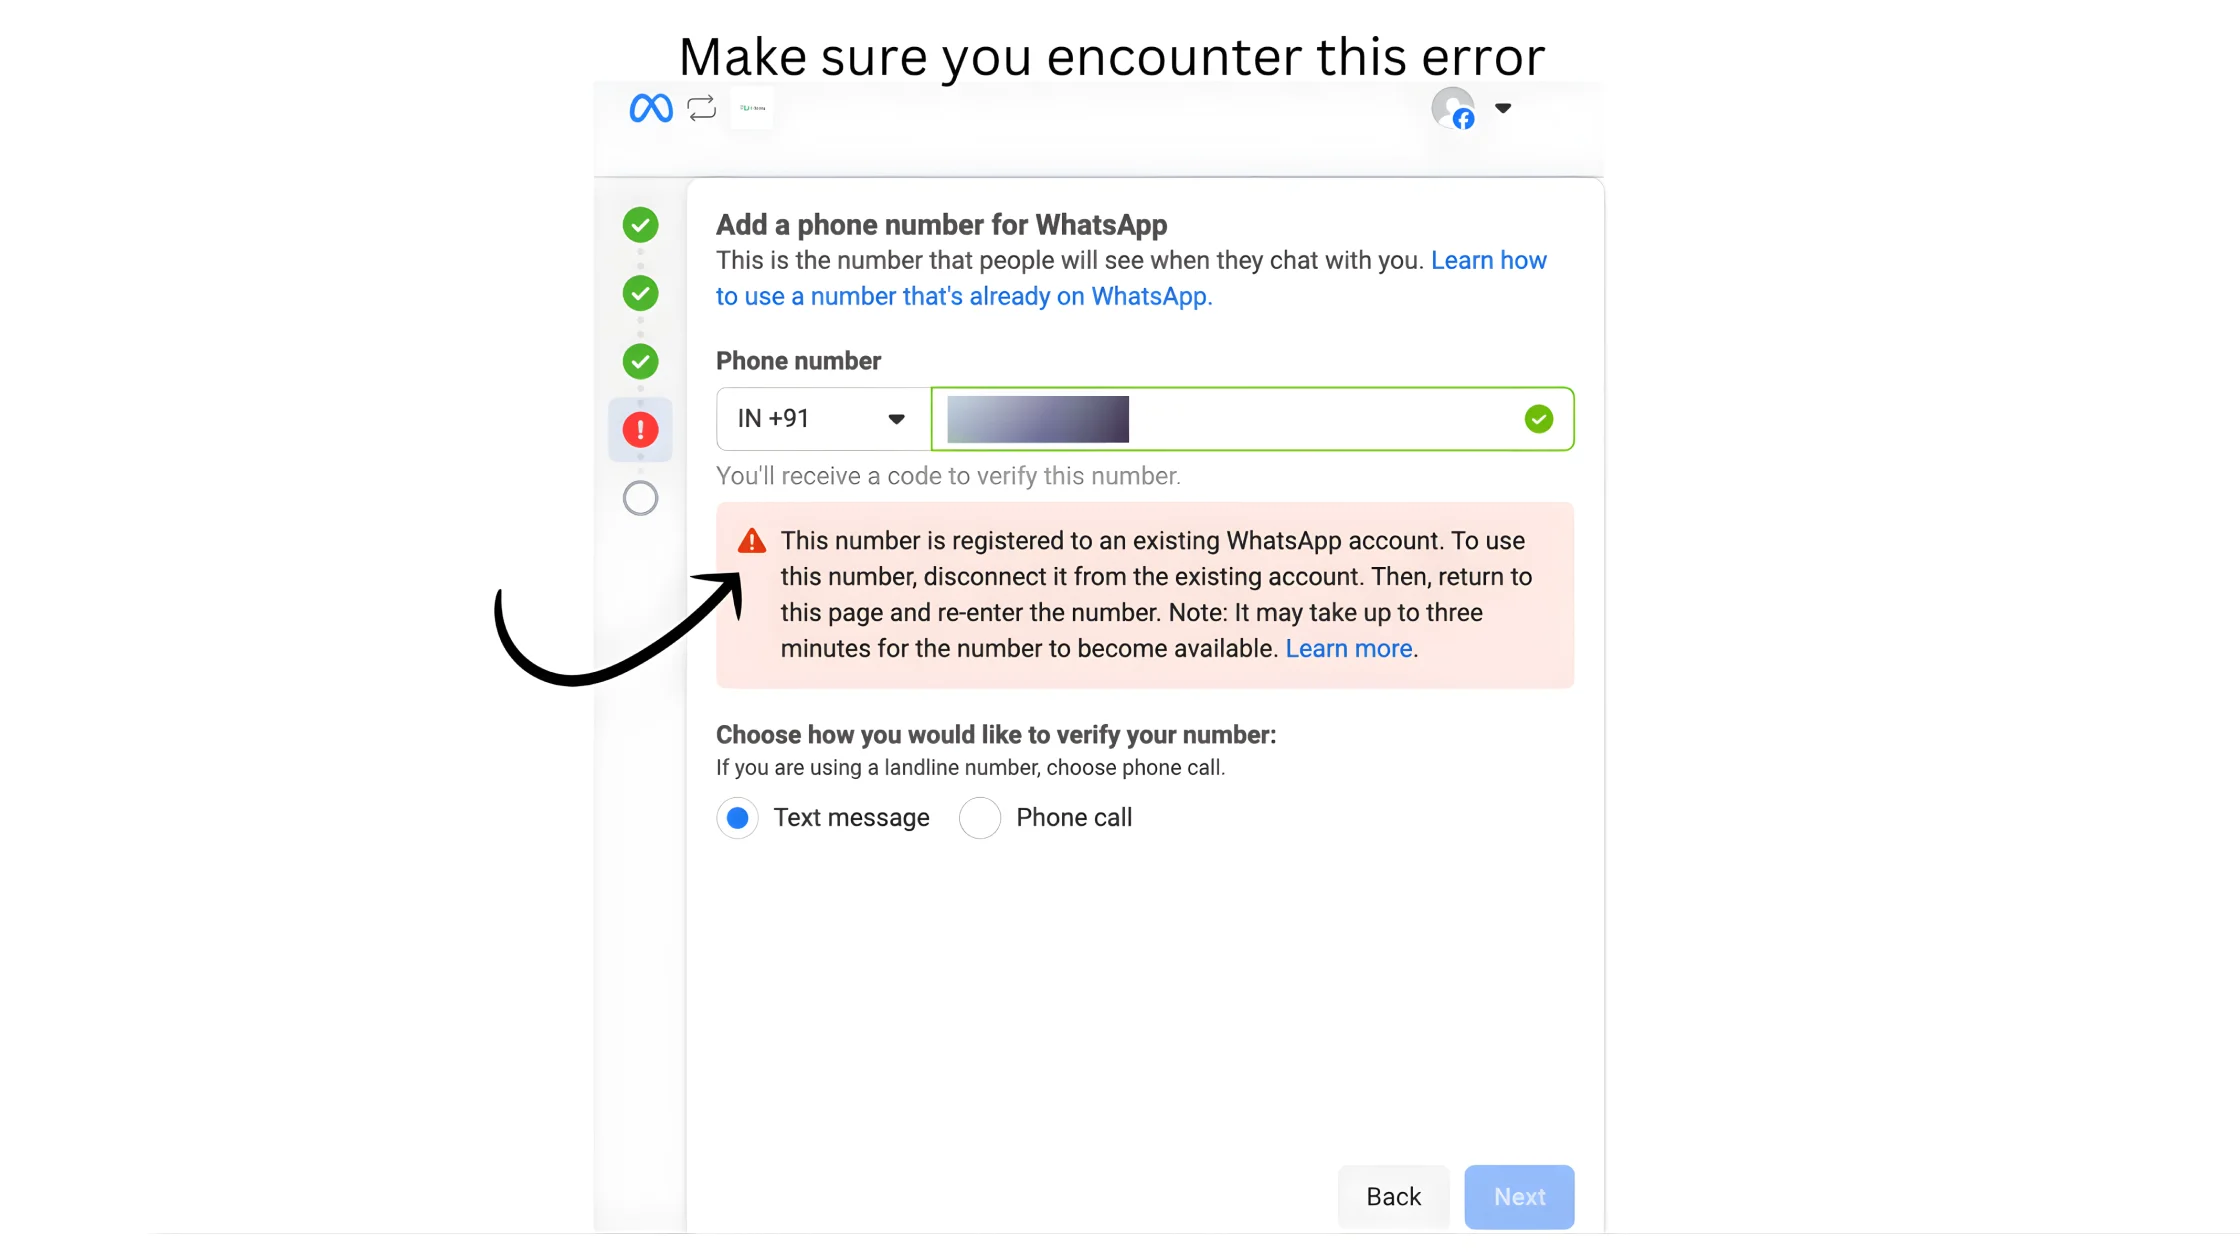
 12. Click “Next” Again
You may see an expected error message (as shown on page 14).
This is normal — enter your phone number and click Next.
If any other error appears, contact Wavixo via Live Chat.
 13. Migration Completed — Your WhatsApp API Is Now Active on Wavixo 🎉
After OTP verification, wait a few minutes.
Your WhatsApp Business API will be fully migrated to Wavixo, including your:
Messaging limits
Display name
Approved templates
🎊 Congratulations on the successful migration!

Related Articles
How to apply for WhatsApp Business API
WhatsApp Broadcast Limit
WhatsApp Broadcasting Rules
How to Opt-in & Opt-out users inside Wavixo
How Do Scheduling and Auto-Broadcasting Work in WhatsApp Automation?


Make your Productivity
more efficient. From this time.
Get the Demo and unplash your productivity. Feel Free to get the
latest Technology. Have a good time